Table of Contents
Advertisement
Quick Links
User Manual of Product 1:
StarTech.com USB 3.1 (10Gbps) Hard Drive Duplicator Dock
for 2.5" & 3.5" SATA SSD HDD + 4Kn - USB/ USB-C
Thunderbolt 3 Compatible Cloner (SDOCK2U313R)
User Manual of Product 2:
StarTech.com M.2 SSD to 2.5in SATA Adapter Converter with
Open Frame Housing and 7mm Height (SAT32M225), Green
Advertisement
Chapters
Table of Contents

Related Manuals for StarTech.com SAT32M225


Summary of Contents for StarTech.com SAT32M225
- Page 1 StarTech.com USB 3.1 (10Gbps) Hard Drive Duplicator Dock for 2.5" & 3.5" SATA SSD HDD + 4Kn - USB/ USB-C Thunderbolt 3 Compatible Cloner (SDOCK2U313R) User Manual of Product 2: StarTech.com M.2 SSD to 2.5in SATA Adapter Converter with Open Frame Housing and 7mm Height (SAT32M225), Green...
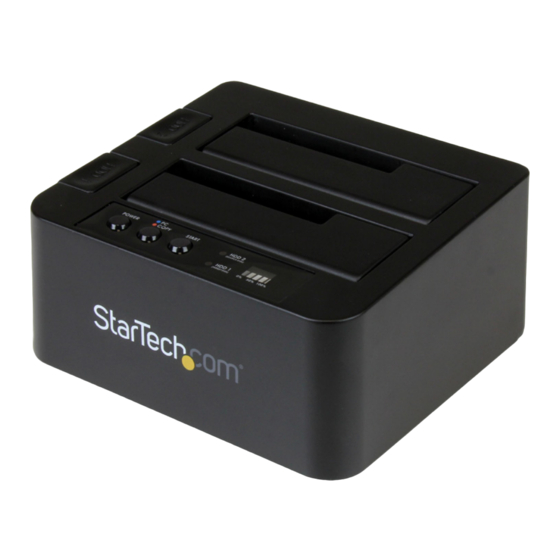
- Page 2 USB 3.1 (10Gbps) Standalone Duplicator Dock for 2.5” and 3.5” SATA Drives SDOCK2U313R *actual product may vary from photos FR: Guide de l’utilisateur - fr.startech.com DE: Bedienungsanleitung - de.startech.com ES: Guía del usuario - es.startech.com NL: Gebruiksaanwijzing - nl.startech.com PT: Guia do usuário - pt.startech.com IT: Guida per l’uso - it.startech.com...
- Page 3 StarTech.com. Where they occur these references are for illustrative purposes only and do not represent an endorsement of a product or service by StarTech.com, or an endorsement of the product(s) to which this manual applies by the third-party company in question. Regardless of any direct acknowledgement elsewhere in the body of this document, StarTech.com hereby...
-
Page 4: Table Of Contents
Table of Contents Introduction ....................1 Packaging contents ..........................1 System requirements ..........................1 Product diagram ..................2 Front view ..............................2 Rear view ..............................3 Installation ....................4 Connect the duplicator dock ........................ 4 Install a drive ............................... 4 Prepare a drive for use ..........................4 Using the duplicator dock ..............6 Duplicate a drive ............................ -
Page 5: Introduction
The SDOCK2U313R is OS independent and doesn’t require any additional drivers or software. Note: To obtain the maximum USB throughput, you must use a computer with a USB 3.1 Gen 2 (10Gbps) port. System requirements are subject to change. For the latest requirements, please visit www.startech.com/SDOCK2U313R. Quick start guide... -
Page 6: Product Diagram
Product diagram Front view Drive #1 slot (destination for Drive #2 slot (source for duplication) duplication) Drive LEDs Drive eject buttons Duplication progress LED POWER button START duplication button and LED PC/COPY mode button and LED Quick start guide... -
Page 7: Rear View
Rear view USB 3.1 Gen 2 port Power adapter port Quick start guide... -
Page 8: Installation
Installation Connect the duplicator dock Warning! Drives and storage enclosures should be handled carefully, especially when they’re transported. If you’re not careful with your drives, you may lose data as a result. Always handle storage devices with caution. 1. Connect the external power adapter from the duplicator dock to a power outlet. 2. - Page 9 4. A dialog window appears and asks you to initialize the drive. Depending on the version of Windows that you’re running, you have the option to create either an MBR or a GPT disk. Note: GPT (GUID partition) is required for drives larger than 2 TB but GPT isn’t compatible with some earlier versions of operating systems.
-
Page 10: Using The Duplicator Dock
Using the duplicator dock Duplicate a drive 1. Install the source and destination drives as per the instructions in the Install a drive topic. Note: If you’re connecting drives for duplication, place the drive containing the data that you intend to copy from in the drive #2 slot, and place the drive that you intend to copy the data to in the drive #1 slot. -
Page 11: About The Led Indicators
About the LED indicators The SDOCK2U313R includes five LED indicators: a power LED, a PC/COPY mode LED, two drive activity LEDs, and a duplication progress LED. For more information about what the LED indicators represent, consult the table below. State POWER Drive 1 Drive 2... -
Page 12: Technical Support
Limitation of Liability In no event shall the liability of StarTech.com Ltd. and StarTech.com USA LLP (or their officers, directors, employees or agents) for any damages (whether direct or indirect, special, punitive, incidental, consequential, or otherwise), loss of profits, loss of business, or any pecuniary loss, arising out of or related to the use of the product exceed the actual price paid for the product. - Page 13 StarTech.com is an ISO 9001 Registered manufacturer of connectivity and technology parts. StarTech.com was founded in 1985 and has operations in the United States, Canada, the United Kingdom and Taiwan servicing a worldwide market.
- Page 14 DE: Bedienungsanleitung - de.startech.com FR: Guide de l'utilisateur - fr.startech.com ES: Guía del usuario - es.startech.com IT: Guida per l'uso - it.startech.com NL: Gebruiksaanwijzing - nl.startech.com PT: Guia do usuário - pt.startech.com For the most up-to-date information, please visit: www.startech.com Manual Revision: 12/19/2013...
- Page 15 StarTech.com. Where they occur these references are for illustrative purposes only and do not represent an endorsement of a product or service by StarTech.com, or an endorsement of the product(s) to which this manual applies by the third-party company in question. Regardless of any direct acknowledgement elsewhere in the body of this document, StarTech.com hereby...
- Page 16 Table of Contents Product Diagram ..................1 Front View ..............................1 Rear View ..............................1 Introduction ....................2 Packaging Contents ..........................2 System Requirements ..........................2 M.2 NGFF SSD Installation ..............2 Hard Drive Initialization ................5 Technical Support ..................7 Warranty Information ................7 Instruction Manual...
-
Page 17: Product Diagram
Product Diagram Front View 1. SATA DATA & Power Combo (7+15 pin) 2. Side mounting holes Rear View 1. M.2 (NGFF) SSD Connector 2. Drive installation bracket 3. Drive length adjustment holes 4. Top mounting holes Instruction Manual... -
Page 18: Introduction
Introduction Packaging Contents • 1 x M.2 NGFF SSD to 2.5in SATA SSD Converter • 1 x Mounting screw kit • 1 x Installation manual System Requirements • M.2 NGFF Drive • SATA Host Device M.2 NGFF SSD Installation WARNING! SSD Drives and storage adapters require careful handling. If you are not careful with your SSD Drive, lost data may result. - Page 19 2. (Only required if the drive installation bracket requires relocating) Remove the screw holding the bracket in place on the reverse side using a Philips head screw driver (Not included). Note: There are screws located on either side of the bracket, ensure the reverse screw is the one removed, see photo below.
- Page 20 5. Slide the M.2 connector on the SSD into the M.2 receprical connector on the SAT32M225. Note: The connector on your M.2 SSD is keyed so the drive will only fit one way.
-
Page 21: Hard Drive Initialization
7. The SSD has now been installed, and is ready to be implemented in your 2.5” SATA drive application. Refer to the manual for your SATA host device for installation instructions. The top or side mounting holes and included screw kit may or may not be required to assist in your installation. - Page 22 2. A dialog window should automatically appear, asking you to initialize the drive. Depending on the version of Windows, it will give you the option of either creating an “MBR” or “GPT” disk. GPT (GUID partition) is not compatible with some older operating systems, while MBR is supported by newer and older operating systems.
-
Page 23: Technical Support
Limitation of Liability In no event shall the liability of StarTech.com Ltd. and StarTech.com USA LLP (or their officers, directors, employees or agents) for any damages (whether direct or indirect, special, punitive, incidental, consequential, or otherwise), loss of profits, loss of business, or any pecuniary loss, arising out of or related to the use of the product exceed the actual price paid for the product. - Page 24 StarTech.com is an ISO 9001 Registered manufacturer of connectivity and technology parts. StarTech.com was founded in 1985 and has operations in the United States, Canada, the United Kingdom and Taiwan servicing a worldwide market.
Need help?
Do you have a question about the SAT32M225 and is the answer not in the manual?
Questions and answers