Table of Contents

Related Manuals for Winmate ATEX R19IHAT-66EX-T


Summary of Contents for Winmate ATEX R19IHAT-66EX-T
- Page 1 ATEX Panel PC R19IHAT-66EX-T for ATEX Zone II and C1D2 User Manual Document Version 1.3 Document Part Number: 9171190I10 Please read these instructions carefully before using this product, and save this manual for future use.
-
Page 2: Table Of Contents
Contents Contents Contents ............................1 Preface ............................3 Chapter 1: Introduction ......................... 9 1.1 Overview ..........................9 1.2 Features ..........................9 1.3 Package Contents ....................... 10 1.4 Product Overview ........................ 11 1.5 Front Buttons ........................12 Chapter 2: Getting Started ......................13 2.1 Turning ON Your Device ...................... - Page 3 R19IHAT-66EX-T User Manual 6.10.2 Win-set Shortcut Setting .................... 67 6.11 Watchdog Driver Installation ....................68 Appendix A: Hardware Specifications ..................71 Appendix B: Cleaning the Monitor ..................... 73 Appendix C: Statement of Regulatory Approval ................ 74...
-
Page 4: Preface
Preface Preface Copyright Notice No part of this document may be reproduced, copied, translated, or transmitted in any form or by any means, electronic or mechanical, for any purpose, without the prior written permission of the original manufacturer. Trademark Acknowledgement Brand and product names are trademarks or registered trademarks of their respective owners. - Page 5 R19IHAT-66EX-T User Manual Customer Service We provide service guide for any problem as follow steps: First, visit the website of our distributor to find the update information about the product. Second, contact with your distributor, sales representative, or our customer service center for technical support if you need additional assistance.
- Page 6 Preface Safety Information Warning!/ Avertissement! Always completely disconnect the power cord from your chassis whenever you work with the hardware. Do not make connections while the power is on. Sensitive electronic components can be damaged by sudden power surges. Only experienced electronics personnel should open the PC chassis.
- Page 7 R19IHAT-66EX-T User Manual • The openings on the enclosure are for air convection. Protect the equipment from overheating. DO NOT COVER THE OPENINGS. Les ouvertures sur l'enceinte sont pour la convection d'air. Protégez l'équipement contre la surchauffe. NE PAS COUVRIR LES OUVERTURES. •...
- Page 8 Preface The equipment has obvious signs of breakage. L'équipement présente des signes évidents de casse. • Do not leave this equipment in an uncontrolled environment where the storage temperature is below -20°C (-4°F) or above 70°C (158°F). It may damage the equipment. Ne laissez pas ce matériel dans un environnement non contrôlé...
- Page 9 R19IHAT-66EX-T User Manual AVERTISSEMENT - RISQUE D'EXPLOSION - NE PAS remplacer les pièces que l'alimentation est coupée ou que la zone est connue pour être non dangereux; • WARNING - EXPLOSION HAZARD - DO NOT DISCONNECT EQUIPMENT UNLESS POWER HAS BEEN SWITCHED OFF OR THE AREA IS KNOWN TO BE NON-HAZARDOUS; AVERTISSEMENT - RISQUE D'EXPLOSION - NE PAS déconnecter l'équipement que l'alimentation est Coupée ou la région est connue pour être non dangereux;...
-
Page 10: Chapter 1: Introduction
This includes technologies used in potentially explosive atmospheres. The Winmate 19” HazLoc PPC is the first of its kind to offer the Class1 Division2 certification, ensuring safe and reliable data collection and processing in Hazardous Locations. -
Page 11: Package Contents
R19IHAT-66EX-T User Manual 1.3 Package Contents Before using this Panel PC, please make sure that all the items listed below are present in your package: Standard Accessories: Before using this Panel PC, please make sure that all the items listed below are present in your package: Panel PC 24V 150W AC to DC... -
Page 12: Product Overview
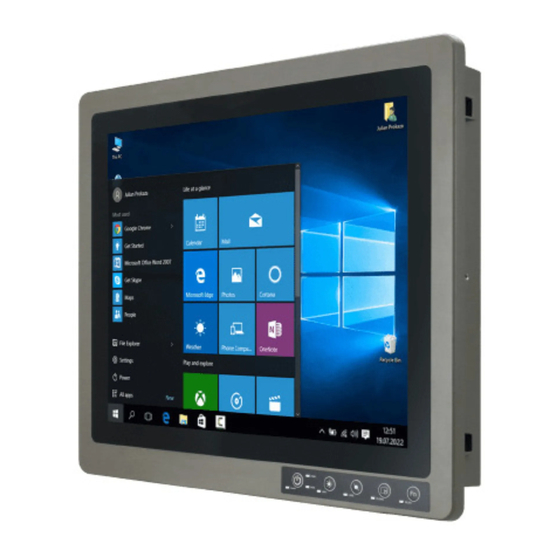
Chapter 1: Introduction 1.4 Product Overview Unit: mm Front View... -
Page 13: Front Buttons
R19IHAT-66EX-T User Manual 1.5 Front Buttons Front Button & LED Indicators Button Type Function Power on/off Increase the brightness of the Panel Decrease the brightness of the Panel Suspend the touch’s function temporarily Programmable function key configured by Hot Tab Utility... -
Page 14: Chapter 2: Getting Started
Chapter 2: Getting Started Chapter 2: Getting Started 2.1 Turning ON Your Device 1. Remove the I/O protection cover plate. 2. Connect the Power adapter to the device. 3. Plug the power adapter power cord to an electrical outlet. 4. Touch the Power button on the front to turn on the device. Note: When the system hangs, press the Reset button to restart the device. -
Page 15: Adjusting The Lcd Display Brightness
R19IHAT-66EX-T User Manual 2.2 Adjusting the LCD Display Brightness Use the OSD membrane buttons on the front bottom side to increase / decrease the display brightness. Brightness Brightness Down... -
Page 16: Turning Off Your Device
Chapter 2: Getting Started 2.3 Turning Off Your Device > Shut down. To shut down your device, do the following: Tap Windows icon Wait for your Panel PC to completely turn off before disconnecting the power cord (if necessary). -
Page 17: Chapter 3: Installation
Chapter 3: Installation Chapter 3: Installation 3.1 Wiring Requirements The following common safety precautions should be observed before installing any electronic device: • Strive to use separate, non-intersecting paths to route power and networking wires. If power wiring and device wiring paths must cross make sure the wires are perpendicular at the intersection point. - Page 18 R19IHAT-66EX-T User Manual The unit is available with different pass through glands for cable connections (required to maintain enclosure protection rating). These glands are water and gas tight and must be tightened with a torque described in the gland manufacturer’s instructions provided with the unit. Cables must be passed through the glands and wired to the associated I/O connectors.
-
Page 19: Wiring
Chapter 3: Installation 3.2 Wiring 1. Release the screws to remove the I/O protection cover and twisting the cable gland to increase gland opening for later cable go through Twisting the cable gland to increase gland opening to let the cable go through 2. - Page 20 R19IHAT-66EX-T User Manual 3. Loosen the cable gland and let the cable go through to connect the internal terminal block connector. Connect to the terminal block Cable goes through cable gland 4. Tighten the cable gland and screw the I/O protection cover plate back. Tighten the gland to hold the...
-
Page 21: Pin Assignments
Chapter 3: Installation 3.3 Pin Assignments The pin assignments of the connectors are as follows: VGA Port (Only used in safe area) Pin No Signal Name Pin No Signal Name R_FILTER G_FILTER B_FILTER VGA5V DAC_SDAT0 3VHSYNC0 3VVSYNC0 DAC_SCL0 COM Port (Only used in safe area) Pin No Signal Name Pin No... - Page 22 R19IHAT-66EX-T User Manual Power terminal block Pin No Signal Name Pin No Signal Name VCC+ VCC- *Power wire for VCC should be AMW 1015 18AWG 600V or above. To connect the Panel PC to AC power source: 1. Plug the DC Plug of AC adapter to the Panel PC DC IN Jack. 2.
- Page 23 Chapter 3: Installation *The wire for GND: Equipotential bonding connection facilities on the outside of electrical equipment shall provide effective connection of a conductor with a cross-sectional area of at least 4 mm², AMW 1015 10AWG 600V is recommended. COM Port Pin No Signal Name Pin No Signal Name LAN2 Port Pin No Signal Name...
- Page 24 R19IHAT-66EX-T User Manual Ethernet connection pin Assignments for T568A RJ4-45 Pin No. Wire Color 10BASE-T/100 1000 BASE -T BASE -T Signal Signal Transmit+ BI_DA+ White/Green Transmit- BI_DA- Green Receive+ BI_DB+ White/Orange Blue Unused BI_DC+ White/Blue Unused BI_DC- Orange Receive- BI_DB- Unused BI_DD+ White/Brown...
- Page 25 Chapter 3: Installation Note: This adapter was certified by UL, CUL TUV/GS CE, FCC, BSMI, EK, DOIR+C- TICK, CCC, PSE. Warning!/ Avertissement! Ensure that the external power source is OFF before connecting or disconnecting the DC IN jack. Assurez-vous que la source d'alimentation externe est éteinte avant de connecter ou de déconnecter la prise DC IN.
-
Page 26: Chapter 4: Mounting Solution
Chapter 4: Mounting Solution Chapter 4: Mounting Solution 4.1 Clamp Mount With the mounting clamps and screws, it provides fast and easy mounting of the 19” Panel PC onto an instrument panel or wall panel To mount the device to a sub frame or panel, do the following: 1. -
Page 27: Vesa Mount
R19IHAT-66EX-T User Manual 4.2 VESA Mount Dimensions: 100 x 100mm Screw Hole Diameter: M4 x 5 mm Direction: Compatible with swimming arms mounting kits. -
Page 28: Chapter 5: Insyde H20 Bios Setup
Chapter 5: INSYDE H20 BIOS Setup Chapter 5: INSYDE H20 BIOS Setup This chapter describes the different settings available in the INSYDE BIOS that comes with the board. This chapter offers information on the Award BIOS installation utility 5.1 How and When to Use BIOS Setup To enter the BIOS setup, you need to connect an external USB keyboard, external monitor and press Del key when the prompt appears on the screen during start up. -
Page 29: Bios Functions
R19IHAT-66EX-T User Manual 5.2 BIOS Functions 5.2.1 Main Menu The Main menu displays the basic information about your system including BIOS version, processor RC version, system language, time, and date. When you enter BIOS setup, the first menu that appears on the screen is the main menu. It contains the system information including BIOS version, processor RC version, system language, time, and date. -
Page 30: Advanced
Chapter 5: INSYDE H20 BIOS Setup 5.2.2 Advanced Select the Advanced Tab from the setup menu to enter the advanced BIOS setup screen. You can select any of the items on the left frame of the screen to go to the sub menu for the item, such as CPU Configuration. - Page 31 R19IHAT-66EX-T User Manual 5.2.2.1 Power & Performance BIOS Setting Description Setting Option Effect CPU – Power Configure CPU – Power Enter Enters sub- Management Control Management Control parameters menu...
- Page 32 Chapter 5: INSYDE H20 BIOS Setup BIOS Setting Description Setting Option Effect Boot Performance Configure Boot - Max non-turbo Select the performance Mode Performance Mode performance state that the BIOS will set parameters - Max battery starting from reset vector - Turbo Performance Intel SpeedStep...
- Page 33 R19IHAT-66EX-T User Manual 5.2.2.2 PCH-IO Configuration BIOS Setting Description Setting Option Effect PCI Express Configure PCI Enter Opens sub-menu Configuration Express settings SATA And RST Configure SATA And Enter Opens sub-menu RST settings Configuration USB Configuration Configure USB Enter Opens sub-menu settings S0 = Auto power ON State After G3...
- Page 34 Chapter 5: INSYDE H20 BIOS Setup 5.2.2.3 SATA and RST Configuration 5.2.2.4 USB Configuration BIOS Setting Description Setting Option Effect USB Port Disable USB Port Disable Disable Select Selectively Enable/ Disable Override Override configuration Per-Pin the corresponding USB port from reporting a Device Connection to the controller...
- Page 35 R19IHAT-66EX-T User Manual 5.2.2.4.1 State After G3 BIOS Setting Description Setting Option Effect State After G3 State After G3 S0 State Specify what state to go to when configuration S5 State power is re-applied after a power failure (G3 state) 5.2.2.5 SIO F81866A...
- Page 36 Chapter 5: INSYDE H20 BIOS Setup BIOS Setting Description Setting Option Effect Serial Port A ~ Serial Configure Serial Disable No configuration Port D port settings Enable User configuration Auto EFI/OS chooses configuration Watchdog Timer Disable Enable or disable configuration Watchdog Timer Enable Hardware Monitor...
- Page 37 R19IHAT-66EX-T User Manual 5.2.2.6 GPIO Configuration BIOS Setting Description Setting Option Effect Internal Internal Resistance Push Pull User can pull internal Resistance configuration Open Drain resistance push-pull / open- drain Input/ Output GPIO pin Input Set GPIO pin is input or output Mode configuration Output...
-
Page 38: Security
Chapter 5: INSYDE H20 BIOS Setup 5.2.3 Security BIOS Setting Description Setting Option Effect TrEE Protocol Choose TrEE TrEE Protocol Version: Version Protocol Version 1.0 or 1.1 TPM Availability TPM Availability Available When hidden don’t configuration Hidden exposes TPM to 0 TPM Operation TPM Operation Select one of the supported... -
Page 39: Boot
R19IHAT-66EX-T User Manual 5.2.4 Boot BIOS Setting Description Setting Option Effect Boot Type Boot Type UEFI Boot Type Select boot type to Dual type, configuration Legacy type or UEFI type Quick Boot Quick Boot Enabled Allows InsydeH20 to skip certain configuration Disabled tests while booting. - Page 40 Chapter 5: INSYDE H20 BIOS Setup 5.2.4.1 PXE Boot 1. Press del to boot BIOS setup utility then change "Network Stack" setting to enable at Boot page. 2. Change Boot capability to UEFI:Ipv4/IPv6 that support both protocol.
- Page 41 R19IHAT-66EX-T User Manual 3. Type F10 to save setting and exit then reboot it will auto connects media server. If you see picture as bellow please checks your server. 4. You also can press "esc" go into boot manager to choose which one LAN you want to do PXE if you have more than one LAN.
-
Page 42: Exit
Chapter 5: INSYDE H20 BIOS Setup 5.2.5 Exit... -
Page 43: Chapter 6: Driver Installation
Chapter 6: Driver Installation Chapter 6: Driver Installation 6.1 Chipset Driver Installation The Intel Chipset Drivers should be installed first before the software drivers to enable Plug & Play INF support for Intel chipset components. Step 1. Insert the DVD that comes with the motherboard. Open the “Intel Chipset subfolder” and click on the Setup file to install driver. - Page 44 R19IHAT-66EX-T User Manual Step 3. Click Accept and Install to install driver. Step 4. After the installation completed, click Finish.
-
Page 45: Graphic Driver Installation
Chapter 6: Driver Installation 6.2 Graphic Driver Installation ITAT Motherboard is with Intel mobile Core i5-1145G7E(Optional i3-1115G4E/i7-1185G7E) dual core CPU and with an integrated graphics controller. You need to install the Graphic driver to enable the function. Step 1. Insert the DVD that comes with the motherboard. Open the “Intel Graphics subfolder” and click on the Setup file to install driver. - Page 46 R19IHAT-66EX-T User Manual Step.3. Click Yes to agree License. Step.4. Click on Next to install Driver.
- Page 47 Chapter 6: Driver Installation Step.5. Choose “Yes, I want to restart this computer now” then click Finish.
-
Page 48: Audio Driver Installation
R19IHAT-66EX-T User Manual 6.3 Audio Driver Installation The High-Definition Audio Codecs providing ten DAC channels , plus 2 channels of independent stereo sound output (multiple streaming) through the front panel stereo outputs. The series integrates two stereo ADCs that can support a stereo microphone, and feature Acoustic Echo Cancellation (AEC), Beam Forming (BF), and Noise Suppression (NS) technology. - Page 49 Chapter 6: Driver Installation STEP 3. Choose “Yes, I want to restart this computer now” then click Finish.
-
Page 50: Dynamic Tuning Installation
R19IHAT-66EX-T User Manual 6.4 Dynamic Tuning Installation Please make sure which operating system you are using in the ITAT Motherboard before installing the dynamic tuning drivers. STEP 1. Insert the DVD that comes with the motherboard. Open the “driver subfolder” and click on the Setup file to install the driver. - Page 51 Chapter 6: Driver Installation STEP 3. Click on Yes to agree License. STEP 4. Click on Next to install driver. STEP 5. After the installation completed, click Finish.
-
Page 52: Management Engine Software Installation
R19IHAT-66EX-T User Manual 6.5 Management Engine Software Installation This installation program installs the Intel® ME software components required for the platform on which you are installing, and installs only those components that match your platform’s capabilities. STEP 1. Insert the DVD that comes with the motherboard. Open the “ME_SW_DCH subfolder” and click on the Setup file to install driver. - Page 53 Chapter 6: Driver Installation STEP 3. Check the “I accept the terms in the License Agreement” then click Next. STEP 4. Choose the destination folder, then click Next. STEP 5. After the installation completed, click Finish.
-
Page 54: Serial Io Host Controller Installation
R19IHAT-66EX-T User Manual 6.6 Serial IO Host Controller Installation This installation program installs the driver for Intel Serial I/O. Intel serial I/O driver enables the communication and the transfer of data between connected devices and the system. STEP 1. Insert the DVD that comes with the motherboard. Open the “Serial IO subfolder” and click on the Setup file to install driver. - Page 55 Chapter 6: Driver Installation STEP 3. Check the “I accept the terms in the License Agreement” then click Next. STEP 4. Click Next.
- Page 56 R19IHAT-66EX-T User Manual STEP 5. After the installation completed, click Finish.
-
Page 57: Gna Scoring Accelerator Driver Installation
Chapter 6: Driver Installation 6.7 GNA Scoring Accelerator Driver Installation This installation program installs the driver for Intel GNA Scoring Accelerator. The purpose of Intel GNA is to offload the CPU during some computations. The primary intended usage (but not limited to) is the Automated Speech Recognition domain. - Page 58 R19IHAT-66EX-T User Manual STEP 4. Click Browse… STEP 5. Choose the drivers, click OK. STEP 6. Check the Include subfolders, click Next.
- Page 59 Chapter 6: Driver Installation STEP 7. Click Close.
-
Page 60: Ethernet Driver Installation
R19IHAT-66EX-T User Manual 6.8 Ethernet Driver Installation The Users must make sure which operating system you are using in the ITAT Motherboard before installing the Ethernet drivers. Follow the steps below to complete the installation of the Intel® LAN drivers. You will quickly complete the installation. STEP 1. -
Page 61: Win-Set_Watchdog Driver Installation
Chapter 6: Driver Installation 6.9 Win-Set_WatchDog Driver Installation Before install this Win-Set Driver, Please install C++ first. To install this Win-Set Driver and AP to make the buttons on the front of unit work. Driver Installation: 1) Installation Files Please select the driver for the corresponding operating system. WMMIO_32bit Windows 7/8/8.1/10 x86 Edition WMMIO_64bit... - Page 62 R19IHAT-66EX-T User Manual Select “PortIO Driver” under System devices and right-click it. Use Uninstall selection to remove the driver.
- Page 63 Chapter 6: Driver Installation B. Install the driver 1. Type “cmd” in the run box. 2. The cmd.exe will appear in Programs 3. Right click on the cmd.exe and click on “Run as administrator” to start command prompt. 4. Change directory to driver’s location, and type install to install the driver...
- Page 64 R19IHAT-66EX-T User Manual 5. When Windows Security dialog appear, select install to continue the installation. When the driver is successfully installed, you can see “Drivers Updated successfully” message in the dos prompt. “WMMIO” device also added in the Device Manger under “System devices”...
- Page 65 Chapter 6: Driver Installation Win-Set Installation Important: Please make sure the Win-set driver (WMMIO) has been installed before you start to install the Win-set application 1. Uninstall the old version Win-set software before start to install the new version Win-set 2.
- Page 66 R19IHAT-66EX-T User Manual 4. Click "Next", the installation will be started 5. Installation Complete, click "Close" to close the window 6. Yan can find this shortcut on the desktop, double click it to open the Win-Set application...
-
Page 67: Win-Set Utility
Chapter 6: Driver Installation 6.10 Win-set Utility Win-set ® is a program made by Winmate to control the main functions of the R19IHAT-66EX-T. In Win-set ®, users can check system information, control function button settings, configure blanking function and settings. -
Page 68: Win-Set Shortcut Setting
R19IHAT-66EX-T User Manual 6.10.2 Win-set Shortcut Setting In Function Behavior, submenu users can set up functions. -
Page 69: Watchdog Driver Installation
Chapter 6: Driver Installation 6.11 Watchdog Driver Installation For more details about Winmate Watchdog, please download Watchdog Guide from Winmate Downloads Center. Follow instructions below to install Watchdog driver. Type “cmd” in the run box then the cmd.exe will appear in programs. - Page 70 R19IHAT-66EX-T User Manual Wait for installation to complete. When installation is complete, press any key to close. Open the Driver CD (included in the package) and select Watchdog AP. Select Next. The installed storage location is displayed, select Next to continue.
- Page 71 Chapter 6: Driver Installation Select Next to start the installation. 10 When installation is completed, select Finish to close the window.
-
Page 72: Appendix A: Hardware Specifications
Appendix Appendix A: Hardware Specifications Item Specifications Computer Intel® Core™ i5-1135G7(8M Cache, up to 4.20 GHz) Intel® Core™ i7-1165G7(12M Cache, up to 4.70 GHz, optional) Intel® Core™ i3-1115G4E (6M Cache, up to 3.90 GHz, optional) Intel® Core™ i5-1145G7E(8M Cache, up to 4.10 GHz, optional) Intel®... - Page 73 1. Accessories and Integrated Options may vary depending on your configuration. The product shown in this datasheet is a standard model. For diagrams that contain customized or optional I/O, please contact the Winmate Sales Team for more information. 2. All specifications are subject to change without prior notice.
-
Page 74: Appendix B: Cleaning The Monitor
Appendix Appendix B: Cleaning the Monitor Before cleaning: • Make sure the device is turned off. • Disconnect the power cable from any AC outlet. When cleaning: • Never spray or pour any liquid directly on the screen or case. •... -
Page 75: Appendix C: Statement Of Regulatory Approval
R19IHAT-66EX-T User Manual Appendix C: Statement of Regulatory Approval Refer the following descriptions for various approvals and certifications Explosive Atmospheres Directive Certification with ATEX Directive 2014/34/EU; Independent 3rd party assessment (Notified Body: DEMKO) Low Voltage Directive European Safety for Industrial Control Equipment Self-Declaration in accordance with European LVD Directive 2014/35/EU;... - Page 76 Winmate Inc. 9F, No.111-6, Shing-De Rd., San-Chung District, New Taipei City 24158, Taiwan, R.O.C www.winmate.com Copyright © 2023 Winmate Inc. All rights reserved.
Need help?
Do you have a question about the ATEX R19IHAT-66EX-T and is the answer not in the manual?
Questions and answers