Table of Contents
Advertisement
Available languages
Available languages
BEFORE THE FIRST USING YOUR ELECTRIC STORAGE WATER
HEATER, CAREFULLY READ THIS OPERATION MANUAL
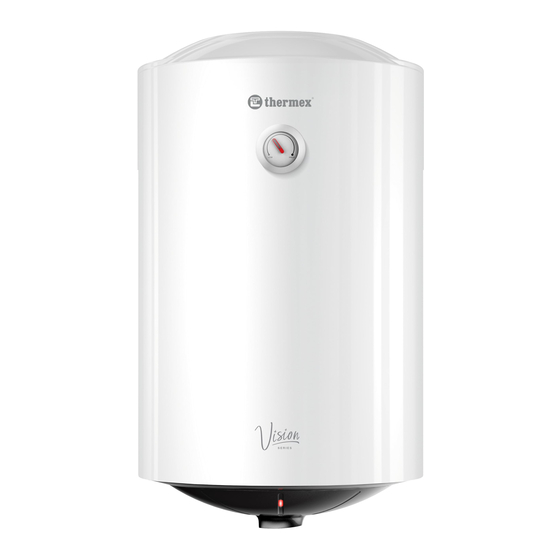
Congratulations on your purchase of an electric water heater THERMEX.
Water heaters THERMEX are designed and manufactured in strict accordance with
domestic and international standards guaraneteeing operation reliability and safety.
Present manual applies to THERMEX models of Vision. The full name of the
model of your heater is specified in "Manufaturer's warranty" section (sub-section
"Note of sale") and in the marking plate on the heater casing.
Electric water heater (hereinafter referred to as the EWH) is designed to provide
with hot water for domestic and industrial facilities having a cold water supply line
pressure of not less than 0.05 MPa and not more than 0.75 MPa.
EWH shall be operated indoors in heated spaces and it is not designed for operation
in continuous flow mode.
Water heater
Safety valve of GP type
Operation manual
Installation kit
Packaging
3.
EWH power supply shall be within the range of 220-240 V. Supply network fre-
quency 50/60 Hz ± 1%. Volume of the inner tank and heating element power are spec-
ified in the marking plate on the casing. Thread diameter in water inlet and outlet pipes
- G1/2 ".
The manufacturer reserves the right to make changes to the design, complete set
and specifications of the heater without prior notice.
DEAR CUSTOMER!
1.
APPLICATION
2.
SCOPE OF SUPPLY
MAIN TECHNICAL CHARACTERISTICS
- 1 pcs.
- 1 pcs.
- 1 pcs.
- 1 set
- 1 pcs.
EN
ы
1
Advertisement
Table of Contents

Related Manuals for THERMEx Vision 30 V


Summary of Contents for THERMEx Vision 30 V
- Page 1 Water heaters THERMEX are designed and manufactured in strict accordance with domestic and international standards guaraneteeing operation reliability and safety. Present manual applies to THERMEX models of Vision. The full name of the model of your heater is specified in "Manufaturer’s warranty" section (sub-section "Note of sale") and in the marking plate on the heater casing.
-
Page 2: Description And Principle Of Operation
Table 1 ы Average heating time Model Code Installation ∆T = 45° C at 1.5 kW Vision 30 V 111 243 1 h 03 min. vertical Vision 50 V 111 244 1 h 45 min. vertical Vision 80 V 111 245 2 h 48 min. -
Page 3: Installation And Connection
SPECIFYING SECURITY MEASURES ы Electrical safety and corrosion protection of EWH are guaranteed only if there is an effective grounding in accordance with applicable electric installation rules and regula- tions. Plumbing pipes and fittings shall conform to parameters of water main and have the required certificates of quality. -
Page 4: Connection To Water Mains
ARRANGEMENT AND INSTALLATION ы All installation, plumbing and electrical works shall be performed by qualified per- sonnel. EWH installation shall be performed in accordance with marking on the housing. It is recommended to install EWH as close as possible to the place of hot water using to reduce heat loss in the pipes. - Page 5 Connection to the water supply line shall be carried out in accordance with Fig. 1 ы using copper, plastic pipes or special flexible sanitary wiring. Do not use any used flex- ible wiring. It is recommended to supply water to EWH through filter installed on the cold water main (not included in the scope of supply).
-
Page 6: Connection To Power Supply
hot water outlet valve (Fig. 1, p. 12) and hot water tap on mixer to ensure outflow of air ы from the EWH. When the final EWH filling, water will continuously flow out of mixer tap. When connecting EWH in places not provided with water supply it is permitted to supply water in EWH from auxiliary tank using pumping station, or from reservoir placed at a height of not less than 5 meters over the top of EWH. - Page 7 ATTENTION: accumulation of scale on TEH may cause its damage . ы Note: Damages to THE due to scale formation are not subject to warranty. Regular maintenance is not included in the warranty of the manufacturer and the seller. The following shall be carried out for maintenance: •...
- Page 8 POSSIBLE FAULTS AND REMEDIES. ы Malfunction Possible cause How to fix Hot water pressure from EWH decreased. Cold Clogged inlet safety Remove the valve and clean it in water pressure keeps at valve water the level. THE is covered with a Remove the flange and clean the layer of sludge Heating time increased...
-
Page 9: Manufacturer's Warranty
13. TRANSPORTATION AND STORAGE OF ELECTRIC WATER HEATERS ы Transportation and storage of electric water heaters shall be carried out in accord- ance with manipulation marks on the packaging: need to protect the goods from moisture fragile, delicate handling recommended storage temperature range from +5°... -
Page 10: Information On The Manufacturer
The warranty shall apply to EWH only. Responsibility for compliance with prin- ы ciples of installation and connection shall be borne by the buyer (in case of connection by his own) or by the installer carrying out connection. The manufacturer shall not be liable for defects due to violations of principles of installation, operation and maintenance of EWH set forth herein, including in cases where these defects have arisen due to invalid parameters of mains (electricity and wa- ter), where EWH is operated, and due to the intervention of a third party. - Page 11 NOTE OF SALE ы Model _________________________ Serial No. ___________________________ Date of sale __________________________________, 20 ______ . Dealer: __________________________________________________ Dealer's representative signature ____________________________ Dealer's seal The product is completed; I have no claims for the appearance of the product. Operation manual with the necessary marks is received. I have read, understood and accepted operation rules and warranty terms.
- Page 12 Sehr geehrte Kunden! Wir gratulieren Ihnen bei Anschaffung des elektrischen Warmwasserspeichers „THERMEX“. Wir sind überzeugt, dass eine breite Palette an elektrischen Warmwas- serspeicher Ihre Anforderungen und Bedürfnisse abhelfen kann. Durch die Anwendung neuer Technologie und die Benutzung der hochwertigen Materialien konnte sich die Marke THERMEX die Popularität und das Vertrauen verschaffen...
- Page 13 Warmwasserspeichers ohne Voranmeldung zu ändern. Tabelle 1 Durchschnittliche Heizzeit um ΔТ=45°С Bezeichnung Code bei einer Leistung von 1,5 kW Vision 30 V 111 243 1 stunden 03 min. Vision 50 V 111 244 1 stunden 45 min. Vision 80 V 111 245 2 stunden 48 min.
- Page 14 Während des Betriebes des Warmwasserspeichers ist der Griff in der Zu-Position zu ы stehen. SICHERHEITSMASSNAHMEN Die elektrische Sicherheit des Speichers werden nur bei effektiver Erdung, die gemäß den Normen für Montage von elektrischen Geräten gemacht wurde, gewährleis- tet. Der Sanitäranschluss und der Absperrarmatur müssen den Parametern der Was- serleitung entsprechen und über die notwendige Qualitätszertifikate verfügen.
-
Page 15: Installation Und Anschluss
AUFSTELLUNG UND INSTALLATION Die Aufstellung des Speichers erfolgt gemäß der am Gehäuse gekennzeichneten Markierung und in der Tabelle angegebenen Daten: Bezeichnung Austellung Vision 30 V Vision 50 V Senkrechte Montage, Stutzen nach unten; Vision 80 V Vision 100 V Empfehlenswert ist, den Speicher in maximaler Nähe von der Stelle der Warm- wasserverwendung aufzustellen, um Warmverluste in der Wasserleitung zu reduzieren. - Page 16 Um die Beschädigung des Vermögens des Benutzers und (oder) des Drit- ы ten durch Mängel des Warmwasserversorgungssystems zu vermeiden, soll der Speicher in einem Raum mit Вodenabdichtung und Drainage in Abwasser-leitung installiert werden. Die wasserempfindlichen Gegen- stände sollen unter dem Speicher nicht gestellt werden. Wird der Speicher in einem nicht geschützten Raum installiert, so ist eine Bodenwanne (nicht im Lieferum-fang) mit Drainage in Abwasserleitung aufzustellen.
- Page 17 Bild 1. Wasseranschluss ы Bild 1: 1 – Speicher, 2 – Warmwasserleitung, 3 – Kaltwasserstutzen, 4 – Ablass- ventil, 5 – Sicherheitsventil, 6 – Drainage zur Entwässerung, 7 – Leitung, 8 – während des Betriebs des Speichers Ventil absperren, 9 – Kaltwasserleitung, 10 – Warmwasser- leitung, 11 –...
-
Page 18: Elektrischer Anschluss
Wird der Speicher an einer Stelle ohne Wasserrohrleitung anmontiert, so kann das ы Wasser in den Speicher aus einem zusätzlichen Behälter mittels Pumpe oder aus einem Behälter, der in Höhe von 5 m von dem oberen Rand des Speichers aufgestellt wird, zugeführt werden. -
Page 19: Wartung
11. WARTUNG ы Die Ansammlung von Kesselstein auf dem Rohrheizkörper kann die Be- schädigung zur Folge haben. Die Beschädigung des Rohrheizkörpers ist kein Garantiefall. Die Garantiever- pflichtungen des Herstellers und des Verkäufers umfassen die regelmäßige Wartung nicht. Bei Durchführung der Wartungsarbeiten: ... - Page 20 12. STÖRUNGEN UND BEHEBUNG. ы Störung Ursache Abhilfe Druck des warmen Einlaufverstopfung des Sicherheitsventil abnehmen und spüllen Wasser im Speicher ver- Sicherheitsventils minderte sich. Kaltwas- serdruck unverändert geblieben Rohrheizkörper ist mit Flansch herausnehmen und Rohrheizkörper reinigen Kesselstein bedeckt Verlängerte Aufheizzeit Spannungsabfall im Wenden Sie sich an die Strom- Stromnetz...
- Page 21 13. TRANSPORT UND LAGERUNG DER ELEKTRISCHEN WARMWAS- ы SERSPEICHER Der Transport und die Lagerung der elektrischen Warmwasserspeicher soll in Übereinstimmung mit den auf der Verpackung angebrachten Handhabungshinweisen erfolgen: — Feuchtigkeitsschutz; — Vorsicht, fragile Ware; — Empfohlene Lagerungstemperaturen: von +5°С bis zu +40°С; —...
-
Page 22: Angaben Zum Hersteller
durchführt) oder die Installationsfirma, die den Speicher installiert und angeschlossen ы hat. Bei der Installation und Bedienung des Speichers soll der Benutzer die Vorschrif- ten, die eine einwandfreie Funktion des Speichers während der Garantiezeit sichern, einhalten: Sicherheitsmaßnahmen und Vorschriften zu Installation, Anschluss, Bedie- nung, Wartung, die in dieser Bedienungsanleitung aufgeführt sind, einhalten;... - Page 23 VERKAUF-VERMERK ы Modell _______________________ Seriennr _______________________ Verkaufsdatum «_____» __________________________________ 20 ______ г. Verkäufer: __________________________________________________ Unterschrift des Vertreters des Verkäufers ____________________________ Siegel Die Ware ist komplett ausgestattet. Ich habe keine Ansprüche auf die Gerä- teübersicht. Ich habe die Bedienungsanleitung mit erforderlichen Vermerken be- kommen.
- Page 25 WARRANTY CERTIFICATE 1 / GARANTIEZETTEL 1 Model / Ausführung Serial No. / Serie Dealer's seal / Siegel des verkäu-fers Date of sale / Verkaufsdatum Dealer / Verkäufer To be filled by the dealer / Wird von dem verkäufer ausgefüllt WARRANTY CERTIFICATE 2 / GARANTIEZETTEL 2 Model / Ausführung Serial No.
- Page 26 Date of acceptance / Aufnahmeda- Issue date / Ausgabedatum Stamp of service center / Siegel des Defect / Defekt servicebetriebs Executed work / Durchgeführte Ar- beiten Expert (full name) / Fachspezialist (name) Filled in by service center / Wird von dem Servicebetrieb ausgefüllt Date of acceptance / Aufnahmeda- Issue date / Ausgabedatum Stamp of service...
- Page 27 WARRANTY CERTIFICATE 3 / GARANTIEZETTEL 3 Model / Ausführung Serial No. / Serie Dealer's seal / Siegel des verkäu-fers Date of sale / Verkaufsdatum Dealer / Verkäufer To be filled by the dealer / Wird von dem verkäufer ausgefüllt WARRANTY CERTIFICATE 4 / GARANTIEZETTEL 4 Model / Ausführung Serial No.
- Page 28 Date of acceptance / Aufnahmeda- Issue date / Ausgabedatum Stamp of service center / Siegel des Defect / Defekt servicebetriebs Executed work / Durchgeführte Ar- beiten Expert (full name) / Fachspezialist (name) Filled in by service center / Wird von dem Servicebetrieb ausgefüllt Date of acceptance / Aufnahmeda- Issue date / Ausgabedatum Stamp of service...
Need help?
Do you have a question about the Vision 30 V and is the answer not in the manual?
Questions and answers