Table of Contents
Advertisement
Quick Links
Advertisement
Table of Contents

Related Manuals for ATD Tools SPI-77401


Summary of Contents for ATD Tools SPI-77401
- Page 1 SPI-77401 User’s Manual Land Rover...
-
Page 2: Table Of Contents
Contents Toggle Switch Setup........................1 Choose the toggle switch setup according to the system of your car’s screen....1 1.1. Where to find the toggle (DIP) switches?..............2 1.2. Set the toggle switch settings according to the system of your car’s screen....3 1.3. -
Page 3: Toggle Switch Setup
1. Toggle Switch Setup 1.1Choose the toggle switch setup according to the system of your car’s screen Car Model Year Bosch System Grand Evoque Discovery Range Rover Sport Range Rover 2012-2016 DiscoverySport Jaguar F-TYPE Jaguar XF Jaguar XE 1.2 Where to find the toggle (DIP)switches? Tips: There are two dialling options, Dial Setup 1... - Page 4 Steps for change the toggle switch Step 1 : power off the engine Step 2 : change the toggle switch according the toggle switch dial setup chart Step 3 : unplug and reconnect the CAN power cable Step 4 : power on the engine 1.3 Set the toggle switch according to the system of your car’s screen 1.3.1 For Bosch System 2/19...
- Page 5 Tips: If there is a problem with displaying the original interface and the carplay or android auto function interface at the same time, please keep the toggle switch dial 5 Check the photo of the problem shown below! 3/19...
-
Page 6: Dashboard Removal
On cars with the original navigation, our systems will take over this feature so you would lose the original navigation of the car as the smart phone menu would start when pressing the Navi button in future. For non-navigation cars, it works in via the HOME button. PLEASE NOTE: Not compatible with cars with the dual view function (where passenger can see differently on the screen to the driver). -
Page 7: Kit Contents
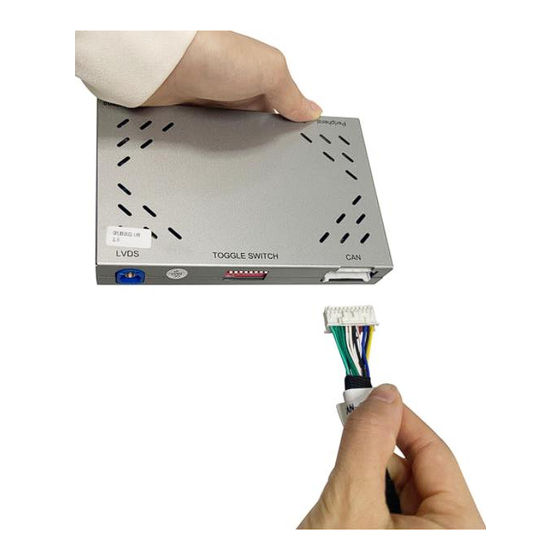
3. Kit Contents 3.1 Cables and accessories 3.2 Cable connection chart 5/19... -
Page 8: Power Cable Connection
Please follow the connection chart accurately (detailed instructions below). After the cables are all connected, you will be able to switch between the original Bosch System and the CarPlay interfaces by long pressing the “NAV” button on the car’s center console. 3.3 Power cable connection 1 ) Unplug the OEM original power cable from the head unit and the screen to reconnect it to the new cable harness. - Page 9 2 ) For the black small plug, please connect as follows A : Old car’s steering wheel connect to CP’s Steering wheel control B : New car’s steering wheel connect to Recovery car’s Steering wheel 7/19...
-
Page 10: Lvds Cable Connection
3.4 LVDS cable connection 1 ) New LVDS 1 cable connect to “LVDS” port from screen. 2 ) New LVDS 2 cable connect to the original LVDS cable unplug from the screen. Wrong LVDS cables connections will cause black screen. 8/19... -
Page 11: Wifi Antenna And Usb-Av Cable Connection
3.5 WiFi antenna and USB-AV cable connection Tip : A)The WiFi antenna cannot be placed close to metal objects. (The WiFi signal will lost if WiFi antenna is close to the metal objects.) B) The USB port in the USB-AV cable is used for software updates. 3.6 Audio GND cable connection In the power cable harness, there is a wire with label “Audio GND”. -
Page 12: Where To Put The Carplay Box
There is no need to connect the “ Audio GND ” cable, unless the sound of the CarPlay is distorted or with noise or the sound can’t work. If you have problem about the sound of the CarPlay, like without sound, noise, distorted sound, etc., please connect the “Audio GND”... -
Page 13: Carplay Sound Setup
In the glove box In the glove box 4. CarPlay Decoder Sound Setup 4.1 Bluetooth settings If your phone already has a Bluetooth connection to your car, disconnect it. 4.2 Set AUX When using the CarPlay system, need to keep original multimedia system into AUX interface, the CarPlay system will have sound. -
Page 14: Reverse And Front Cameras
CarPlay Decoder main interface 5. Reverse and Front Cameras 5.1 Original OEM Camera Enter the “Setup” menu from the decoder main menu, choose “Reverse”, then make sure the “Reverse Camera” option is set to “Original”. Make sure that the following three options are all set to “off”. 12/19... -
Page 15: Aftermarket Camera
Aftermarket Camera Aftermarket rear view camera cable connection Aftermarket front view camera cable connection 5.3 Settings for aftermarket reverse camera and front cameras After the aftermarket camera cables are connected, you need to check the camera settings (click the “Setup” button from the decoder main menu). “Reverse”... -
Page 16: Faq
the options “Reverse line detect”, the “Reverse display track”, and the “Reverse display radar” should all be set to “off”. Front view camera settings: choose “Reverse”, from the menu and set the front view time between 1 to 15 seconds. 6. - Page 17 4. Why have the Echo during the call? Solution: 1. in the Audio setting, Change the setting “Mic Echo PreConfig“ , then restart the engine. 2. in the setting, set the “using car's BT phone“ to ON, then connect original car's bluetooth to make a call.
- Page 18 How do I activate Siri? Use the Voice Control button on the steering wheel 16/19...
-
Page 19: Contact Us
7. Contact Us Please contact us via purchase platform if you need any help. Tip: before contacting us, please help us to collect the following information. 1. the order ID 2. the car model 3. the year of the car 4.
Need help?
Do you have a question about the SPI-77401 and is the answer not in the manual?
Questions and answers