Table of Contents
Advertisement
Quick Links
© 2009, Videolarm, Inc. All Rights Reserved
FDW8CF2
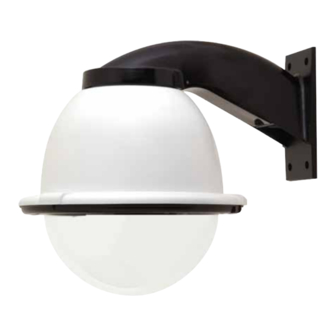
Fusion Dome (Outdoor/Indoor Housing with Wall Mount)
Installation and Operation Instructions for the following models:
FDW8CF2
8" Outdoor dome hsg w/wall mount, clear dome, w/24Vac input,
heater/ blower, (1) fixed camera bracket, MCL8.5"
FDP8CF2
8" Outdoor dome hsg w/pendant mount, clear dome, w/24Vac input,
heater/ blower, (1) fixed camera bracket, MCL8.5"
FDP8CF2
8" Indoor dome hsg w/wall mount, tinted dome, plus (1) fixed camera
bracket, MCL8.5"
IFDP8CF
8" Indoor dome hsg w/pendant mount, tinted dome, plus (1) fixed camera
bracket, MCL8.5"
Before attempting to connect or operate this product,
please read these instructions completely.
© 2009, Videolarm, Inc. All Rights Reserved
www.videolarm.com
CERTIFIED
81-IN5417
01-29-2009
Advertisement
Table of Contents

Related Manuals for Moog Videolarm SView FDP7TS-3


Summary of Contents for Moog Videolarm SView FDP7TS-3
- Page 1 © 2009, Videolarm, Inc. All Rights Reserved FDW8CF2 Fusion Dome (Outdoor/Indoor Housing with Wall Mount) Installation and Operation Instructions for the following models: FDW8CF2 8” Outdoor dome hsg w/wall mount, clear dome, w/24Vac input, heater/ blower, (1) fixed camera bracket, MCL8.5”...
- Page 2 IMPORTANT SAFEGUARDS IMPORTANT SAFEGUARDS Read these instructions. 1 Read Instructions - All the safety and operating Keep these instructions. instructions should be read before the unit is operated. Heed all warnings 2 Retain Instructions - The safety and operating Follow all instructions. instructions should be retained for future Do not use this apparatus near water.
- Page 3 1. NOTIFICATIONOF CLAIMS: WARRANTYSERVICE:If Purchaser believes that the Product is defective in material or workmanship, then written notice with an explanation of the claim shall be given promptly by Purchaser to Videolarm but all claims for warranty service must be made within the warranty period.
-
Page 4: Electrical Specifications
Electrical Specifications Power 24VAC Class 2 Only 24 VAC 26 Watts Accessories: Heater: 25 Watts, Blower: 1 Watt Camera Power: Tools Required: .100” Flat Head Screwdriver English 24 VAC 26 vatios Accesorios: Calentador: 25 Vatios, Soplador: 1 vatio Energía De la Cámara fotográfica: Las Herramientas Requirieron: Destornillador Principal Plano Del 100". - Page 5 Securely mount unit to wall or to appropriate adapter bracket. • Monte con seguridad la unidad a la pared o al soporte apropiado del adaptador. • Montez solidement l'unité au mur ou à la parenthèse appropriée d'adapteur. • Bringen Sie sicher Maßeinheit zur Wand oder zum passenden Adapterhaltewinkel an.
- Page 6 Securely mount bracket to wall. Pull wiring through bracket and position grommet as shown. • Con seguridad soporte del montaje a emparedar. Tire del cableado a través del soporte y del ojal de la posición según lo demostrado. • Solidement parenthèse de bâti à murer. Tirez le câblage par la parenthèse et le canon isolant de position comme montré.
- Page 7 Loop the lanyard over the set screw to temporarily hold housing. • Coloque el acollador sobre el tornillo de presión para celebrar temporalmente la cubierta. • Faites une boucle la lanière au-dessus de la vis de réglage pour tenir temporairement le logement. •...
- Page 8 Bolt camera to camera bracket as shown. • Cámara fotográfica del perno al soporte de la cámara fotográfica según lo demostrado. • Appareil-photo de boulon à la parenthèse d'appareil- photo comme montré. • Schraubbolzenkamera zum Kamerahaltewinkel, wie gezeigt. • Câmera do parafuso ao suporte da câmera como mostrado.
-
Page 9: Replacement Parts List
Fasten down the dome with a Phillips screwdriver. • Sujete abajo de la bóveda con un destornillador Phillips. • Attachez en bas du dôme avec un tournevis Phillips. • Befestigen Sie sich hinunter die Haube mit einem Kreuzkopfschraubenzieher. • Prenda abaixo a abóbada com uma chave de fenda Phillips. -
Page 10: Product Registration/Warranty
Product Registration/Warranty Thank you for choosing Videolarm. We value your patronage and are solely committed to providing you with only the highest quality products available with unmatched customer service levels that are second-to-none in the security industry. Should a problem arise, rest assure that Videolarm stands behind its products...
Need help?
Do you have a question about the SView FDP7TS-3 and is the answer not in the manual?
Questions and answers