Advertisement
Quick Links
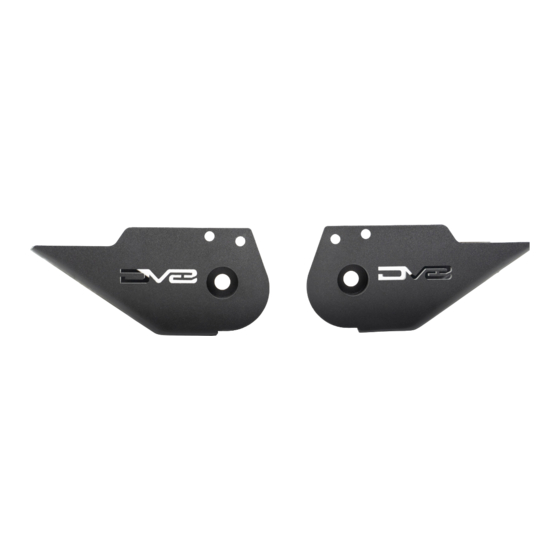
TRAILING ARM SKID PLATE
21+ FORD BRONCO
SPBR-05
TOOLS
REQUIRED
- 18, 24mm Socket
- Torque Wrench
- Breaker Bar or Impact Gun
- #6 Allen Bit
- Rubber Mallet
- Safety Glasses
- HD Ratchet Strap
- Preferred Cutting Tool
- Prybar
- Floor Jack
- Jack Stands
- Black Spray Paint
WARNINGS/CAUTIONS BEFORE STARTING INSTALLATION
Before you install this kit —
instructions, warnings, cautions, and notes contained in
this installation instruction guide. Consult your vehicle
owner's manual for proper disconnection of electrical and
lifting of vehicle if required for installation of this product.
This install may require some technical skills and
knowledge of basic mechanical work. If you do not feel that
you are capable of performing this install please take this
product to a trained professional.
After reading this guide please contact us with any
questions or concerns before installing product.
Customer Service: 855-680-9595
DV8 Offroad is not responsible for any bodily injury or harm to you
or your vehicle as a result of an improper install.
6400 SYCAMORE CANYON BLVD.
RIVERSIDE, CALIFORNIA 92507
855-680-9595
WWW.DV8OFFROAD.COM
SKILL
LEVEL
- Novice/Intermediate
- 2 persons
Intermediate skill level required,
you can install it by yourself,
however, additional help is highly
recommended.
Read and understand all
INSTALLATION
PRODUCT
TIME
- 1.5 Hour.
Time to install this should only
take about an hour and a half.
Proper installation of this kit required knowledge of the factory
recommended procedures for removal and installation of original
equipment components. We recommend that the factory shop manual
and any special tools needed to service your vehicle be on hand during
the installation. Installation of this kit without proper knowledge of the
factory recommended procedures may affect the performance of these
components and the safety of the vehicle
• Always wear eye protection when operating power tools
Inspect all contents of this package to make sure product is not damaged
and all installation hardware has been included. If parts are missing from
kit, please be prepared to provide the following information
1. Name of purchase location
2. Bar Code on side of box
3. Date above bar code
4. Date inside box cover
NEED HELP?
MANUAL
REQUIRED
855-680-9595
Advertisement

Subscribe to Our Youtube Channel
Related Manuals for DV8 OFFROAD SPBR-05


Summary of Contents for DV8 OFFROAD SPBR-05
- Page 1 1. Name of purchase location Customer Service: 855-680-9595 2. Bar Code on side of box DV8 Offroad is not responsible for any bodily injury or harm to you 3. Date above bar code or your vehicle as a result of an improper install.
- Page 2 INSTALLATION MANUAL Begin by unpacking all items and inspecting for missing pieces or damage. If you have any concerns, please contact the company the product was purchased from. Extra hardware may be included with the product. HARDWARE INCLUDED (4) M10x35 (4) M10 Spring Washers (4) M10 Flat Washers (4) Aluminum Spacers...
- Page 3 INSTALLATION MANUAL STEP 2 | Place the floorjack under gas tank and raise it so they are supporting the gas tank. We used two floorjacks for increased stability, If using only one floorjack for support, center it under gastank parallel with bolt directly in front of frame side control arm mount.
- Page 4 INSTALLATION MANUAL STEP 5 | Ensure the bolt above the rear drive shaft is secure, then carefully lower the floorjack(s) allowing the gas tank/skid to come down and swing to the driverside slightly. Drop it down until there is clearance for the provided T25 tool to remove the factory hardware.
- Page 5 INSTALLATION MANUAL STEP 6 | Use the provided “L” shaped T25 torx key to remove the (2) factory bolts and then remove the factory plate. 855-680-9595 NEED HELP?
- Page 6 INSTALLATION MANUAL STEP 7 | Use the floorjack to lift the gas tank/skid plate back into place, and loosely thread all the factory hardware into place. There are (6) factory bolts total to replace. Once all hardware is threaded loosely, secure all factory hardware for the gas tank skid using an 18mm socket.
- Page 7 INSTALLATION MANUAL STEP 8 | On the gas tank skid, in front of the frame-side control arm mount, there may be a lip that sticks out from the tank. This will vary based on the vehicle. This will need to removed prior to installation.
- Page 8 INSTALLATION MANUAL STEP 10 | Hook one side of the ratchet strap to the shock mount, and the opposite side of the strap to center hole in the gas tank skid. It will be parallel with the middle mounting bolt for the gas tank skid on the frame rail.
- Page 9 INSTALLATION MANUAL STEP 12 | Use a 24mm socket to remove the nut securing the control arm to the frame rail. STEP 13 | When the ratchet strap is tensioned correctly, the bolt should slide out and back in fairly easily with a few decent hits with a rubber mallet.
- Page 10 INSTALLATION MANUAL STEP 14 | Slide the bracket over the mounting bolt for the control arm and let it hang as low as possible while swinging it around the opposite edge of the control arm mount. It should go into place with relative ease, but may require some force to get it seated on the mount properly.
- Page 11 INSTALLATION MANUAL STEP 17 | Secure the M10 hardware using a #6 allen bit. STEP 18 | Secure the factory nut to the control arm mounting bolt using a 24mm socket. Torque to 159 ft-lbs. 855-680-9595 NEED HELP?
- Page 12 INSTALLATION MANUAL STEP 19 | Repeat steps 9-17 for the driverside of the vehicle. Congrats! You are finished with the install of the 21+ Bronco Trailing Arm Skid Plate. 855-680-9595 NEED HELP?
Need help?
Do you have a question about the SPBR-05 and is the answer not in the manual?
Questions and answers