Advertisement
Quick Links
IMPORTANT
Carefully remove all the parts from the carton and
place them individually on a soft cloth to prevent
scratches or other damage.
Carefully and strictly follow these assembly instructions
to ensure a completed product as designed.
Do not use power tools above 8 volts to assemble.
Part List
Part List
A.
Top
1 pc.
F.
Back Panel
3 pcs.
L.
Towel Bar
1 pc.
W.
Base
1 pc.
X.
Front Rail
1 pc.
Tool(s) required for assembly: Phillips screwdriver
home
4514-95
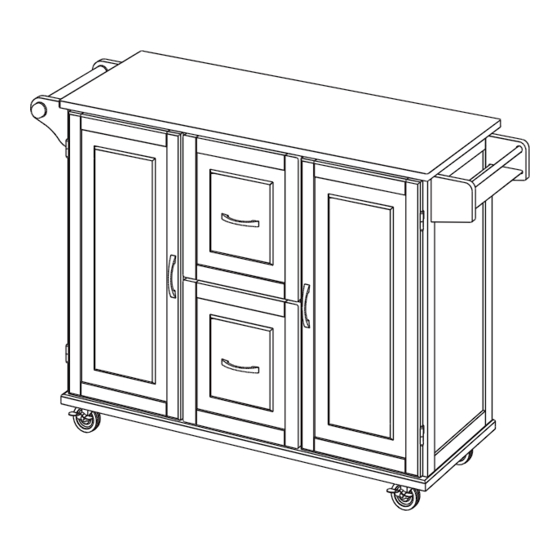
Kitchen Cart
B.
Side Panel
1 pc.
G.
Back Upright
2 pcs.
H.
Back Rail
1 pc.
M.
N.
Rack Side
Rack Side
1 pc.
1 pc.
R.
Door
1 pc.
styles Customer Service: www.homestylesfurniture.com,
servicedesk@homestylesfurniture.com,
C.
D.
Side Panel
Middle Panel
1 pc.
1 pc.
I.
J.
Back Rail
Front Rail
1 pc.
1
pc
O.
Rack Base
1 pc.
S.
Door
1 pc.
888-680-7460
E.
Middle Panel
1 pc.
K.
Arm
.
2 pcs.
P.
Q.
Rack Bar
Shelf
1 pc.
4 pcs.
T.
Drawer
2 pcs.
Refer to later page(s) of these
instructions for drawer assembly.
Advertisement

Summary of Contents for Homestyles 4514-95
- Page 1 4514-95 Kitchen Cart IMPORTANT Carefully remove all the parts from the carton and place them individually on a soft cloth to prevent scratches or other damage. Carefully and strictly follow these assembly instructions to ensure a completed product as designed.
-
Page 2: Hardware List
Assembly Instructions 2/9 Hardware List Small Hex Wrench Hex Wrench Head Cap Bolt Head Cap Bolt (long) 1 pc. 1 pc. 4 pcs. (+1 extra) 4 pcs. (+1 extra) Locking Caster Non-Locking Caster Head Cap Bolt for Caster Magnet 2 pcs. 2 pcs. - Page 3 Assembly Instructions 3/9 IMPORTANT Ÿ Use a soft cloth between these parts and the floor. Ÿ Do not use power tools above 8 volts to assemble. Ÿ Do not tighten all the bolts until each part is properly assembled. Ÿ Keep Hex Wrench as the bolts may need to be tightened in the future.
- Page 4 Assembly Instructions 4/9 STEP 4 Attach Back Rail (H) to Side Panel (C), then flip Locks. (See Figures 1 and 2) Attach Back Uprights (G) to unit. Slide Back Panels (F) into position. Attach Back Rail (I) to unit, then flip Lock. Attach Side Panel (B) to unit, then flip Locks.
- Page 5 Assembly Instructions 5/9 STEP 6 Attach 2 pcs. of and 2 pcs. of to unit with 16 pcs. of Attach at front. (See Figure 4) Note: Arrow label indicates front of unit. Arrow label at front Figure 4 STEP 7 Attach 2 pcs.
- Page 6 Assembly Instructions 6/9 STEP 8 Turn unit over to its upright position. Attach Middle Panels (D) and (E) to unit, then flip Locks. Attach Front Rails (J) and (X) to unit, then flip Locks. Slide Towel Bar (L) into position. Figure 6 STEP 9 Attach Doors (R) and (S) by...
-
Page 7: Part List
Assembly Instructions 7/9 Drawer (T) Bottom STEP 10 Attach Drawer Front (T1) and Drawer Back (T2) to Drawer Side (T3) with 6 pcs. of Attach Drawer Side (T4) to unit with 6 pcs. of Roller at back STEP 11 Slide Drawer Bottom (T5) into groove. Attach Drawer Bottom (T5) to unit with 4 pcs. - Page 8 Assembly Instructions /9 STEP 13 Close the doors, then adjust doors gaps look proportional by move the unit (See Figure 8) Open the doors slowly. Figure 8 Insert 12 pcs. of into pre-drilled holes in unit, then tighten. STEP 14 Insert 3 pcs.
- Page 9 Assembly Instructions 9/9 STEP 15 Insert 16 pcs. of into side panel and middle panel at desired level. (See Figure 9) Place Shelves (Q) into position. Slide Drawers (T) into position. Figure 9...
- Page 10 CARE INSTRUCTIONS NEVER NEVER use glass cleaners on allow liquids to remain on furniture. finished furniture. Ammonia Absorption causes parts to warp chemically attacks the finish. and split and finishes to delaminate. Do not use power tools Do not place Do not write above 8 volts to assemble.


Need help?
Do you have a question about the 4514-95 and is the answer not in the manual?
Questions and answers