Table of Contents
Advertisement
Quick Links
Advertisement
Table of Contents

Related Manuals for Webasto Thermo Top Pro 120


Summary of Contents for Webasto Thermo Top Pro 120
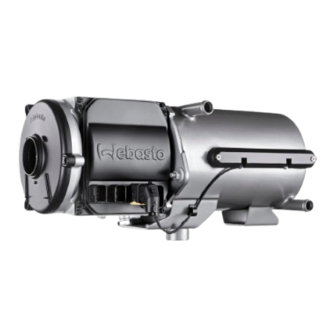
- Page 1 Workshop Manual Thermo Top Pro 120 | 150 Water Heater English...
-
Page 2: Table Of Contents
Contents Contents About this document ...... 3 Function checks ......... 24 Purpose of the document .......... 3 Basics ............... 24 Using this document.......... 3 Check and set CO₂ in exhaust gas...... 24 Use of symbols and highlighting ........ 3 Checking exhaust gas temperature sensor .... 25 Checking control unit .......... 25 Safety .......... -
Page 3: About This Document
This workshop manual is designed to assist trained personnel Do not operate the heater in closed rooms that do not with maintenance of the Thermo Top Pro 120 | 150. have an exhaust extraction unit. The document is part of the product and contains all the in- Do not switch on or operate the heater. -
Page 4: Qualification Of Personel
Checks Webasto recommends to carry out the following servicing jobs before and after each heating period: Read out the fault code memory. Clean heater exterior (make sure no water gets in). -
Page 5: Information Regarding The Heater
Thermo Top Pro 150 Rail Basis This is a heater model for installation and operation in rail The Thermo Top Pro 120 | 150 heaters consist essentially of the vehicles. The essential functions correspond to the standard ver- following main components: sion of the heater. -
Page 6: Description Of The Components
4 | Description of the components Description of the components Overview of the subassemblies X W V Fig. 2 Exploded view The following legend extends over this and the next page. Ignition spark generator Coolant temperature sensors Screw for ignition spark generator Cover for sensors M5x14 PH2 (on fuel pump) (2 +/- 0.2 Nm) Ignition electrodes... - Page 7 Description of the components | 4 O-ring fuel pump (small) Burner Fuel pump with solenoid valve Seal Screw for fuel pump M5x45 T25 (on burner head) (3.5 +/- 0.35 Nm) M8 SW13 (burner head on heat exchanger) (19 +/- 2 Nm) Fuel nozzle Cable tie for electrical cables (nozzle block preheater SW16 (20 +/- 2 Nm) and ignition spark generator) Baffle plate...
-
Page 8: Burner Head
The air is sucked in through the air intake opening in the fan cover. Optionally, a spray guard or a combustion air intake line ap- proved by Webasto can be attached to the fan cover. Drive motor Fig. 4 Burner head details... -
Page 9: Fuel Pump With Solenoid Valve
Description of the components | 4 Fuel pump with solenoid valve Ignition spark generator with ignition electrodes Fig. 9 Ignition spark generator Fig. 7 Fuel pump with solenoid valve A Ignition electrodes B Ignition spark generator A Solenoid valve C Fuel pump The high voltage for igniting the air-fuel mixture is generated in B Fuel nozzle Axle connection to the drive motor... -
Page 10: Control Unit
4 | Description of the components Control unit 4.12 Heat exchanger NOTE The control unit must not be disassembled. Fig. 12 Heat exchanger The heat exchanger transfers the heat generated in the combus- tion process to the coolant circuit. Fig. 11 Inside and outside of control unit Components associated with the heat exchanger include: l Seal A Pressure equalization ele-... -
Page 11: Coolant Temperature Sensors
After 20 unsuccessful start attempts, the coolant pump The standard variant of the Thermo Top Pro 120 | 150 are oper- switches itself off. To carry out a renewed start attempt, ated with the coolant pump U4850. The coolant pump is the coolant pump must be turned off and switched back on switched on by the heater control unit. -
Page 12: Coolant
4 | Description of the components l Overvoltage protection NOTE In the event of overvoltage, the coolant pump automatic- You will find further information in the installation in- ally shuts down at a voltage supply above 36 V (24 V) and structions and at the vehicle manufacturer. -
Page 13: Functional Description
Depending on the system equipment, the switch signals are produced by a switch, control element or a climate control sys- The Thermo Top Pro 120 | 150 is a water heater with coolant tem. temperature control, monitored by its integrated control unit. -
Page 14: Functional Sequence
5 | Functional description Functional sequence Fig. 18 Functional sequence Switch on/ component test Operating indicator Supply Coolant pump External light request 1 Pre-ignition/flame ignition Ignition spark generator Flame stabilisation Fuel cut-off valve Control mode Flame indicator After-running period Control pause ADR heaters <... -
Page 15: Fault Switch-Off
"Overview of faults and fault codes" on page 17. 6.2.1 Switch (On/Off) Connect and use the Webasto Thermo Test (WTT) USB interface, diagnostic adapter and adapter cable as de- On control elements without a display (analogue), the fault scribed in the Operating Instructions. -
Page 16: Cause Of Malfunctions In The Heater And Systems
6 | Malfunctions and troubleshooting 6.2.2 MultiControl / SmartControl / UniControl 6.4.2 Digital cancelling the fault lock-out (with WTT) Malfunctions are shown with fault codes in the display. Error code output: Connect diagnostic cable to the heater diagnostic plug (next to fuses). The fault code is indicated by a combination of digits and letters (e.g. -
Page 17: Heater Unlocking Instructions
Malfunctions and troubleshooting | 6 Heater unlocking instructions Overview of faults and fault codes The heater can be unlocked with or without Webasto Thermo NOTE Test PC diagnostics. The control element can be connected via W-bus or 6.5.1 Analogue heater unlocking... - Page 18 6 | Malfunctions and troubleshooting 6.6.1 Troubleshooting with error code output *: Indicator lamp of control element flashing: count the number of long flash pulses after 5 short flash pulses. Analogue Fault code Fault message / Possible causes Recommended action in workshop fault code (hexa- Symptom...
- Page 19 Malfunctions and troubleshooting | 6 *: Indicator lamp of control element flashing: count the number of long flash pulses after 5 short flash pulses. Analogue Fault code Fault message / Possible causes Recommended action in workshop fault code (hexa- Symptom decimal) Short circuit of Coolant temperature...
- Page 20 6 | Malfunctions and troubleshooting *: Indicator lamp of control element flashing: count the number of long flash pulses after 5 short flash pulses. Analogue Fault code Fault message / Possible causes Recommended action in workshop fault code (hexa- Symptom decimal) Exhaust gas temperat- 2.
- Page 21 Malfunctions and troubleshooting | 6 Symptom Possible cause Possible troubleshooting Comments / Service Heater will not start, coolant Component fault See chapter 6.2, "Fault list on pump briefly starts up then the control element" on page switches immediately to after- running period, or the heater switches off.
- Page 22 6 | Malfunctions and troubleshooting Symptom Possible cause Possible troubleshooting Comments / Service 4. Tank extracting device or fuel lines leaking Check tank extracting device and fuel lines for leaks. 5. Air in fuel system Bleed fuel system Combustion air line blocked Unblock combustion air in- let and combustion air line, replace if necessary...
- Page 23 Malfunctions and troubleshooting | 6 Symptom Possible cause Possible troubleshooting Comments / Service Fuel supply disrupted Check fuel supply (tank empty, lines clogged, fuel line only partially filled) Check fuel filter Check tank extracting device and fuel line for leaks Bleed fuel system l Coolant heats up l If the coolant gets warm...
-
Page 24: Function Checks
The heater should be in combustion mode to test the fuel val- ues. l Diagnostic adapter including Webasto Thermo Test soft- Maximum heat dissipation must be ensured so that the coolant ware for displaying the fault code memory, operating data, temperature remains as low as possible and several minutes in control unit information. -
Page 25: Checking Exhaust Gas Temperature Sensor
Function checks | 7 Checking exhaust gas temperature Checking control unit sensor PC and Webasto For the fault code: When testing with a digital multimeter, the exhaust gas temper- Thermo Test dia- See chapter 6.6, "Overview of faults ature sensor should show the following values: gnosis adapter: and fault codes"... -
Page 26: Check The Blower Fan Wheel
Deformation? The fuel pump and the fuel lines must be replaced after Broken? 5 years. 7.9.1 Connect to Webasto Thermo Test PC Diagnostics Test the fuel pump for abnormalities and activate the fuel sup- ply. Component is OK. Checking drive motor Check connector. -
Page 27: Checking Heater Cartridge
24 V valve 10 Watt Connector X2 and X4 must be connected. 7.9.4 Check pressure on fuel pump Testing the fuel pump with Webasto Thermo Test Follow these steps: Diagnostics: – Disconnect connector X3 from the control unit Burner head removed –... -
Page 28: Check Coolant Pump
7 | Function checks Testing the heater cartridge when removed 7.12 Checking coolant temperature sensors 7.12.1 Testing the coolant temperature sensors via WTT Diagnostics Fig. 22 Testing the heater cartridge A Pin 1 B Pin 2 Follow these steps: Connect supply voltage (12 V or 24 V) to PIN1 and PIN2 of Fig. 23 Coolant temperature sensors testing via WTT connector. -
Page 29: Repairing And Replacing Components
Repairing and replacing components | 8 Follow these steps: 7.13.2 Testing ignition electrode when removed If the electrodes are dirty: DANGER Rectify cause. Potentially hazardous high voltage This operating mode is not intended for the ignition Remove spark corrosion from electrode tips with sandpa- spark generator and safety precautions must be taken per. -
Page 30: Disconnecting Control Unit Connections
8 | Repairing and replacing components Disconnecting control unit Install burner head connections Fig. 27 Detaching the control unit connector Unlatch all connectors from the control unit and disconnect as shown above. NOTE Unclip the yellow clip in the connector: Fig. 29 Install burner head, check position of combustion tube. While the yellow clip is carefully pressed down with the When attaching the burner head to the heat exchanger, flat-blade screwdriver, remove the connectors. -
Page 31: Electrical Wiring In The Burner Head
Repairing and replacing components | 8 Fig. 33 Position of clip for electrical cables on housing Fig. 31 Removing control unit A Control unit Connectors Bolt T20 Follow these steps: Pull connector (C) out of control unit (A). Remove screws of control unit (B) 4x14 T20 (4x). Turn control unit toward front. -
Page 32: Removing Ignition Electrodes
8 | Repairing and replacing components Remove ignition electrodes, see chapter 8.9, "Removing ig- NOTE nition electrodes" on page 32. Carefully remove baffle plate over the collar. During re- moval, do not bend ignition electrodes. Carefully unscrew fuel nozzle (SW16). Follow these steps: NOTE Carefully pull baffle plate forward by approx. -
Page 33: Removing Ignition Spark Generator
Repairing and replacing components | 8 8.11 Removing ignition spark generator 8.12 Removing fuel pump NOTE NOTE Do not bend or damage ignition electrodes. Pay attention to the axle connection (to drive motor). The axle connection may fall out of the drive motor. Fig. 39 Removing fuel pump Fig. 38 Remove ignition spark generator (C) with ignition electrodes. -
Page 34: Removing Nozzle Block Preheater
8 | Repairing and replacing components 8.14 Removing nozzle block preheater 8.15 Removing blower fan wheel Fig. 41 Fuel pump with nozzle block preheater Fig. 43 Overview Screws Blower fan wheel Cover for combustion air fan D Circlip Fig. 42 Removing clip and heater cartridge Fuel pump Clip Heater cartridge... -
Page 35: Removing Drive Motor
Repairing and replacing components | 8 8.16 Removing drive motor NOTE If the drive motor has to be removed, the ignition spark generator and the ignition electrodes can remain in- stalled. Fig. 46 Heat exchanger with burner and sensors Follow these steps: Remove burner head, see chapter 8.4, "Disconnect burner head"... -
Page 36: Remove Coolant Temperature Sensors
8 | Repairing and replacing components 8.19 Remove coolant temperature sensors NOTE Never remove the temperature sensors for testing, just for replacement. Do not reinstall the removed sensors. Fig. 49 Exhaust gas temperature sensor with connector, clip and screw A Exhaust gas sensor C Exhaust gas temperature sensor B Spring clip D Screw for spring clip... -
Page 37: Installing Exhaust Gas Temperature Sensor
Install exhaust gas temperature sensor. Position spring clip of exhaust gas temperature sensor. See Fig. 49. Fig. 51 Ideal position of Thermo Top Pro 120 / 150 heater for storage and transport 9039412C Workshop manual TTP 120 _ 150 37 / 49... -
Page 38: Storage And Transportation
Switch for residual heat utilisation to the specific application. In case of queries, contact a On/Off switch (min. 500 mA) Webasto service workshop. Switch for auxiliary drive / pumping device If the heater is parameterised for automatic ADR recog- nition and the ADR switch-off is set to the 'high' level,... -
Page 39: Cable Colours / Cable Cross-Sections
Electrical incorporation | 10 12-pin plug connection. Vehicle-specific wiring harness Line length < 7.5 m 7.5 – 15 m 3-pin plug connection. Item ISG to item A2 4.0 mm² 6.0 mm² 3-pin plug connection. Item CAF to item A2 Cable colours 2-pin plug connection. -
Page 40: Wiring Diagrams
10 | Electrical incorporation 10.5.2 Overview of plug assignments at control unit X6 X7 X8 X6 X7 Fig. 52 Plug assignments at control unit: exterior (left): X1 - X1, interior (right): X5 - X8 10.6 Wiring diagrams Please read the following pages. Wires or components shown with dashed lines are op- tional and not included in the scope of delivery or in the wiring harness. - Page 41 Electrical incorporation | 10 10.6.1 Heater Fig. 53 Wiring diagram for heater Thermo Top Pro 120 | Thermo Top Pro 150 9039412C Workshop manual TTP 120 _ 150 41 / 49...
- Page 42 10 | Electrical incorporation 10.6.2 W-bus Fig. 54 Wiring diagram for power supply, fan control and control element(s) connection via W-bus (Cable cross-sections suitable for cable lengths <7.5 m) 42 / 49 9039412C Workshop manual TTP 120 _ 150...
- Page 43 Electrical incorporation | 10 10.6.3 Analogue Fig. 55 Wiring diagram for power supply, fan control and control element(s) connection via analogue (optional) (Cable cross-sections suitable for cable lengths <7.5 m) 9039412C Workshop manual TTP 120 _ 150 43 / 49...
- Page 44 10 | Electrical incorporation 10.6.4 TTP Chiller 9042559A01 Fig. 56 Wiring diagram for Chiller version (cable cross-sections suitable for cable lengths <7.5 m) 44 / 49 9039412C Workshop manual TTP 120 _ 150...
- Page 45 Electrical incorporation | 10 10.6.5 W-bus with ADR inclusion Fig. 57 Wiring diagram for power supply, fan control and control element(s) connection via ADR W-bus (Cable cross-sections suitable for cable lengths <7.5 m) 9039412C Workshop manual TTP 120 _ 150 45 / 49...
- Page 46 10 | Electrical incorporation 10.6.6 Analogue with ADR inclusion Fig. 58 Wiring diagram for power supply, fan control and control element(s) connection via ADR analogue (Cable cross-sections suitable for cable lengths <7.5 m) 46 / 49 9039412C Workshop manual TTP 120 _ 150...
- Page 47 Electrical incorporation | 10 10.6.7 UniControl with battery disconnector (BTS) Fig. 59 Wiring diagram for power supply, fan control and control element(s) connection via UniControl with battery disconnector (BTS) (cable cross-sections suitable for cable lengths <7.5 m) 9039412C Workshop manual TTP 120 _ 150 47 / 49...
-
Page 48: Technical Data
[W] Parts per million (millionth) Permissible ambient temper- –40 to +80 Thermo Top Pro ature (operation) [°C] Webasto Thermo Test (PC diagnosis) Permissible ambient temper- –40 to +120 ature (storage) [°C] Permissible working pressure < 2.5 [bar]... - Page 49 Webasto Thermo & Comfort SE UK only Postfach 1410 82199 Gilching Webasto Thermo & Comfort UK Ltd Germany Webasto House White Rose Way Company address: Doncaster Carr Friedrichshafener Str. 9 South Yorkshire 82205 Gilching DN4 5JH Germany United Kingdom www.webasto.com...
Need help?
Do you have a question about the Thermo Top Pro 120 and is the answer not in the manual?
Questions and answers