Webasto Thermo Pro 50 Eco Workshop Manual
Hide thumbs
Also See for Thermo Pro 50 Eco:
- Operation manual (8 pages) ,
- Installation instructions manual (34 pages)

Related Manuals for Webasto Thermo Pro 50 Eco


Summary of Contents for Webasto Thermo Pro 50 Eco
- Page 1 03/2003 Water Heater Workshop Manual Thermo Pro 50 Eco Thermo Pro 50 Eco - D 24 V ADR (Diesel, dangerous-goods transport)
- Page 2 Only genuine Webasto parts may be used. See also Webasto air and water heaters accessories catalogue. NEVER try to install or repair Webasto heating or cooling systems if you have not completed a Webasto training course, you do not have the necessary technical skills and you do not have the technical documentation, tools and equipment available to ensure that you can complete the installation and repair work properly.
-
Page 4: Table Of Contents
Thermo Pro 50 Eco Table of Contents Table of Contents Introduction ............... .101 Contents and purpose . - Page 5 Table of Contents Thermo Pro 50 Eco Servicing work ..............801 Work on heater .
- Page 6 Retaining plate for installing water connection piece ........912 Fig. 1001 Preferred position of Thermo Pro 50 Eco heater for storage and transport ..... . 1001...
-
Page 7: Thermo Pro 50 Eco
Type approvals according to ECE-R 10 (EMC) and ECE- Contents and purpose R 122 (Heater) exist for the Thermo Pro 50 Eco heater. This workshop manual serves to support instructed person- For the installation, primarily the regulations of the directive nel, which repairs the Thermo Pro 50 Eco water heaters. -
Page 8: Spare Parts
• At locations at which highly flammable gases or dusts lead to the exclusion of all liability by Webasto. The can form, and at locations at which highly flammable same applies if repairs are carried out incorrectly or with liquids or solid materials are stored (e.g. -
Page 9: General Description
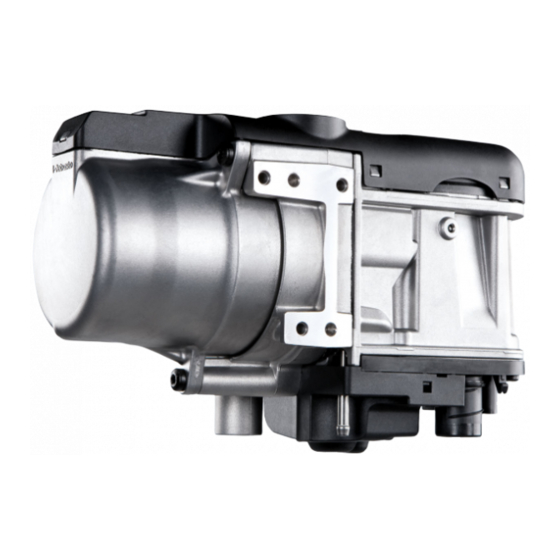
The water heater is integrated in the cooling system, the fuel system The Thermo Pro 50 Eco heater consists of the combustion- and the electrical system of the vehicle. air fan unit (G) with the control unit, the heat exchanger (W) When the engine is shut off, the water heater is not auto- and the burner unit (B). -
Page 10: Combustion-Air Fan Unit With Control Unit
Thermo Pro 50 Eco 2 General description Combustion-air fan unit with control unit The combustion-air fan unit contains: • the heater type label • the connection piece for the combustion air pipe • the control unit with the plug-in contacts •... -
Page 11: Glow Plug
2 General description Thermo Pro 50 Eco 2.2.1 Glow plug 2.3.1 Temperature sensor and overheating sensor The glow plug (B4) is connected to the control unit via an electrical line with a connector (B9). The glow plug is fas- The temperature sensor detects the coolant temperature in tened to the evaporator mount with a retaining spring (B2). -
Page 12: Circulation Pump
IMPORTANT Only the model DP42 fuel metering pump may be used for the Thermo Pro 50 Eco heater. Observe the model designa- tion on the component for this purpose. When replacing the metering pump, the CO settings must be checked. -
Page 13: Description Of Operation
Operating indi- cator lamp Circulation pump Vehicle fan Possible encodable control temperatures Fig. 301 Operating sequence Thermo Pro 50 Eco 1) Switching on 12) Run-on ended 2) Component check 13) Preheating 15 to 20 sec. 3) Preheating 40 s. 14) Metering pump/partial load (1/4) 4) Metering pump/partial load (1/4) 15) "Flame ON"... -
Page 14: Starting And Control Mode
Thermo Pro 50 Eco 3 Description of Operation Starting and control mode After combustion begins (start), controlled heating auto- matically begins. At a higher coolant temperature, the heating capacity is modulated between 2.5 kW and 5 kW. The objective to achieve and maintain the control temperature. -
Page 15: Technical Data
4 Technical data Thermo Pro 50 Eco Technical data The technical data is contained in the current version (part no. 9026479_) of the installation instructions. -
Page 16: Faults, Troubleshooting
This is carried out by the operation indicator or by the switch with an operating indicator. The error code is used by the 10. The heater switches into the control mode workshop or the authorised Webasto dealer for trouble- shooting. -
Page 17: Troubleshooting Without Error Code Output
Troubleshooting without error code output Possible faults The overview only shows some of the possible faults. The Webasto Service Hotline must be contacted in individual cases. IMPORTANT The error points specified from Tables Fig. 501 and Fig. 502 DO NOT match the error code numbers for error code output! -
Page 18: Fig. 502 Overview Of Functional Test Of Heater And Its Components
Section 8.5 22 ± 5 1 °C , test current: < 1 mA Measure fuel feed rate (use Webasto Thermo Test PC Diesel feed rate at metering Diagnostics for controlling the metering pump), also pump frequency of 7 Hz and see Section 8.5... - Page 19 Disconnect the fuel line from the heater, hold the hose in a catch container and operate the metering pump with the Webasto Thermo Test PC Diagnostics for 60 s at 7 Hz. When doing so, watch whether the fuel is pumped bubble-free...
- Page 20 Thermo Pro 50 Eco 5 Faults, Troubleshooting Error point Component Recommended workshop action Parameter Coolant circuit Check the integration in the vehicle coolant circuit in IMPORTANT accordance with the general installation instructions Observe the direction of flow of the coolant circuit.
- Page 21 5 Faults, Troubleshooting Thermo Pro 50 Eco Error point Component Recommended workshop action Parameter Sooting: Dismantling and visual inspection of burner unit, Clean or completely replace Exhaust gas exhaust temperature sensor, combustion pipe and depending on condition temperature heat exchanger, see Section 9.8...
-
Page 22: Troubleshooting With Error Code Output
Thermo Pro 50 Eco 5 Faults, Troubleshooting Troubleshooting with error code output Equipment with switch with an operating indicator Equipment with standard timer The type of fault is displayed with a flashing code via the If the system is fitted with a standard timer, the fault is indi- operating indicator lamp during the heater run-on time for cated on the timer's display after an error has occurred. - Page 23 Glow plug defec- Wiring Check wiring for damage, open circuit and short circuit tive Glow plug defective Functional check of glow plug with Webasto Thermo Test PC Diagnostics; replace glow plug if necessary F 10 Overheating Heater overheated Check coolant level, bleed coolant circuit.
-
Page 24: Operating Tests
Thermo Pro 50 Eco 6 Operating tests Operating tests General This section describes the tests of the heater and its compo- nents in the installed and the removed state. WARNING The heater may not be operated in closed rooms, such as garages or workshops, without exhaust extraction, not even with time preselection. -
Page 25: Circuit Diagrams
7 Circuit diagrams Thermo Pro 50 Eco Circuit diagrams Fig. 701, Fig. 702 and Fig. 703 show the possible circuits of the Thermo Pro 50 Eco heater. Legend for wiring diagram. Table 1 Cable cross-sections Table 2 Cable colours blue... - Page 26 Thermo Pro 50 Eco Table 3 Legend for wiring diagrams (Section 2 of 2) Item Description Comment Pumping device switch ADR switch-off function Immediate heating signal Momentary-contact switch (optional via remote control) Electronic battery cut-off switch optional ÜHS Overheating sensor...
-
Page 27: Fig. 701 System Wiring Diagram For Thermo Pro 50 Eco With Standard Timer Without Adr
7 Circuit diagrams Thermo Pro 50 Eco Fig. 701 System wiring diagram for Thermo Pro 50 Eco with standard timer without ADR... -
Page 28: Fig. 702 System Wiring Diagram For Thermo Pro 50 Eco With Switch With Operating Indicator Without Adr
Thermo Pro 50 Eco Fig. 702 System wiring diagram for Thermo Pro 50 Eco with switch with operating indicator without ADR... -
Page 29: Fig. 703 System Wiring Diagram For Thermo Pro 50 Eco With Switch With Operating Indicator With Adr
7 Circuit diagrams Thermo Pro 50 Eco Fig. 703 System wiring diagram for Thermo Pro 50 Eco with switch with operating indicator with ADR... -
Page 30: Servicing Work
After replacing the combustion-air fan unit with the control unit, the CO value must be checked and reset if necessary. The CO setting is carried out with Webasto Thermo Test PC Diagnostics. The heater is optimally set to a CO value for operation at altitudes up to 2,800 m above sea level at the factory. -
Page 31: Circulation Pump
> 140 mbar of of the metering pump in accordance with the general instal- 450 l/h. lation instructions for the Thermo Pro 50 Eco. The Thermo Pro 50 Eco heater may only be operated with the DP42 Electrical checking of circulation pump metering pump. -
Page 32: Checking Work
NOTE 5 Loose combustion air pipe and exhaust pipe on heater The heater can be put into operation with the Webasto and pull off. Thermo Test Diagnostics. With the fuel line completely drained, the line must be filled 6 Loosen hose clamps and pull off fuel line. -
Page 33: Repair
Thermo Pro 50 Eco Repair NOTE The seals must always be replaced before assembling the heater. Dismantling and assembling heater Fig. 901 Component description for Thermo Pro 50 Eco heater = Heater cover = Gasket = Heat exchanger = Screw = Connector cover... -
Page 34: Dismantling Heater
Thermo Pro 50 Eco 9 Repair 9.1.1 Dismantling heater Moisten new O-rings (A5) and lay in heat exchanger (W1), then fasten water connection piece (A4) and retaining plate (A3) with screw (A2). Loosen screw (A2, Fig. 901) and remove water connec- Tightening torque 7.5 ±0.7 Nm. -
Page 35: Burner Unit
9 Repair Thermo Pro 50 Eco Burner unit 9.2.2 Installing burner unit 9.2.1 Removing burner unit Retaining ring open closed Fig. 903 Burner unit Fig. 902 Burner unit and combustion-air fan unit Dismantle heater as described in Section 9.1.1 up to Point 8. -
Page 36: Glow Plug
Thermo Pro 50 Eco 9 Repair Pre-position burner unit with grommet (B7) in Glow plug combustion-air fan unit (G1). During installation, make sure that the glow plug cable (B6) and grommet (B7) are mounted in the guide and groove provided on the combustion-air fan unit (G1) (see Fig. -
Page 37: Removing Glow Plug
9 Repair Thermo Pro 50 Eco 9.3.2 Removing glow plug 9.3.3 Installing glow plug NOTE IMPORTANT The removal of the glow plug may entail an increased appli- Only use a new glow plug during installation. Uninsulated cation of force, therefore destroying the glow plug. -
Page 38: Fig. 911 Installing Retaining Spring
Thermo Pro 50 Eco 9 Repair Slide retaining spring of glow plug (B2) over cooling flag (B3) and glow plug dome (B8) (for orientation of retaining spring B2, see Fig. 913). Fig. 911 Installing retaining spring IMPORTANT Fig. 913 Installing glow plug The glow plug (B4) must be installed in the glow plug dome as far as possible. -
Page 39: Combustion-Air Fan Unit And Control Unit
9 Repair Thermo Pro 50 Eco Route glow plug cable (B6) as shown in Fig. 915 with Combustion-air fan unit and control a slight bend and slide grommet (B7) onto fuel pipe unit (B5). The combustion-air fan unit and the control unit may not be disassembled further. -
Page 40: Heat Exchanger
Thermo Pro 50 Eco 9 Repair Heat exchanger The heat exchanger must be replaced as a complete assem- bly. Fig. 917 Heat exchanger IMPORTANT The heat exchanger may not be dismantled into its individ- ual parts. NOTE Water connection pieces with retaining plate must be checked for damage and replaced if necessary. -
Page 41: Temperature Sensor/Overheating Sensor
9 Repair Thermo Pro 50 Eco Temperature sensor/ verheating sensor 9.6.1 Checking sensors 9.6.3 Installing temperature sensor/ overheating sensor NOTE The sensors must not be removed for checking. NOTE The gaskets of the sensors must be moistened with a suita- ble lubricant prior to installation in the heat exchanger. -
Page 42: Fig. 920 Mounting Screw
Thermo Pro 50 Eco 9 Repair IMPORTANT When screwing on the sensors, do not re-cut the thread sev- eral times. The screw must be carefully inserted in the exist- ing threads and screwed in by hand. Fig. 920 Mounting screw 4 ±... -
Page 43: Exhaust Temperature Sensor
9 Repair Thermo Pro 50 Eco Exhaust temperature sensor 9.7.1 Checking exhaust temperature sensor Loosen screw (W8). Remove retaining spring (W9) and pull exhaust tem- NOTE perature sensor (W7) out of exhaust pipe on heat The exhaust temperature sensor may not be removed for exchanger. -
Page 44: Water Connection Piece
Thermo Pro 50 Eco 9 Repair Water connection piece Fig. 924 Retaining plate Fig. 925 Retaining plate for installing water connection piece 9.8.1 Installing water connection piece The contact surfaces of the O-rings in the heat exchanger must be clean and must not have any dam- age. -
Page 45: Packing, Storage And Shipping
Shipping address damage with a suitable surface (e.g. cardboard). The address of the responsible Webasto service center can be found on http://dealers.webasto.com. Fig. 1001 Preferred position of Thermo Pro 50 Eco heater for storage and transport 1001... - Page 46 Thermo Pro 50 Eco 10 Packing, Storage and Shipping Page free for notes 1002...
- Page 48 Germany Visitors’ address: Friedrichshafener Str. 9 82205 Gilching Germany Internet: www.webasto.com Technical Extranet: http://dealers.webasto.com The telephone number of each country can be found in the Webasto service center leaflet or the website of the respective Webasto representative of your country.
Need help?
Do you have a question about the Thermo Pro 50 Eco and is the answer not in the manual?
Questions and answers