Genmitsu 4040 PRO Installation Manual
Hybrid spoilboard
Hide thumbs
Also See for 4040 PRO:
- Installation manual (130 pages) ,
- User manual (35 pages) ,
- Installation manual (50 pages)
Advertisement
Quick Links
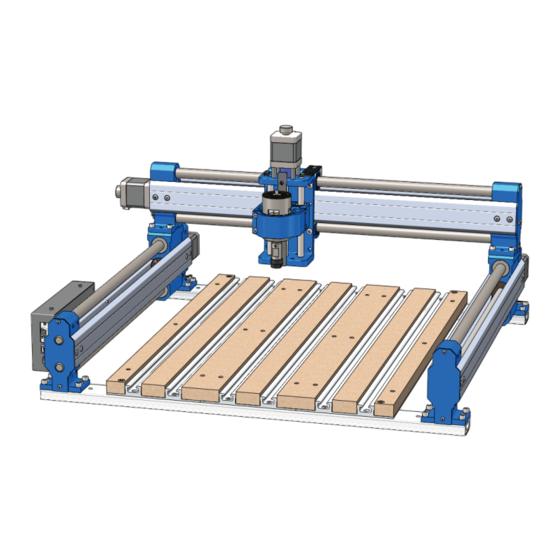
4040 PRO Hybrid Spoilboard Installation Guide
Unboxing
①
(3) Aluminum & MDF Hybrid Slat
③
(2) Narrow MDF Slat
⑤
(9) M5x16 Hex Socket Cap Screw
(5) M5Χ25 Hex Socket Cap Screw
Genmitsu
01
②
(2) Wide MDF Slat
④
Allen Wrench
2mm, 3mm, 4mm
⑥
(19) M3Χ18 Flat
Head Cap Screw
Advertisement

Related Manuals for Genmitsu 4040 PRO


Summary of Contents for Genmitsu 4040 PRO
- Page 1 Genmitsu 4040 PRO Hybrid Spoilboard Installation Guide Unboxing ① ② (3) Aluminum & MDF Hybrid Slat (2) Wide MDF Slat ③ ④ Allen Wrench (2) Narrow MDF Slat 2mm, 3mm, 4mm ⑤ ⑥ (9) M5x16 Hex Socket Cap Screw (19) M3Χ18 Flat (5) M5Χ25 Hex Socket Cap Screw...
- Page 2 Dimension 420mm 600mm...
- Page 3 PART 1: Remove the Original Platforms 1. Remove the screws from the original platform, as shown.
- Page 4 PART 1: Remove the Original Platforms 2. Remove original MDF boards.
- Page 5 PART 2: Install the Hybrid Slat Step 1: Install Aluminum Modules ① ⑤ (9) M5x16 Hex (3) Aluminum & MDF Hybrid Slat Socket Cap Screw 1. Place the aluminum & MDF hybrid slats on the profile frame as shown below, align the hybrid slat over-holes with the corresponding screw holes. 2.
- Page 6 PART 2: Install the Hybrid Slat Step 2: Install Narrow MDF Slats ① ⑤ (2) Narrow MDF Slat (4) M5x25 Hex Socket Cap Screw 1. Place the narrow MDF slats as shown below, then align the narrow MDF slat over-holes with the corresponding screw holes. 2.
- Page 7 PART 2: Install the Hybrid Slat Step 3: Install Wide MDF Slats ① ⑤ (2) Narrow MDF Slat (19) M3Χ18 Flat Head Cap Screw 1. Place the wide MDF slats into aluminum & MDF hybrid slat recesses as shown below, then align the wide MDF slat over-holes with the corresponding screw holes.
-
Page 8: Part 3: Cautionary Note
PART 3: Cautionary Note In the assembly process, if you find that there are screws that can not be locked into, you should first loosen all the fixed screws on the extended aluminum table (counterclockwise rotation of 2-3 turns), to re-adjust the position between the aluminum &... - Page 9 Genmitsu If you need any assistance, please contact us via: Email: support@sainsmart.com Facebook messenger: https://m.me/SainSmart Help and support is also available from our Facebook Group...
Need help?
Do you have a question about the 4040 PRO and is the answer not in the manual?
Questions and answers
how can i install new firmware on my genmitsu 4040 pro. mine has got messed up