
Related Manuals for BCP SKY6818


Summary of Contents for BCP SKY6818
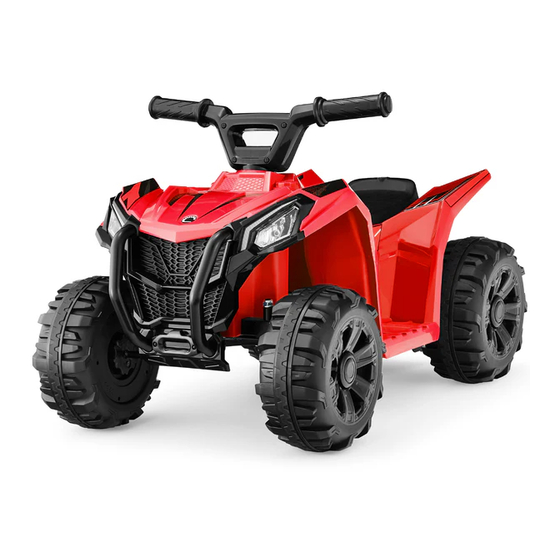
- Page 1 INSTRUCTION MANUAL 6V Kids Ride On ATV 4-Wheeler SKY6818 + SKY6819 + SKY6820 + SKY6821 + SKY6822 Ver. 1...
- Page 3 Charge for 12 hrs before initial use. After initial charge, follow the normal recommended charging time. bestchoiceproducts.com...
-
Page 4: Battery Warnings
SAFETY Please retain these instructions for future reference. This vehicle must be assembled by an adult who has read and understood the instructions in this manual. Keep the packaging and bags away from children and dispose of all packaging before use. Always use common sense and safe practices when operating this vehicle. -
Page 5: Specifications
WARNING To reduce the risk of injury, adult supervision is required. Never use on roadways, near motor vehicles, on or near steep inclines or steps, swimming pools or other bodies of water; always wear shoes, and never allow more than one rider. •... -
Page 6: Tools Required
TOOLS REQUIRED PLASTIC PHILLIPS 2 PERSON APPROXIMATELY WRENCH SCREWDRIVER ASSEMBLY 45 MIN. (2, PROVIDED) ASSEMBLY HARDWARE SELF-TAPPING SCREW 4 PCS PARTS ATV BODY HANDLEBARS MOTOR 1 PC 1 PC 1 PC REAR AXLE REAR SUPPORT WHEEL COVER 1 PC 1 PC 4 PCS... - Page 7 PARTS WHEEL FRONT BUMPER FRONT AXLE 4 PCS 2 PCS 1 PC 6V CHARGER 1 PC DIAGRAM ON/OFF BUTTON CHARGING PORT...
-
Page 8: Product Assembly
PRODUCT ASSEMBLY Place the part A ATV body on a flat, covered surface to prevent scratches, then locate the part I front axle. Remove the pre-assembled hardware: two nuts, two washers, and two square tube covers. On the bottom of the part A ATV body, place the square tube covers onto the square pipe. Insert the part I front axel through the square pipe then secure by replacing the hardware. - Page 9 PRODUCT ASSEMBLY Locate the part D rear axle and remove the pre-assembled hardware, set this hardware aside. NOTE: Leave the bushings on the axle in place. Remove the pre-assembled hardware from the part I front axle, then set aside. Locate the part C motor and plug the adapter into the receiver at the back of the part A ATV body.
- Page 10 PRODUCT ASSEMBLY Attach two part G wheels to the part D & I axles, secure with each axle’s respective hardware, then a x four part F wheel covers.
- Page 11 PRODUCT ASSEMBLY Attach the part E rear support to the part A ATV body with four part 1 self-tapping screws.
- Page 12 PRODUCT ASSEMBLY Flip the ATV body upright so all four wheels touch the ground. Locate the part B handlebars and remove the pre-assembled hardware, insert the handlebars into the ATV body, then thread the handlebar shaft through the hole on the part I front axle. Reattach the hardware to secure.
- Page 13 PRODUCT ASSEMBLY Attach two part H front bumpers to the front of the ATV. Locate knob on the seat of the ATV body. Turn the knob counterclockwise to open the seat.
- Page 14 PRODUCT ASSEMBLY Thread the handlebar’s wire through opening and into the recess under the seat.
- Page 15 PRODUCT ASSEMBLY Connect the handlebar wire to the motor wire, then connect the power terminal as shown. Replace the seat.
- Page 16 USER INSTRUCTIONS Please retain these instructions for future reference. After completing the initial charge (see charging instructions), have the user sit on the designated seat. Locate the on/o switch on the handlebar. This product has no braking capabilities, press and hold the on/o switch to make the ride on move forward;...
-
Page 17: Charging Instructions
CHARGING INSTRUCTIONS Charging connector is located at the rear of the seat. Insert part J charger into the charging port and plug the other end into a wall outlet. Charge the battery 12 hours before initial use. When fully charged, unplug part J charger from the wall outlet, then place it under the seat. CARING FOR YOUR RIDE-ON •... -
Page 18: Troubleshooting
TROUBLESHOOTING Problem Reason Solution Fully charge the battery Low battery Stop use for several minutes and restart Electrical protection Vehicle does not move Switch not in the correct position Completely press in switches Plug in battery connectors Battery connectors disconnected Battery connectors disconnected Plug in battery connectors Battery does not recharge... -
Page 19: California Proposition
CALIFORNIA PROPOSITION 65 WARNING: Battery posts, terminals, and related accessories can expose you to chemicals including lead and lead compounds, which are known to the State of California to cause cancer and birth defects or other reproductive harm, and are toxic and corrosive. Wash hands after handling. For more information go to www.P65Warnings.ca.gov... -
Page 20: Help Center
HELP CENTER Question about your product? We're here to help. Visit us at: help.bestchoiceproducts.com CHAT Chat Support Product Inquiry Orders FAQ Product Assembly Returns & Refunds PRODUCT WARRANTY INFORMATION All items can be returned for any reason within 60 days of the receipt and will receive a full refund as long as the item is returned in its original product packaging and all accessories from its original shipment are included.
Need help?
Do you have a question about the SKY6818 and is the answer not in the manual?
Questions and answers