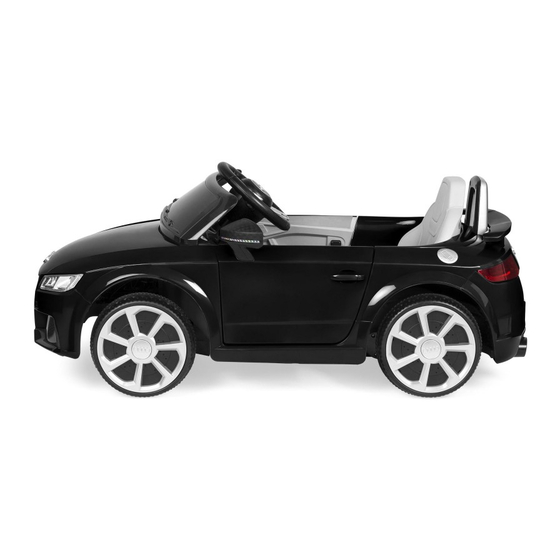
Summary of Contents for BCP SKY4750
- Page 1 INSTRUCTION MANUAL Audi TT Ride-on with Remote SKY4750 + SKY4751 + SKY4752 + SKY4753 Ver. 3...
- Page 2 Charge for 8 - 12 hrs before initial use. After initial charge, follow the normal recommended charging time. bestchoiceproducts.com...
-
Page 3: Battery Warnings
SAFETY Please retain these instructions for future reference. This vehicle must be assembled by an adult who has read and understood the instructions in this manual. Keep the packaging and bags away from children and dispose of all packaging before use. Always use common sense and safe practices when operating this vehicle. -
Page 4: User Warnings
USER WARNINGS • Never leave a child unattended. • Always sit in the seat when using this vehicle. • Keep your hands, hair, and clothes away from moving parts. • Always wear shoes when operating this vehicle. • Only one rider is allowed on the vehicle at a time •... - Page 5 TOOLS AA - 2 AA BATTERIES AAA - 2 PEOPLE APPROXIMATELY PHILLIPS PLASTIC SPANNER NEEDLE NOSE ASSEMBLY 45 MIN. SCREWDRIVER (PROVIDED) PLIER 2 AAA BATTERIES ASSEMBLY HARDWARE Spare parts may be included M5 x 16mm SCREW M4 x 12mm SCREW WASHER 8 PCS 2 PCS...
- Page 6 PARTS STEERING COLUMN STEERING WHEEL 1 PC 1 PC 4 PCS SEAT MOTOR HOOD WINDSHIELD 1 PC 1 PC 2 PCS SIDE MIRROR (L/R) SEAT REST SPOILER 2 PCS 1 PC 1 PC 6V CHARGER REMOTE CONTROL 1 PC 1 PC...
-
Page 7: Product Assembly
PRODUCT ASSEMBLY Slide a part A gear box onto the rear axle. Route the wires from the gear box through the body of the vehicle and into the seat. Slide on a part B rear wheel and part 3 washer, then secure it with a part 4 nut. Repeat on the other side. - Page 8 PRODUCT ASSEMBLY Flip the car on its side. Slide a part 3 washer onto the straight end of the part E steering column, then slide the steering column through the car and into the steering wheel mount. Insert the hooked end of the steering column onto the front axle, slide on a washer, and secure it with a part 6 pin.
- Page 9 PRODUCT ASSEMBLY Position motor hoods so the tracks face the inside & wires route through the tracks. CHARGING PORT Within the seat, join the connectors from the gear boxes to the corresponding connectors. Connect the red wire from the fuse box to the red terminal on the battery. Attach two part G motor hoods with eight part 1 screws, four screws per motor hood.
- Page 10 PRODUCT ASSEMBLY Install the part H seat and secure it with two part 2 screws. Snap on the part I windshield.
- Page 11 PRODUCT ASSEMBLY Insert two part J side mirrors, one on each side. Insert the part K seat rest and part L spoiler.
- Page 12 CHARGING INSTRUCTIONS AND DIAGRAM SEE STEP 4 DIAGRAM • Charging port is located below the seat. Insert one end of the part N charger into the charging port and plug the other end into a wall outlet. • Charge the battery 4 to 6 hours before initial use. •...
-
Page 13: Media Player
DASHBOARD DIAGRAM ENGINE SOUND POWER SWITCH FORWARD/ STOP/ MEDIA PLAYER REVERSE HORN HIGH/LOW SPEED PEDAL • Push down on the pedal to drive forward/reverse. Release the pedal to slow down and stop. MEDIA PLAYER • AUX INPUT: Plug in a music player to play music MICROSD (TF) PORT: Play music from a MicroSD card •... -
Page 14: Remote Control Functions
REMOTE CONTROL FUNCTIONS FREQUENCY FORWARD TURN RIGHT PARK TURN LEFT BACKWARD SPEED SPEED SELECT INDICATOR • Insert 2 AAA batteries into the remote control. • After 10 seconds of non-operation, the remote will go into power-saving mode. Linking the remote control: Press and hold the car select button for 2-4 seconds. - Page 15 FCC COMPLIANCE STATEMENT This device complies with part 15 of the FCC rules. Operation is subject to the following two conditions: (1) This product may not cause harmful interference, and (2) this device must accept any interference received, including interference that may cause undesired operation. NOTE: This equipment has been tested and found to comply with the limits for a Class B digital device, pursuant to part 15 of the FCC Rules.
-
Page 16: Help Center
HELP CENTER Question about your product? We're here to help. Visit us at: help.bestchoiceproducts.com CHAT Chat Support Product Inquiry Orders FAQ Product Assembly Returns & Refunds PRODUCT WARRANTY INFORMATION All items can be returned for any reason within 60 days of the receipt and will receive a full refund as long as the item is returned in its original product packaging and all accessories from its original shipment are included.


Need help?
Do you have a question about the SKY4750 and is the answer not in the manual?
Questions and answers