Table of Contents
Advertisement
Available languages
Available languages
De' Longhi Appliances Srl
Divisione Commerciale Ariete
Via San Quirico, 300
50013 Campi Bisenzio FI - Italy
E-Mail: info@ariete.net
Internet: www.ariete.net
IMPORTADO E DISTRIBUÍDO POR:
Karimex Comp. Elet. Ltda
Av. Vereador Abrahão João Francisco, 3.555
Ressacada – Itajaí/SC – CEP 88307-302
CNPJ 88.938.329/0007-34
SAC: (11) 4502-4596
consumidor@karimex.com.br
www.karimex.com.br
827070
Máquina de café
1450
Advertisement
Table of Contents

Related Manuals for ARIETE 1450


Summary of Contents for ARIETE 1450
- Page 1 De’ Longhi Appliances Srl Divisione Commerciale Ariete Via San Quirico, 300 50013 Campi Bisenzio FI - Italy Máquina de café E-Mail: info@ariete.net Internet: www.ariete.net IMPORTADO E DISTRIBUÍDO POR: Karimex Comp. Elet. Ltda Av. Vereador Abrahão João Francisco, 3.555 Ressacada – Itajaí/SC – CEP 88307-302 CNPJ 88.938.329/0007-34...
- Page 2 Fig. 8 Fig. 9 Fig. 10 Fig. 11 Fig. 12 Fig. 13 Fig. 1 Fig. 14 Fig. 15 Fig. 16 Fig. 2 Fig. 3 Fig. 4 Fig. 17 Fig. 18 Fig. 19 Fig. 5 Fig. 6 Fig. 7 Fig. 20 Fig.
- Page 3 Fig. 23 Fig. 24 Fig. 25 Fig. 26 Fig. 27 Fig. 28 Fig. 29 Fig. 30 Fig. 31 Fig. 32 Fig. 33 Fig. 34 Fig. 35 Fig. 36...
-
Page 4: Safety Warnings
ABOUT THIS MANUAL Even if the appliances have been manufactured in compliance with the specific European Standards in force and all their potentially dangerous parts are therefore protected, read these warnings carefully and use the ap- pliance only for its intended use in order to avoid injury and damage. Keep this manual handy for future refer- ence. -
Page 5: Danger For Children
Danger for children • The appliance can be used by children over 8 years of age and by people with reduced physical, sensory or mental capacities, or who lack of experience or knowledge, only if they are supervised by a responsible person or if they have received and understood the instructions and the existing dangers when using the appliance. - Page 6 Do not use the appliance if the power cord or the plug are damaged, or if the appliance is faulty. All repairs, including the power cord replacement, shall be carried out only by the Ariete Service Centre or by Ariete authorized technicians, in order to prevent any risk.
-
Page 7: Description Of The Components
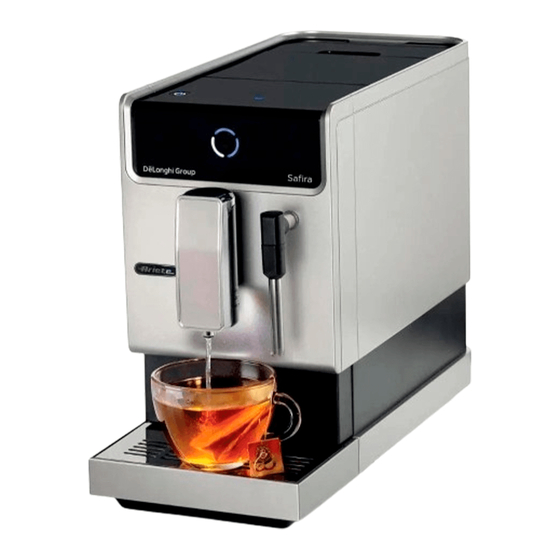
DESCRIPTION OF THE COMPONENTS A - Water tank lid M - Steam/hot water wand B - Water tank N - Steam/hot water wand joint C - Power cord O - Steam/hot water indicator light D - Brewer P - Adjustable dispensing spout E - Lateral door Q - Front display F - Cleaning brush... -
Page 8: Identification Data
Steady The brewer is not installed or is not installed properly. Flashing The lateral door is open or is not closed properly. Steady Descaling required. Flashing Descaling in progress. Empty function of the internal circuits in progress. Identification data The following identification data of the appliance are reported on the plate under the base of the appliance: •... -
Page 9: How To Make Coffee
- Insert coffee beans (Fig. 9). Warning! Only use coffee beans. The use of ground coffee, instant coffee, roasted coffee or any other substanc- es could damage the appliance. Do not use an excessive amount of coffee beans. NOTE: by using a smaller quantity of coffee beans at a time, coffee will always be fresh. 10 Close the coffee beans container lid (W) (Fig. - Page 10 5 Press the power button (S) to turn off the appliance (Fig. 17). Warning! Always empty the water tank after use so as to avoid limescale formation. It is recommended to use the strong coffee button (strong taste) to prepare beverages such as es- presso coffee.
-
Page 11: How To Dispense Hot Water
Use a non-abrasive damp cloth to clean the steam/hot water wand joint (N) and the steel tube (L). 10 Pour the milk froth into the cup of coffee prepared earlier. How to dispense hot water Warning! Danger of burns. Only touch the steam/hot water wand on the rubber part. Do not touch the steel tube. Danger of burns due to splashes of hot water and steam that may escape from the steam/hot water wand. -
Page 12: Filling The Water Tank During Use
The buttons on the display will present a different set-up according to the mode selected: Strong coffee button ( Mild coffee button ( Hot water button ( Default mode Flashing Steady Flashing ECO mode Flashing Flashing Steady Fast mode Steady Flashing Flashing The indicator light of the button turned on indicates the current operating mode. - Page 13 CLEANING AND MAINTENANCE OF THE APPLIANCE Regular and daily cleaning maintains the appliance efficient and extends the life of the appliance. Warning! Cleaning and maintenance operations shall be carried out when the appliance is off and unplugged from the power outlet. Warning! Cleaning shall be carried out when the hot parts of the appliance cooled down.
- Page 14 Cleaning the steam/hot water wand Warning! The procedure shall be carried out when the steam/hot water wand has cooled down in order to avoid burns. 1 Unscrew to the left the steam/hot water wand joint (N). Pull down the steam/hot water wand (M) to remove it from its seat (Fig.
- Page 15 Emptying the internal circuits It is recommended to use this function after a long period of non-use, as frost protection or in case of mal- function. 1 When the appliance enters the stand-by mode, press and hold the power button (S) and the mild coffee button ( ) for 5 seconds.
-
Page 16: Troubleshooting
When all the water inside the water tank is dispensed, the indicator light ( ) and the indicator light of the strong coffee button ( ) start flashing. - Empty the water tank from the remaining solution. - Rinse the water tank. - Fill the water tank with fresh still water up to the MAX level (Fig. - Page 17 PROBLEMS CAUSES SOLUTIONS Coffee brewing does Coffee grinding is too fine. Try using a coarser grinding level. not start or is too slow. The water tank (B) is not installed Insert the water tank properly by pressing it fully. properly. There is little water and the pump Check the water level in the tank is correct.
-
Page 18: Avisos De Segurança
A PROPÓSITO DESTE MANUAL Os aparelhos foram produzidos em conformidade com as Normas específicas europeias vigentes e são, portanto, protegidos em todas as suas partes potencialmente perigosas, deve-se ler atentamente estes avisos e usar o aparelho somente para o uso ao qual foi destinado para evitar acidentes e danos. Manter este manual sempre acessível para futuras consultas. - Page 19 Perigo para as crianças • O aparelho pode ser usado por crianças com idade superior a 8 anos e por pessoas com capacidades físicas, sensoriais ou mentais reduzidas, ou sem ex- periência ou conhecimento do aparelho, somente se observados por uma pes- soa responsável ou se tiverem recebido e compreendido as instruções e saibam reconhecer os perigos presentes durante o uso do aparelho.
- Page 20 ção ou o plugue estiverem danificados, ou se o aparelho estiver com algum defeito. Todos os reparos, incluindo a substituição do cabo de alimentação, devem ser realizados somente pelo Centro de Assistência Ariete ou por técnicos autorizados Ariete, de modo a prevenir qualquer risco.
-
Page 21: Descrição Dos Componentes
• Nunca utilizar solventes ou produtos que danifiquem o plástico. • Não desmontar o aparelho. Não há partes internas a utilizar ou limpar. • CONSERVAR SEMPRE ESTAS INSTRUÇÕES DESCRIÇÃO DOS COMPONENTES A - Tampa do depósito da água M - Tubo do vapor/água quente B - Depósito da água N - Encaixe do tubo do vapor/água quente C - Cabo de alimentação... -
Page 22: Instruções De Uso
DESCRIÇÃO DO DISPLAY FRONTAL ( Q ) COM LUZES PILOTO Luz piloto Estado Significado Quantidade de água insuficiente. Luz intermitente Depósito da água não inserido. Acesa Falta de grãos de café no recipiente. Fixa Recipiente para resíduos de café cheio. Bandeja de recolha de gotas não inserida. - Page 23 Atenção! Não encher o depósito da água quando estiver inserido no aparelho. Perigo de choque elétrico. Atenção! Para as operações de enchimento do depósito da água, não utilizar água com gás, quente ou morna, ou qualquer outro líquido que pode causar danos ao aparelho. 5 Encher o depósito da água com água natural fresca até...
-
Page 24: Como Preparar O Café
Repetir a operação até quando toda a água contida no depósito de água terminar. NOTA: repetir esta operação a cada acionamento do aparelho após muitos dias de inatividade. Regulagem da altura do bico de saída e da bandeja de recolha de gotas É... - Page 25 A regulagem do grau de moagem influi na quantidade de café produzido. Um bom café espresso é obtido quando for atingido um sabor em perfeito equilíbrio entre doçura, acidez e amargor. O sabor do café dependerá de muitos fatores, como o tipo de grão de café, o frescor e o grau de moagem.
- Page 26 Como programar a função bebida preferida ( É possível programar a função bebida preferida para memorizar a quantidade a produzir e o tipo de café ou bebida preferida. 1 Manter pressionado o botão bebida preferida ( ) por 2 segundos. As luzes piloto dos botões de café forte ( ) e café...
- Page 27 Dois sinais sonoros indicarão que a modalidade de funcionamento foi selecionada corretamente. 2 Após ter selecionado a modalidade de funcionamento, manter pressionado novamente o botão ligar/des- ligar (S) por 5 segundos. Enchimento do depósito da água durante o uso Atenção! Não encher o depósito da água quando estiver inserido no aparelho.
-
Page 28: Limpeza E Manutenção Do Aparelho
LIMPEZA E MANUTENÇÃO DO APARELHO Uma limpeza regular e diária permite manter o aparelho eficiente, assim como prolongar a duração da vida útil do mesmo. Atenção! Todas as operações de limpeza e manutenção devem ser efetuadas com o aparelho desligado e desconectado da tomada elétrica. - Page 29 Limpeza do tubo de produção do vapor/água quente Atenção! Efetuar a operação quando o tubo de produção de vapor/água quente estiver frio, para evitar quei- maduras. 1 Girar para a esquerda o encaixe do tubo de produção do vapor/água quente (N). Puxar para baixo o tubo de produção do vapor/água quente (M) para extraí-lo de seu alojamento (Fig.
- Page 30 Esvaziamento dos circuitos internos Recomendamos utilizar esta função após um longo período de inatividade, como proteção anti-gelo ou em caso de mau-funcionamento. 1 Quando o aparelho entrar em modalidade stand-by, manter pressionado o botão ligar/desligar (S) e o botão café fraco ( ) por 5 segundos.
- Page 31 Quando toda a água contida no depósito tiver saído, a luz piloto ( ) e a luz piloto do botão do café forte ) iniciarão a piscar. - Esvaziar o depósito da água eliminando a solução restante. - Enxaguar o depósito da água. - Encher o depósito da água com água natural fresca até...
- Page 32 PROBLEMAS CAUSAS SOLUÇÕES O café está muito Pó de café moído muito grosso. Tentar utilizar um grau de moagem mais fina. aguado e frio. Se estiver fazendo o primeiro café, Dar início ao ciclo de limpeza manual para o circuito o infusor poderia estar frio.
Need help?
Do you have a question about the 1450 and is the answer not in the manual?
Questions and answers