Table of Contents
Advertisement
Available languages
Available languages
Quick Links
Advertisement
Chapters
Table of Contents

Subscribe to Our Youtube Channel
Related Manuals for Cylinda IBU5318PRF


Summary of Contents for Cylinda IBU5318PRF
- Page 1 Bruksanvisning User manual IBU5318PRF 385.4432.97/R.AA/05.05.2023/4-1...
- Page 2 Välkommen! Kära kund, Tack för att du valde Cylinda produkten. Vi vill att din produkt, tillverkad med hög kvalitet och teknik, ska erbjuda dig bästa effektivitet. För att göra detta, läs noggrant denna handbok och annan dokumentation som tillhandahålls innan du använder produkten.
-
Page 3: Table Of Contents
Använda köttsond......26 Innehåll 6 Allmän information om 1 Säkerhetsinstruktioner....matlagning ........Avsedd användning....... Allmänna varningar om Barn, utsatt person och matlagning i mikrovågsugnen ..djursäkerhet ........6.1.1 Bakverk och ugnsmat ....28 Elsäkerhet ........6.1.2 Kött, fisk och fjäderfä....31 Transportsäkerhet...... -
Page 4: Säkerhetsinstruktioner
1 Säkerhetsinstruktioner • Detta avsnitt innehåller Avsedd användning säkerhetsanvisningar som • Produkten är avsedd att hjälper till att förebygga risker användas i hus och inomhus. för personskador eller Den är inte lämplig för materiella skador. kommersiellt bruk. • om produkten överlåts till en •... -
Page 5: Elsäkerhet
erfarenhet och kunskap, så • När dörren är öppen, inte sätta länge de övervakas eller några tunga föremål på den utbildas om säker användning eller låta barnen sitta på den. och risker av produkten. Du kan leda till att ugnen välter •... -
Page 6: Transportsäkerhet
• Anslut produkten till ett uttag • VARNING Innan du byter ut som uppfyller de spännings- ugnslampan ska du se till att och frekvensvärden som koppla bort produkten från anges på typetiketten. elnätet för att undvika risk för • Om produkten inte har elektriska stötar. -
Page 7: Installationssäkerhet
• Lägg inte andra artiklar på • För att förhindra överhettning produkten och bär produkten bör produkten inte installeras upprätt. bakom dekorativa dörrar. • Produkten får inte transporteras när det finns Användningssäkerhet vatten i den. Det kan • Kontrollera att produkten är transporteras efter att avstängd efter varje vattenutsläppet är klart. -
Page 8: Temperaturvarningar
• Ugnshandtaget är inte en • Använd alltid värmeresistanta handdukstork. Häng inte ugnsvantar när mat placeras i handdukar, handskar eller den heta ugnen, när mat tas ut liknande textilier på handtaget, ur ugnen osv. när du använder produkten. Användning av •... -
Page 9: Ångsystem
tillagningen. Annars kan det Placera inte heller maten för orsaka matförgiftning eller långt på baksidan av grillen. sjukdomar. Detta är det hetaste området • Värm inte stängda plåt- eller och fet mat kan fatta eld. glasburkar i ugnen. Trycket 1.10 Ångsystem som uppstår i burken kan få... -
Page 10: Underhåll Och Rengöring
• Var försiktig så att du inte vattentanken rengöras. spiller vatten på ugnsytan eller Användningen av vatten kvar i oönskade ytor när du tar bort kammaren i nästa matlagning eller placerar vattentanken. skapar problem när det gäller hygien. 1.11 Underhåll och •... -
Page 11: Självrengöring Vid Hög Temperatur (Pyrolys)
omgivningstemperatur efter 2 borta från produkten. Vänta eller 3 användningar och vänta minst 30 minuter innan du tar i 30 minuter. Efter 30 minuter, bort återstoden. rengör detta område med en • Vid självrengörande kommer mjuk våt trasa och torka. rök att släppas på... -
Page 12: Information Om Förpackningen
2.2 Information om förpackningen • Stäng av produkten 5 till 10 minuter före tillagningstiden för långvarig tillagning. Produktens förpackning är tillverkad av Nu kan du spara upp till 20 % el med hjälp återvinningsbara material i av eftervärme. överensstämmelse med våra nationella •... -
Page 13: Din Produkt
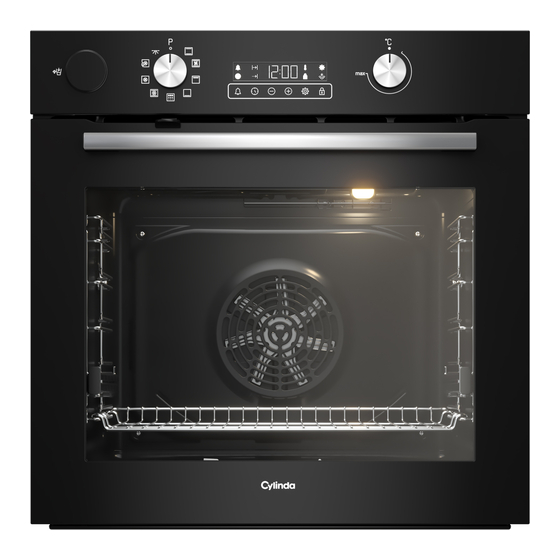
3 Din produkt 3.1 Produkt introduktion 1 Kontrollpanel 2 Lampa 3 Trådhyllor 4 Fläktmotor (bakom stålplatta) 5 Dörren 6 Hantera 7 Vattenbehållare för ångassisterad 8 Hyllpositioner matlagning 9 Övre värmare 10 Ventilationshål 11 Vattentank finnas skillnader i bilder och vissa 3.2 Introduktion och användning av funktioner beroende på... -
Page 14: Kontrollpanel
3.2.1 Kontrollpanel 1 Vattentank 2 Funktion valsratt 3 Tidtagare 4 Temperaturvalsratt Om det finns vred för att kontrollera Tidtagare produkten, i vissa modeller kan dessa vred vara sådana, som kommer ut när de trycks in (gömda vred). För inställningar som ska göras med dessa rattar, tryck först in den aktuella ratten och dra ut vredet. -
Page 15: Ugnsfunktioner
3.3 Ugnsfunktioner I funktionstabellen visas ugnens användningsfunktioner och högsta och lägsta temperatur som kan ställas in för dessa funktioner. Här visade driftslägen kan skilja sig ordningen i din produkt. Funktion Temperaturo Funktionsbeskrivning Beskrivning och användning ssymbol mråde (°C) Ugnslampa Ingen värmare fungerar i ugnen. Endast ugnslampan tänds. Maten värms uppifrån och nerifrån samtidigt. -
Page 16: Användning Av Produkttillbehör
Köttsond Vid tillagning av kötträtter fastnar den tunna långa änden på köttet och den andra änden används genom att fästa den andra änden på sitt uttag på chassisidans vägg. Konditori varor bricka Det används för bakverk som kakor och kex. 3.5 Användning av produkttillbehör Matlagning hyllor Det finns 5 nivåer av hyllan position i... - Page 17 den öppna sektionen vara på framsidan. För bättre tillagning måste trådgallret säkras på trådhyllans propp. Den får inte passera över proppen för att komma i kontakt med ugnens bakre vägg. Modeller utan trådhyllor : Det är också viktigt att placera brickorna på sidohyllorna ordentligt.
- Page 18 Modeller utan trådhyllor : Plåtens stoppfunktion - Modeller med trådhyllor Det finns också en stoppfunktion för att förhindra att plåten tippar ut ur trådhyllan. Släpp den från det bakre proppen när du tar bort plåten och dra det mot dig själv tills den når framsidan.
-
Page 19: Tekniska Specifikationer
3.6 Tekniska specifikationer Allmänna specifikationer Produktens yttre dimensioner (höjd/bredd/djup) (mm) 595 /594 /567 Ugnsinstallationsmått (höjd/bredd/djup) (mm) 590 - 600 /560 /min. 550 Spänning / frekvens 220-240 V ~; 50 Hz Kabeltyp och tvärsnitt som används/lämpar sig för min. H05VV-FG 3 x 1,5 mm2 användning i produkten Totala strömförbrukning (kW) Typ av ugn... -
Page 20: Första Användning
4 Första användning Innan du börjar använda produkten Om klockslaget inte ställs in, rekommenderas följande i följande avsnitt. fortsätter, “12:00” och symbolen blinka på skärmen och ugnen 4.1 Första timerinställning startar inte. För att ugnen ska fungera, måste klockslagets Ställ in dag alltid innan du använder bekräftas genom att ställa in ugnen. -
Page 21: Att Använda Ugnen
OBS! Vissa rengöringsmedel eller OBS! Under första användning kan rök och tvättmedel kan skada ytan. Använd inte lukt uppstå under flera timmar. Detta är slipmedel, rengöringspulver, normalt och endast god ventilation måste rengöringskrämer eller vassa föremål under ombesörjas. Undvik inandning av rök och rengöring. - Page 22 Starta ugnen vrida funktionsvalsvredet och temperaturvredet till avstängningsläget När du väljer en funktion som du vill laga (uppåt). mat med, med hjälp av funktionsvalsvredet och ställer in en viss temperatur med hjälp Tillagning genom att ställa in av temperaturvredet, startar ugnen. tillagningstid: Stäng av ugnen Du kan ställa in ugnen att stängas av...
-
Page 23: Ångassisterad Matlagning
räkna ner och inställd • Håll dig på avstånd från ugnsluckan när temperaturvärde och 3 den öppnas, då ånga och värme kan linjeanimationer intill dessa visas komma ut efter ångassisterad på turvis När temperaturen i ugnen matlagning. Ångan kan bränna din hand, når den inställda temperaturen, ansikte och / eller ögon. -
Page 24: Inställningar
När någon tangent vidrörs när Använd inte destillerat eller filtrerat knapplåset är inställd, sänder timern en vatten. Använd endast färdiga ljudsignal och symbolen blinkar. vatten. Använd inte brandfarliga, alkoholhaltiga eller fasta Om -knappen släpps innan partikellösningar i stället för vatten. nedräkningen avslutas, aktiveras inte knapplåset. - Page 25 ð När alarmtiden har ställts in, lyser Inställning av skärmens ljusstyrka symbolen och alarmtidens 1. Tryck på -knappen tills en av värdena nedräkning startar på skärmen. d-01-d-02-d-03 och symbolen visas Om alarmtiden och tillagningstiden på skärmen. ställs samtidigt, visas den kortare tiden på...
-
Page 26: Använda Köttsond
• Innertemperaturen i den kallaste punkten för fågelkött ska vara minst 74 °C angående matsäkerhet och 85 °C för genomstekt mat. Referenstabell för tillagning av rött kött: Matlagningsnivå Köttets innertemperatur* 5. Bekräfta inställning genom att trycka på (°C) knappen. Blå 55-59 ð... -
Page 27: Allmän Information Om Matlagning
ð När köttsonden används, visas matens där köttsonden är placerad verkliga temperatur och inställd köttsondens innertemperatur turvis med ca. 3 sekunders intervaller. När köttsondens innertemperatur visas, visas en animation med tre linjer bredvid den. Köttsonden upptäcker att köttets innertemperatur uppnår den inställda temperaturen för köttsonden automatiskt och avslutat tillagningen, när... -
Page 28: Allmänna Varningar Om Matlagning I Mikrovågsugnen
Dessutom kan du också hitta några av de • För god bakning, placera maten på den livsmedel som testats av producenter och rekommenderade rätt hyllan. Byt inte de lämpligaste inställningarna för dessa hyllposition under bakningen. livsmedel. Lämpliga ugnsinställningar och 6.1.1 Bakverk och ugnsmat tillbehör för dessa livsmedel anges också. - Page 29 • Om kakans insida har tillagats väl, men • Om degen är brynt på ytan men botten utsidan är klibbig, använd mindre vätska, inte är kokt, se till att mängden sås du sänk temperaturen och förläng kommer att använda för degen är inte för tillagningstiden.
- Page 30 Tillbehör som Funktion för drift Hyllposition Temperatur (°C) Bakningstid ska användas (min) (ca.) Glas / metall rektangulär Upp- och Lasagne 2 eller 3 30 … 40 behållare på tråd bottenvärme grill ** Rund svart metallform, 20 cm Upp- och Äppelpaj 50 …...
-
Page 31: Kött, Fisk Och Fjäderfä
Tillbehör som ska Hyllposition Temperatur (°C) Bakningstid (min) användas (ca.) Små kakor Standardfack * 25 … 35 Kaka Standardfack * 25 … 35 Bakelser Standardfack * 45 … 55 Bulle Standardfack * 35 … 45 * Dessa tillbehör får inte medföljas med din produkt. 6.1.2 Kött, fisk och fjäderfä... -
Page 32: Grill
6.1.3 Grill De viktigaste punkterna i grillen • Förbered livsmedel med liknande tjocklek Rött kött, fisk och fågelkött kommer snabbt och vikt så mycket som möjligt för att bli brun när den grillas, få en vacker grillen. skorpa och torkar inte ut. Filékött, spettkött, •... -
Page 33: Testa Livsmedel
• Utför ångassisterad matlagning endast på en plåt. Förslag för bakning med en plåt - "3D"-funktion Tillbehör Hyllposition Temperatur Vattenmäng Vattenintags Bakningstid Ca. matens som ska (°C) d att tid (min.)** (min) (ca.) vikt (g) användas användas (ml) Standardfack efter Hela bröd 30 …... - Page 34 Tillbehör som Funktion för drift Hyllposition Temperatur (°C) Bakningstid ska användas (min) (ca.) Modeller med trådhyllor : 3 Små kakor Standardfack * Fläktuppvärmning 25 … 35 Modeller utan trådhyllor : 2 Rund kakform, 26 cm i diameter Upp- och Sockerkaka 30 …...
-
Page 35: Underhåll Och Rengöring
7 Underhåll och rengöring 7.1 Allmän rengöringsinformation • Rostfria och inoxytornas färg kan ändras med tiden. Det är normalt. Rengör efter Allmänna varningar varje användning med för rostfria eller • Vänta tills produkten svalnat innan du inoxytor lämplig rengöringsmedel. rengör produkten. Heta ytor kan orsaka •... -
Page 36: Rengöring Av Tillbehör
Glasytor 7.3 Rengöring av kontrollpanelen • Vid rengöring av glasytor ska du inte • Vid rengöring av kontrollpanelerna med använda hårda metallskrapor och kontrollratt, ska du torka av panelen och slipande rengöringsmaterial. De kan rattarna med en fuktig mjuk trasa och skada glasytan. -
Page 37: Självrengöring Vid Hög Temperatur
Använd inte rengöringsmedel som innehåller syror eller klorider för att rengöra vattenpoolen i ugnsbasen. Rengör inte kalken i vattenpoolen i ugnsbasen genom att skrapa bort det. I annat fall skadas produktbasen. För att förbättra kalkborttagningen som troligen uppstår i vattenpoolen, bör utöver kalkborttagningsstegen ovan, efter 10 användningar: Välj en användningsfunktion där nedre... - Page 38 i tillbehörssektionen. Om inte att tvinga upp luckan, innan rengöringen specificerats, tål inte tillbehören höga är färdig och låssymbolen försvinner temperaturer. De måste tas bort ur ugnen från skärmen. innan rengöring för att förhindra skador. 7. När rengöringsfunktionen är färdig, •...
-
Page 39: Rengöring Av Ugnsluckan
ð “ECO” meddelandet visas på trasa. Om kalkavlagringar formas på ugnsglaset, torka glaset med vinäger och skärmen i ca. 2 sekunder och skölj. sedan börjar P1:30 meddelandet att blinka. Använd inte hårda slipande 5. Ställ temperaturknoppen till högsta rengöringsmedel, metallskrapor, "max"... -
Page 40: Ta Bort Det Inre Glaset På Ugnsluckan
8. Dra den borttagna luckan uppåt för att 3. Som visas i figuren, lyft försiktigt det frigöra den från höger och vänster innersta glaset (1) mot "A" och ta sedan gångjärn och ta bort den. bort det genom att dra mot "B". För att sätta tillbaka dörren måste de förfaranden som tillämpas när den togs bort upprepas från slutet... -
Page 41: Rengöring Av Ugnslampan
7.8 Rengöring av ugnslampan I händelse av att glasdörren till ugnslampan i kokområdet blir smutsig; rengör med diskmedel, varmt vatten och en mjuk trasa eller svamp och torka med en torr trasa. Vid fel på ugnslampan kan du byta ut ugnslampan genom att följa de sektioner som följer. -
Page 42: Felsökning
4. Om ugnslampan är typ (A) som visas i figuren nedan vrider du ugnslampan enligt figuren och ersätter den med en ny. Om det är typ (B) modell, drar du ut den som visas i figuren och ersätter den med en ny. 5. - Page 43 Felkoder/orsaker och möjliga lösningar Felkoder Felorsaker Möjliga lösningar Kontakta den auktoriserade serviceverkstaden för ny Fel i kommunikationen med tillagning med köttsonden. För att laga mat utan Er 5 köttsond köttsond, ta bort köttsonden och vrid funktionsväljarknappen till läget av (0). Kontakta den auktoriserade serviceverkstaden för att Er 1 - Er 7 Kommunikationsfel...
- Page 44 Welcome! Dear Customer, Thank you for choosing the Cylinda product. We want your product, manufactured with high quality and technology, to offer you the best efficiency. Therefore, carefully read this manual and any other documentation provided before using the product.
- Page 45 Using the Meat Probe ....68 Table of Contents 6 General Information About Bak- 1 Safety Instructions......46 ing ........... Intended Use........46 General Warnings About Baking Child, Vulnerable Person and Pet in the Oven........Safety ..........6.1.1 Pastries and oven food....70 Electrical Safety......
-
Page 46: Safety Instructions
1 Safety Instructions • This section includes the Intended Use safety instructions necessary • This product is designed to be to prevent the risk of personal used at home. It is not suitable injury or material damage. for commercial use. •... -
Page 47: Electrical Safety
supervised or trained about the • When the door is open, do not safe use and hazards of the put any heavy objects on it or product. allow children to sit on it. You • Children should not play with may cause the oven to tip over the product. -
Page 48: Transportation Safety
• The product must not be • If the power cable is damaged, plugged into the outlet during it must be replaced by the installation, repair, and trans- manufacturer, an authorized portation. service or a person to be spe- • Plug the product into an outlet cified by the importer company that meets the voltage and fre- in order to prevent possible... -
Page 49: Installation Safety
• The product is heavy, carry the • Keep the surroundings of all product with at least two ventilation ducts of the people. product open. • Do not use the door and / or • To prevent overheating, the handle to transport or move product should not be installed the product. -
Page 50: Temperature Warnings
• The hinges of the product door Accessory Use move when opening and clos- • It is important that the wire ing the door and might jam. grill and tray are placed prop- When opening / closing the erly on the wire shelves. For door, do not hold the part with detailed information, refer to the hinges. -
Page 51: Steam System
• Do not heat closed tins and food too far in the back of the glass jars in the oven. The grill. This is the hottest area pressure that would build-up in and fatty foods may catch fire. the tin/jar may cause it to 1.10 Steam System burst. -
Page 52: Maintenance And Cleaning Safety
1.11 Maintenance and cloth, dry it with a dry cloth and store it that way. Never dry the Cleaning Safety tank in the oven. • Wait for the product to cool be- • For lime that may form in the fore cleaning the product. -
Page 53: High Temperature Self-Cleaning (Pyrolysis)
mended that you clean the • During self-cleaning, smoke oven with Vinegar Water and will be released due to the cloth. burning of food residues. Vent- ilate your kitchen well during 1.12 High temperature the cleaning process. self-cleaning (Pyro- • Before starting the cleaning, lysis) clean the outer surfaces of the •... -
Page 54: Recommendations For Energy Saving
2.3 Recommendations for Energy • Turn off the product 5 to 10 minutes be- fore the end time of baking in prolonged Saving bakings. You can save up to 20% electri- According to EU 66/2014, information on city by using residual heat. energy efficiency can be found on the •... -
Page 55: Your Product
3 Your product 3.1 Product Introduction 1 Control panel 2 Lamp 3 Wire shelves 4 Fan motor (behind the steel plate) 5 Door 6 Handle 7 Water pool for steam assisted cook- 8 Shelf positions 9 Upper heater 10 Ventilation holes 11 Water tank 3.2 Product Control Panel Introduc- tion and Usage... -
Page 56: Control Panel
3.2.1 Control Panel 1 Water tank 2 Function selection knob 3 Timer 4 Temperature selection knob If there are knob(s) controlling your Timer product, in some models this/these knob(s) may be so that they come out when pushed (buried knobs). For settings to be made with these knobs, first push the relevant knob in and pull out the knob. -
Page 57: Product Accessories
order of the operating modes shown here may differ from the arrangement on your product. Function Temperature Function description Description and use symbol range (°C) Oven lamp No heater works in the oven. Only the oven lamp lights up. Food is heated from above and below at the same time. Suit- Top and bottom heat- 40-280 able for cakes, pastries or cakes and stews in baking moulds. -
Page 58: Use Of Product Accessories
Meat probe When cooking meat dishes, the thin long end is stuck on the meat and the other end is used by attaching the other end to its socket on the chassis side wall. Pastry tray It is used for pastries such as cookies and biscuits. - Page 59 Placing the wire grill on the cooking shelves On models with wire shelves : It is crucial to place the wire grill on the wire side shelves properly. While placing the wire grill on the desired shelf, the open section must be on the front. For better cooking, the wire grill must be secured on the wire shelf’s stopping point.
- Page 60 On models without wire shelves : Tray stopping function - On models with wire shelves There is also a stopping function to prevent the tray from tipping out of the wire shelf. While removing the tray, release it from the rear stopping socket and pull it towards yourself until it reaches the front side.
-
Page 61: Technical Specifications
3.6 Technical Specifications General specifications Product external dimensions (height/width/depth) (mm) 595 /594 /567 Oven installation dimensions (height / width / depth) 590 - 600 /560 /min. 550 (mm) Voltage/Frequency 220-240 V ~; 50 Hz Cable type and section used/suitable for use in the min. -
Page 62: First Use
4 First Use Before you start using your product, it is re- If the first timer is not set, “12:00” commended to do the following stated in symbol continue to flash the following sections respectively. and your oven will not start. For your oven to function, you must 4.1 First Timer Setting confirm the time of day by setting... -
Page 63: Using The Oven
NOTICE: During the first use, smoke and odour may come up for several hours. This is normal and you just need good ventila- tion to remove it. Avoid directly inhaling the smoke and odours that form. 5 Using the Oven 5.1 General Information on Using the 5.2 Operation of the Oven Control Oven... - Page 64 audible warning. The 3-line animation : Key lock symbol appearing on the display stops and the : Temperature symbol C symbol appears fixed next to the : Settings symbol temperature value. The oven does not : Door lock symbol * switch off automatically since manual * It varies depending on the product model.
-
Page 65: Steam Assisted Cooking
ð Your oven will start operating im- General Warnings mediately at the selected function • Steam assisted cooking can only be per- and temperature. The set baking formed with the steam assisted cooking time starts counting down and functions specified in the manual. appears on the display. -
Page 66: Settings
1. Touch the key until the symbol ap- pears on the display. 5. Open the lid of the water reservoir and ð The symbol is shown on the display fill in the amount specified in the baking and the 3-2-1 count down starts. The table. - Page 67 2. Set the desired level with the keys. (b-01-b-02-b-03) 2. Set the alarm time with the keys. ð Touch the key for confirmation or wait without touching any key. The volume set becomes active after a while. Setting the display brightness ð...
-
Page 68: Using The Meat Probe
3. Touch key to activate the However, if the meat probe is exposed to 250 °C or above, the sensor is rendered minutes field. useless. • The operating temperature may be at least 30 °C higher than the meat probe temperature. - Page 69 ð While cooking with a meat probe, Meat probe slot cover the actual temperature of the food 2. Insert the sensor tip of the meat probe that the meat probe is inserted and to the food you will be cooking. the internal meat probe temperat- ure you have set shall be displayed alternately with intervals of approx-...
-
Page 70: General Information About Baking
6 General Information About Baking You can find tips on preparing and cooking • For good baking performance, place your your food in this section. food on the recommended correct shelf. Do not change the shelf position during Plus, this section describes some of the baking. - Page 71 • If the cake is moist, use a small amount • If the pastry is getting cooked slowly, of liquid or reduce the temperature by make sure that the thickness of the 10°C. pastry you have prepared does not over- •...
- Page 72 Food Accessory to be Operating func- Shelf position Temperature (°C) Baking time used tion (min) (approx.) Standard tray * Fan Heating 20 … 30 Top and bottom Whole bread Standard tray * 30 … 40 heating Whole bread Standard tray * Fan Heating 30 …...
-
Page 73: Meat, Fish And Poultry
Food Accessory to be Shelf position Temperature (°C) Baking time (min) used (approx.) Small cakes Standard tray * 25 … 35 Cookie Standard tray * 25 … 35 Pastry Standard tray * 45 … 55 Standard tray * 35 … 45 * These accessories may not be included with your product. -
Page 74: Grill
6.1.3 Grill The key points of the grill • Prepare foods of similar thickness and Red meat, fish and poultry meat quickly weight as much as possible for the grill. turns brown when grilled, holds a beautiful • Place the pieces to be grilled on the wire crust and does not dry out. -
Page 75: Test Foods
Suggestions for baking with a single tray - "3D" function Food Accessory Shelf posi- Temperat- Amount of Water in- Baking time Approx. to be used tion ure (°C) water to be take time (min) (ap- food weight (mins.)** used (ml) prox.) Standard tray after preheat-... - Page 76 Food Accessory to be Operating func- Shelf position Temperature (°C) Baking time used tion (min) (approx.) On models with wire shelves : 3 Small cakes Standard tray * Fan Heating 25 … 35 On models without wire shelves : 2 Round cake mould, 26 cm in Top and bottom...
-
Page 77: Maintenance And Cleaning
7 Maintenance and Cleaning 7.1 General Cleaning Information • Stainless-inox surface may change col- our in time. This is normal. After each op- General warnings eration, clean with a detergent suitable • Wait for the product to cool before clean- for the stainless or inox surface. -
Page 78: Cleaning Accessories
Glass surfaces 7.3 Cleaning the Control Panel • When cleaning glass surfaces, do not use • When cleaning the panels with knob-con- hard metal scrapers and abrasive clean- trol, wipe the panel and knobs with a ing materials. They can damage the damp soft cloth and dry with a dry cloth. -
Page 79: High Temperature Self-Cleaning
Do not use cleaning agents contain- ing acids or chlorides to clean the water pool on the base of the oven. Do not clean the lime that may form in the water pool on the oven base by scraping. Otherwise, the product base shall be damaged. - Page 80 Whether your accessories are pyro-proof 5. When the pyrolysis function starts, or not is specified in the accessories sec- “P2:00” lights up and starts counting tion. If not specified, your accessories down. The pyrolysis time (2 hours) is are not resistant to high temperatures. It shown on the display.
-
Page 81: Cleaning The Oven Door
1. Remove all accessories inside the oven. After the pyrolysis function is com- In the models with wire shelves, remem- pleted, the door lock will be active ber to remove the wire shelf. until the oven cools to the appropri- ate temperature. -
Page 82: Removing The Inner Glass Of The Oven Door
2. Pull the plastic component, attached on the upper section of the front door, to- wards yourself by simultaneously push- ing on the pressure points on both sides of the component and remove it. 6. (C) type hinge is available in soft open- ing/closing door types. -
Page 83: Cleaning The Oven Lamp
your product has an inner glass). Inner 2. Remove the glass cover by turning it glass (2) must be attached to the plastic counter clockwise. slot closest to the innermost glass (1). 6. While reassembling the innermost glass (1), pay attention to place the printed side of the glass on the inner glass. -
Page 84: Troubleshooting
3. Lift the lamp's protective glass cover with a screwdriver. Remove the screw first, if there is a screw on the square lamp in your product. 4. If your oven lamp is type (A) shown in the figure below, rotate the oven lamp as shown in the figure and replace it with a new one. - Page 85 Error codes/reasons and possible solutions Error codes Error reasons Possible solutions Contact the authorized service to be able to cook again with the meat probe. Remove the meat probe and set Meat probe communication er- Er 5 the function selection knob to off (0) to be able to cook normally without the meat probe in the oven.
- Page 88 Service Vi har service i hela Sverige/ Nationwide service in Sweden Besök www.cylinda.se / Visit www.cylinda.se Ring 0771-25 25 00 (endast lokaltaxa) / Call 0771-25 25 00 Uppge / Declare Maskintyp / Model code Serienummer / Serial number Inköpsdatum / Purchase date...
Need help?
Do you have a question about the IBU5318PRF and is the answer not in the manual?
Questions and answers