Table of Contents
Advertisement
Quick Links
Advertisement
Table of Contents

Subscribe to Our Youtube Channel
Related Manuals for TSC PR30 Series


Summary of Contents for TSC PR30 Series
- Page 1 PR30/ GR30/ 3300 Series Direct Thermal Portable Printer USER’S MANUAL...
- Page 2 Information in this document is subject to change without notice and does not represent a commitment on the part of TSC Auto ID Technology Co. No part of this manual may be reproduced or transmitted in any form or by any means, for any purpose other than the purchaser’s personal use,...
- Page 3 Agency Compliance and Approvals CE CLASS B EN 55022:2006 +A1:2007 EN 55024:1998+A1:2001+A2:2003 EN 61000-4 SERIES REQULATIONS FCC CFR Title 47 Part 15 Subpart B:2011 Class B ICES-003 Issue 4:2004 Class B Wichtige Sicherheits-Hinweise 1. Bitte lesen Sie diese Hinweis sorgfältig durch. 2.
- Page 4 Class B: FEDERAL COMMUNICATIONS COMMISSION INTERFERENCE STATEMENT This equipment has been tested and found to comply with the limits for a Class B digital device, pursuant to part 15 of the FCC Rules. These limits are designed to provide reasonable protection against harmful interference in a residential installation. This equipment generates, uses and can radiate radio frequency energy and, if not installed and used in accordance with the instructions, may cause harmful interference to radio communications.
- Page 5 Radio Frequency (RF) Exposure Information The radiated output power of the Wireless Device is below the Industry Canada (IC) radio frequency exposure limits. The Wireless Device should be used in such a manner such that the potential for human contact during normal operation is minimized.
-
Page 6: Table Of Contents
Contents 1. Introduction ..........1 1.1 Product Introduction ..................1 1.2 Product Features ....................2 1.2.1 Printer Standard Features ..............2 1.2.2 Printer Optional Features ............... 3 1.3 General Specifications ..................3 1.4 Print Specifications ................... 4 1.5 Media Specifications ..................4 2. - Page 7 6.2 Printer Function ....................27 6.3 Calibrating Media Sensor by Diagnostic Tool ..........28 6.3.1 Auto Calibration ..................28 6.4 Setting by Diagnostic Tool ................29 6.5 Setting by Diagnostic Tool ................30 7. Troubleshooting ..........31 7.1 Common Problems ..................31 8.
-
Page 8: Introduction
To print label formats, please refer to the instructions provided with your labeling software; if you need to write the custom programs, please refer to the TSPL/TSPL2 programming manual that can be found on the accessories CD-ROM or on TSC website at http://www.tscprinters.com... -
Page 9: Product Features
1.2 Product Features 1.2.1 Printer Standard Features The printer offers the following standard features. Product standard feature Direct thermal printing Reflective sensor Head open sensor 3 operation buttons (On/off, feed, and cover-open) 2 color LED for printer status, 3 LEDs for battery status USB 2.0 (full speed) interface 8 MB SDRAM memory 4 MB FLASH memory... -
Page 10: Printer Optional Features
1.2.2 Printer Optional Features The printer offers the following optional features. User Factory Product option feature options options ○ 802.11 b/g/n wireless ○ CPCL emulation Black mark sensor position ○ (left / right / center) Charge station 1 cell ○ (with changeable power connector) ○... -
Page 11: Print Specifications
1.4 Print Specifications Print Specifications Alpha-3R Print head resolution 203 dots/inch (8 dots/mm) Printing method Direct thermal Dot size 0.125 x 0.125 mm (width x length) (1 mm = 8 dots) Print speed 2, 3, 4 ips selectable (inches per second) Up to 4 ips 72 mm (2.83”) Max. -
Page 12: Operations Overview
2. Operations Overview 2.1 Unpacking and Inspection This printer has been specially packaged to withstand damage during shipping. Please carefully inspect the packaging and printer upon receiving the bar code printer. Please retain the packaging materials in case you need to reship the printer. Unpacking the printer, the following items are included in the carton. -
Page 13: Printer Overview
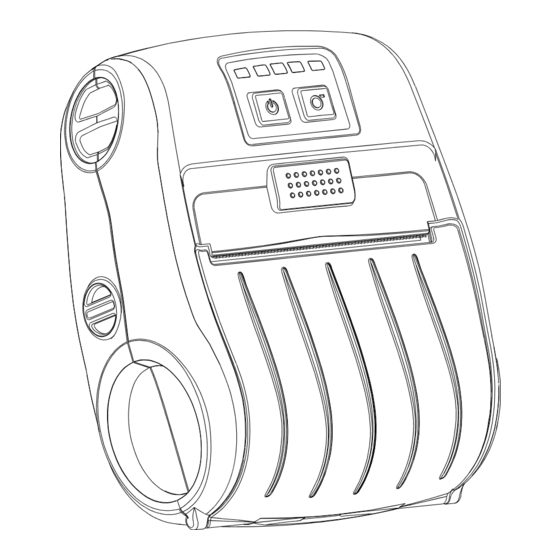
2.2 Printer Overview 2.2.1 Front View 1. LED indicator 2. Feed button 3. Power on/off button 4. Media cover release button 5. Media holder adjustment knob 6. Media cover... -
Page 14: Interior View
2.2.2 Interior View 1. Tear edge 2. Print head 3. Media holder 4. Platen 5. Black mark sensor... -
Page 15: Rear View
2.2.3 Rear View 1. Li-ion battery 2. Battery open clasp 3. USB interface 4. Power jack 5. Interface cover... -
Page 16: Operator Control
2.3 Operator control 2.3.1 LED Indication and Keys 1. Power on/off button 2. Printer status LED indicator 3. Battery charge level LED indicator 4. Battery status LED indicator 5. Wireless status LED indicator 6. Feed button Status Indication Pinter is ready Printer status LED Green (blinking) Printer is paused... - Page 17 Keys Function 1. Press and hold for 2-3 seconds to turn on the printer. 2. Press and hold for 2-3 seconds to turn off the printer. 1. Feed one label when printer is ready. 2. Pause the print gob while printing.
-
Page 18: Setup
3. Setup 3.1 Install the Battery 1. Insert the left side to install the battery at the rear of the printer. 2. Push the right side of the battery. 3. Pull the battery clasp to lock the battery. Battery safety warning: DO NOT throw the battery in fire. -
Page 19: Charge The Battery
3.2 Charge the Battery It takes 2 to 3 hours to fully charge the battery before the first time usage. The lifetime of the battery is 300 times for charge/discharge cycles. 3.2.1 Charge the Battery 1. Open the interface cover and plug the power cord to the power jack. -
Page 20: Charge By Charger Station (Optional)
3.2.2 Charge by Charger Station (Optional) 1. Plug the power cord to the power jack on the charger station. 2. Install the battery in the charger station. (Refer to steps on section 3.1) 3. Plug the power cord into a properly power outlet. -
Page 21: Charge By Vehicle Power Adaptor (Optional)
3.2.3 Charge by Vehicle Power Adaptor (Optional) Open the interface cover and plug the power cord to the power jack. Plug the vehicle power adaptor into the car cigarette lighter socket. -
Page 22: Communicate
3.3 Communicate 3.3.2 Connecting with the Communication Cable * USB to USB Cable (Optional) Open the interface cover and connect the printer to the computer with USB cable. USB interface USB connector (Printer) USB connector (PC) * USB to RS-232 Cable (Optional) Open the interface cover and connect the printer to the computer with RS-232 cable. - Page 23 3.3.2...
-
Page 24: Loading The Media
3.4 Loading the Media Open the printer media cover by pressing the media cover release button. Use a coin to rotate the media holder adjustment knob, and the media holder should be placed at the correct place to fit the media roll. - Page 25 Press each side of media cover to close the media cover and make sure the media cover closed correctly.
-
Page 26: Accessories
4. Accessories 4.1 Install the Belt Clip Refer to figure beside. Loop the belt clip through the slot below the battery. Fasten the belt clip with 2 buttons. The printer can be hung on the belt. -
Page 27: Install The Ip54-Rated Environmental Case With Shoulder Strap (Optional)
4.2 Install the IP54-rated environmental case with shoulder strap (Optional) Open the case top cover. Top cover Put the printer into the case. Close the case top cover. And the outside cover should be opened while printing. Outside cover... -
Page 28: Power-On Utilities
5. Power-on Utilities There are three power-on utilities to set up and test printer hardware. These utilities are activated by pressing FEED button then turning on the printer power simultaneously and release the button at different positions of LED indicator. Please follow the steps below for different power-on utilities. -
Page 29: Self-Test And Dump Mode
It will calibrate the black mark sensor sensitivity. The LEDs will be changed as following order: (amber) (5 blinks) (5 blinks) (5 blinks) (solid green) 5.2 Self-test and Dump Mode While calibrate the black mark sensor, printer will measure the media length, print the internal configuration (self-test) on media and then enter the dump mode. - Page 30 Self-test Printer will print the printer configuration after black mark sensor calibration. Self-test printout can be used to check if there is any dot damage on the heater element, printer configurations and available memory space. Printer model name & Main board firmware version Printer serial number Printed mileage Main board firmware checksum...
-
Page 31: Printer Initialization
Dump mode Printer will enter dump mode after printing printer configuration. In the dump mode, all characters will be printed in 2 columns as following. The left side characters are received from your system and right side data are the corresponding hexadecimal value of the characters. - Page 32 Printer configuration will be restored to defaults as below after initialization. Parameter Default setting Speed 50.8 mm/sec (2 ips) Density 2.83” (72 mm) Media Width 4” (101.5 mm) Media Height Sensor Type Black mark sensor (As paper end sensor) Black Mark Setting As paper end sensor Print Direction Reference Point...
-
Page 33: Diagnostic Tool
6. Diagnostic Tool TSC’s Diagnostic Utility is an integrated tool incorporating features that enable you to explore a printer’s settings/status; change a printer’s settings; download graphics, fonts and firmware; create a printer bitmap font; and send additional commands to a printer. -
Page 34: Printer Function
6.2 Printer Function 1. Select the PC interface connected with bar code printer. The default interface setting is USB interface. If USB interface is connected with printer, no other settings need to be changed in the interface field. 2. Click the “Printer Function” button to setup. 3. -
Page 35: Calibrating Media Sensor By Diagnostic Tool
6.3 Calibrating Media Sensor by Diagnostic Tool 6.3.1 Auto Calibration 1. Make sure the media is installed ready and media cover is closed. (Please refer to section 3.4) 2. Turn on the printer power switch. 3. Open Diagnostic tool and set interface. (The default setting is USB) The default interface setting is USB interface. -
Page 36: Setting By Diagnostic Tool
6.4 Setting by Diagnostic Tool 1. Make sure the media is installed ready and media cover is closed. (Please refer to section 3.4) 2. Turn on the printer power switch. 3. Open Diagnostic tool and set interface. (The default setting is USB) The default interface setting is USB interface. -
Page 37: Setting By Diagnostic Tool
6.5 Setting by Diagnostic Tool Open the command tool ,use instruction check connect state. -
Page 38: Troubleshooting
7. Troubleshooting 7.1 Common Problems The following guide lists the most common problems that may be encountered when operating this bar code printer. If the printer still does not function after all suggested solutions have been invoked, please contact the Customer Service Department of your purchased reseller or distributor for assistance. - Page 39 * Re-connect cable to interface. * If using serial cable, - Please replace the cable with pin to pin connected. - Check the baud rate setting. The default baud rate setting of printer is 9600,n,8,1. * If using the Ethernet cable, - Check if the Ethernet RJ-45 connector green LED is lit on.
-
Page 40: Maintenance
8. Maintenance This session presents the clean tools and methods to maintain your printer. 1. Please use one of following material to clean the printer. Cotton swab Lint-free cloth Vacuum / Blower brush 100% Ethanol or Isopropyl Alcohol 2. -
Page 41: Revise History
Revise History Date Content Editor... - Page 42 9F., No.95, Minquan Rd., Xindian Dist., No.35, Sec. 2, Ligong 1st Rd., Wujie Township, New Taipei City 23141, Taiwan (R.O.C.) Yilan County 26841, Taiwan (R.O.C.) TEL: +886-2-2218-6789 TEL: +886-3-990-6677 FAX: +886-2-2218-5678 FAX: +886-3-990-5577 Web site: www.tscprinters.com E-mail: printer_sales@tscprinters.com TSC Auto ID Technology Co., Ltd. tech_support@tscprinters.com...
Need help?
Do you have a question about the PR30 Series and is the answer not in the manual?
Questions and answers