Table of Contents
Advertisement
Quick Links
Product
Bidore 100H MKII
Information
HOT GLASS WILL
CAUSE BURNS.
DO NOT TOUCH GLASS
UNTIL COOLED.
NEVER ALLOW CHILDREN
TO TOUCH GLASS.
A barrier designed to reduce the risk of burns from the hot viewing glass is provided with this appliance and shall be installed
for the protection of children and other at-risk individuals.
Une barrière conçu pour réduire le risque de brûlure par le verre de visualisation chaude est fournie avec cet appareil et doit
être installé pour la protection des enfants et autres personnes à risque.
WARNING:
FIRE OR EXPLOSION HAZARD
Failure to follow safety warnings exactly could
result in serious injury, death, or property damage.
- Do not store or use gasoline or other flammable
vapors and liquids in the vicinity of this or any
other appliance.
- WHAT TO DO IF YOU SMELL GAS
• Do not try to light any appliance.
• Do not touch any electrical switch; do not
use any phone in your building.
• Leave the building immediately.
• Immediately call your gas supplier from a
neighbor's phone. Follow the gas supplier's
instructions.
• If you cannot reach your gas supplier, call
the fire department.
- Installation and service must be performed
by a qualified installer, service agency or the
gas supplier.
INSTALLER: Leave this manual with the appliance.
CONSUMER: Retain this manual for future reference.
Element4 Gas Fireplaces
Video
Installation, Operation and
Owner's Manual
Modore 100H MKII
Bidore 100H MKII
Trisore 100H MKII
Direct Vent
Gas Fireplaces
Une surface vitrée chaude
peut causer des brûlures.
Laisser refroidir la surface
vitrée avant d'y toucher.
Ne permettez jamais á un enfant
de toucher la surface vitrée.
AVERTISSEMENT:
INCENDIE OU D'EXPLOSION
Le non-respect des avertissements de sécurité à la
lettre pourrait entraîner de graves blessures , la mort
ou des dommages matériels.
- Ne pas entreposer ni utilizer d'essence ni d'autres vapeurs
ou liquides inflammables dans le voisinage de cet appareil
ou de tout autre appareil.
- QUE FAIRE SI VOUS SENTEZ UNE ODEUR DE GAZ
• Ne pas tenter d'allumer d'appareil.
• Ne touchez á aucan interrupteur. Ne pas vous servir des
téléphones se trouvant dans le bátiment ou vous trouvez.
• Quitter immédiatement le bâtiment.
• Appelez immédiatment votre fournisseur de gaz depuis
un voisin. Suivez les instructions du fournisseur.
• Si vous ne pouvez rejoindre le fournisseur de gaz
appelez le service des incindies.
- Installation et l'entretien doivent être effectués par un
installateur qualifié, une agence de service ou le fournisseur
de gaz.
INSTALLATEUR: Laissez cette notice avec l'appareil.
CONSOMMATEUR: Conservez cette notice pour
consultation ultérieure.
1
4006611
Mar. 2, 2017
EuropeanHome.com
Advertisement
Table of Contents

Related Manuals for Element4 Bidore 100H MKII


Summary of Contents for Element4 Bidore 100H MKII
- Page 1 Installation, Operation and Owner’s Manual Modore 100H MKII Bidore 100H MKII Trisore 100H MKII Product Bidore 100H MKII Information Video Direct Vent Gas Fireplaces HOT GLASS WILL Une surface vitrée chaude CAUSE BURNS. peut causer des brûlures. DO NOT TOUCH GLASS Laisser refroidir la surface UNTIL COOLED.
-
Page 2: Table Of Contents
Important Safety Information ..................... 3 Key Installation Points ......................6 User Information ........................7 Specifications and Dimensions ..................8 Modore 100H MKII Bidore 100H MKII Trisore 100H MKII Parts of the Fireplace Clearances ..........................14 Locating the Fireplace Placing the Fireplace... -
Page 3: Important Safety Information
Do not place furniture or other objects within 36” of the fireplace glass. SAVE THESE INSTRUCTIONS Make yourself fully aware of all the following instructions and the many features of the Element4 direct vent gas fireplace appliance. INSTALLER: Leave this manual with the appliance. - Page 4 Canada, consult with the local authority having The glass must only be removed by a qualified person. jurisdiction for gas product installations to determine their Gloves should be worn when removing the glass. specific requirements for high altitude installations. Element4 Gas Fireplaces EuropeanHome.com...
- Page 5 For convenience, the inches are rounded to the nearest 1/16” when converted. If greater accuracy is DO NOT USE abrasive cleaners on the panels. DO NOT required, use the metric dimensions. ATTEMPT to clean the glass panels when they are hot. Element4 Gas Fireplaces EuropeanHome.com...
-
Page 6: Key Installation Points
Gas pressures MUST be read with a manometer and confirmed with what is required in the installation manual. • FINISHING • A 1/8”/3 mm gap between the flange and the enclosing wallboard MUST be maintained to prevent cracking from heat expansion and contraction. Element4 Gas Fireplaces EuropeanHome.com... -
Page 7: User Information
WARMTH AND BEAUTY - HOW IT WORKS The Element4 fireplaces are direct vent fireplaces and, as such, the intake and exhaust are both handled through the vent pipe. The fireplace also provides convection air to your room. The illustration shows one of the unique features of the Element4 fireplaces - its use of warm, convection air flow. -
Page 8: Specifications And Dimensions
27.1 Efficiency 80.6% A typical rating label is shown above. It is attached to every AC ADAPTER SPECIFICATIONS Element4 fireplace and contains important certification Input Voltage 120V AC information. It must not be removed from the fireplace. Input Power Output Voltage... -
Page 9: Modore 100H Mkii
MODORE 100H MKII Letter Inches Millimeters 77/8 51/16 393/8 1000 431/2 1104 155/8 393/8 1000 411/16 357/16 135/16 2911/16 MODORE 100H MKII A DWG file is available for download at www.europeanhome.com for design specific dimensions not listed. Element4 Gas Fireplaces EuropeanHome.com... -
Page 10: Bidore 100H Mkii
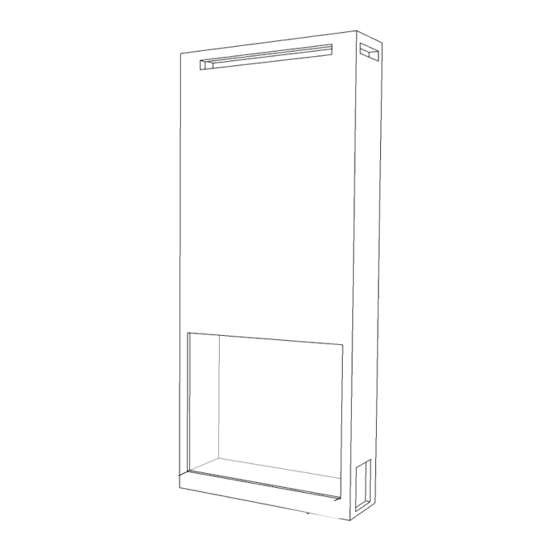
SPECIFICATIONS and DIMENSIONS BIDORE 100H MKII Letter Inches Millimeters 77/8 51/16 383/16 415/8 1057 155/8 395/8 1005 411/16 357/16 135/16 2911/16 BIDORE 100H MKII A DWG file is available for download at www.europeanhome.com for design specific dimensions not listed. Element4 Gas Fireplaces... -
Page 11: Trisore 100H Mkii
TRISORE 100H MKII Letter Inches Millimeters 77/8 51/16 383/4 415/16 1050 155/8 415/16 1050 411/16 357/16 135/16 2911/16 TRISORE 100H MKII A DWG file is available for download at www.europeanhome.com for design specific dimensions not listed. Element4 Gas Fireplaces EuropeanHome.com... -
Page 12: Parts Of The Fireplace
SPECIFICATIONS and DIMENSIONS PARTS OF THE FIREPLACE The various parts of the 100H MKII Series fireplaces are shown below. These parts are typical of any Element4 fireplace. Table of Fireplace Parts Outer Frame Face - surrounds the glass panels and limits the non-combustible wall board... - Page 13 Glass Rope Gaskets - holds the Glass Panel in place (2 ea. - Modore, 3 ea. - Bidore, 4 ea. - Trisore) Vent Collar - accepts the 5” x 8” venting adapter (included) Relief Door - part of the safety system. Do NOT block the operation. Pilot Assembly Upright Trim - (2 ea. - Modore, Bidore, Trisore) Element4 Gas Fireplaces EuropeanHome.com...
-
Page 14: Clearances
VALVE, ELECTRICAL WIRING, AND GAS LINES) DOES NOT IMPEDE THE FULL OPERATION OF THE RELIEF DOORS. IT IS YOUR RESPONSIBILITY TO ENSURE THE SAFETY OF THESE CRITICAL COMPONENTS THROUGHOUT THE INSTALLATION PROCESS. REMOVE & DISPOSE OF ALL WRAPS AND TIES. Element4 Gas Fireplaces EuropeanHome.com... -
Page 15: Clearances To Combustibles
These clearances are the same for ALL Element 4 Fireplaces, regardless of model. We reccomend that the fireplace be set into its final location before building the enclosure. Please refer to the “Reduced Clearance to Existing Combustible Wall” section for use of combustibles inside of the above clearances. Element4 Gas Fireplaces EuropeanHome.com... -
Page 16: Mantel Clearances
OF GLASS CONSTRUCTION BEAMS COMBUSTIBLE INCHES (TYPICAL) Mantel Depth NON COMBUSTIBLE 12”/300 mm MATERIAL CONSTRUCTION BEAMS NON- COMBUSTIBLE (TYPICAL) DETAIL C ETAIL C 1”/25 mm ALE 1 : 10 TOP OF FIREPLACE OPENING GLASS CONVECTION GAP Element4 Gas Fireplaces EuropeanHome.com... -
Page 17: Convection Clearances
Convection Air Outlet Area by Model Minimum Distances Model Square Inches Square Centimeters Room ceiling to 72” appliance bottom 1830 Modore 100H MKII Room ceiling to top of 1” Bidore 100H MKII Convection Air Outlet Trisore 100H MKII Element4 Gas Fireplaces EuropeanHome.com... -
Page 18: Gas And Electric
Remove batteries after use to avoid battery corrosion. Battery corrosion will damage the receiver. Electrical work must be performed by a qualified, licensed electrician. WARNING All wiring shall be in compliance with all local, city, and state codes. Element4 Gas Fireplaces EuropeanHome.com... -
Page 19: Venting
Pro-Form (BDM - Bernard Dalsin Manufacturing) Direct-Temp (Selkirk Corporation) AmeriVent Direct Vent (Hart & Cooley Inc.) Ventis Direct Vent (Olympia Chimney Supply, Inc.) North American Vent Adapter For the power venting installation manuals please visit the link below. www.europeanhome.com/qr-support Element4 Gas Fireplaces EuropeanHome.com... - Page 20 Calculate the Total Vertical Section by adding up all vertical upward sections in your specific vent design. CALCULATING THE TOTAL HORIZONTAL SECTION (THS) Calculate the Total Horizontal Section by adding up all horizontal sections in your specific vent design. Element4 Gas Fireplaces EuropeanHome.com...
- Page 21 Loosen the screws on either side and slide the restrictor as desired. Do not modify the restrictor(s). Please use the graph above to determine if you will need to use a restrictor. Loosen these (2) Phillip’s head screws to slide on/off the restrictor. Element4 Gas Fireplaces EuropeanHome.com...
-
Page 22: Venting Charts
VENTING VENTING CHARTS HORIZONTAL TERMINATIONS & RESTRICTOR USE rise VERTICAL TERMINATIONS & RESTRICTOR USE rise Element4 Gas Fireplaces EuropeanHome.com... -
Page 23: Venting Clearances
VENTING CLEARANCES HORIZONTAL VENT TERMINATION CLEARANCES AND REQUIREMENTS Element4 Gas Fireplaces EuropeanHome.com... - Page 24 National Fuel Gas Code (ANSI Z223.1 in the USA) or the current standard of CAN/CSA-B149.1 in Canada. Termination Heights A second termination may be no closer than 12”/305 Multiple Termination Clearance Element4 Gas Fireplaces EuropeanHome.com...
-
Page 25: Enclosing The Fireplace
James Hardie Building Products HardieBacker® 1/4” Cement Board 1/4”/6 * The listed brand names are trademarks of their respective companies Skamol Americas, Inc. (844) 475-2665 E-mail: skamotec225@skamol.com www.skamotec225.com Promat Inc. (865) 681-0155 E-mail: sales@promat.us www.promat.us/en James Hardie Building Products (888) 542-7343 www.jameshardie.com Element4 Gas Fireplaces EuropeanHome.com... - Page 26 1. Most important, these fireplaces are NOT zero-clearance fireplaces. Unlike zero-clearance fireplaces, there is not a metal box around the Element4 fireplaces. With no metal box there are no louvers to distract your view of the fire. However, we want the cooling advantage of a metal box so your site-built, non-combustible enclosure will substitute.
- Page 27 ENCLOSING the FIREPLACE REDUCED CLEARANCE TO EXISTING COMBUSTIBLE WALLS OMbUSTIbLE hIELd INIShEd OMbUSTIbLE hIELd INIShEd 2”/50 Minimum Air Gap MUST BE MAINTAINED 1”/25 Minimum Air Gap MUST BE MAINTAINED OMbUSTIbLE hIELd INIShEd hIELd INIShEd OMbUSTIbLE Element4 Gas Fireplaces EuropeanHome.com...
-
Page 28: Rough Opening Dimensions
Note! The finished walls must be at least 11/8”/28 mm thick or the fireplace trim will extend beyond the finished walls. We recommend that the fireplace be set into its final location before building the enclosure. Element4 Gas Fireplaces EuropeanHome.com... - Page 29 When enclosing the Bidore 100H MKII fireplace there is a minimum clear area which must be maintained. Nothing except the Bidore 100H MKII may be within this area. When enclosed, the Bidore 100H MKII is centered - stand off frame face in line with the front inside or back inside blue limit and centered- above.
- Page 30 This minimum area MUST BE DEFINED BY NON-COMBUSTIBLE MATERIAL. The inside of the enclosing walls (including any necessary framing) may be no less than the distances shown above. We recommend that the fireplace be set into its final location before building the enclosure. Element4 Gas Fireplaces EuropeanHome.com...
- Page 31 Skamol Skamotec® 225 Fireplace Building Board 11/2”/38 Promat PROMAFOUR® System 1/2”/12 5/8”/15 3/4”/18 James Hardie Building Products HardieBacker® 500 1/2” Cement Board 1/2”/12 James Hardie Building Products HardieBacker® 1/4” Cement Board 1/4”/6 Fireplace Trim Minimum Wall Thickness = 1/2”/12 Element4 Gas Fireplaces EuropeanHome.com...
-
Page 32: Convection Air Opening
Bidore with Bidore with Outlet Convection Outlets Reveal Trisore with Trisore with Outlet Convection Outlets Reveal Convection Air Outlet Area by Model Model Square Inches Square Centimeters Modore 100H MKII Bidore 100H MKII Trisore 100H MKII Element4 Gas Fireplaces EuropeanHome.com... - Page 33 Dimension A, B, and C must be equal throughout the installation. Any support framing (NON-combustible framing ONLY) must be at least 2”/50 mm away, above and beside the fireplace. The entire weight of the non-combustible walls must be borne by a structure other than the fireplace. Element4 Gas Fireplaces EuropeanHome.com...
-
Page 34: Cold Climate Installation
It also helps to tape the venting for maximum air tightness and to caulk firestops. LOCATING THE CONTROLS The control system for the Element4 fireplaces consist of three major components: • the receiver •... - Page 35 Replace the white door/frame cover onto the radius of less than 2”/50 frame and secure it with the four bolts. Tighten the bolt through the mounting Fit the gas control tab into the bracket on bosses. the Access Door frame. Element4 Gas Fireplaces EuropeanHome.com...
- Page 36 Once the system stays lit for at least one full minute, turn the fireplace off, fix the glass panels in place and operate the fireplace for at least 45 minutes to ensure the system works properly when heated. Element4 Gas Fireplaces EuropeanHome.com...
-
Page 37: Installing The Fire Media
2nd thermocouple remains clear of media. What’s in the box? (LSE 412 II) -(1) small bag of ash (optional use) -(2) pine cones -(9) logs -bags of black & grey chips Element4 Gas Fireplaces EuropeanHome.com... - Page 38 B shows the pilot area (below) clear of media (above). C shows the 2 thermocouple area (below) clear of media (above). 2nd Thermocouple Pilot Assembly To see how to arrange media in an Element4 fireplace please visit the link below. WWW.EUROPEANHOME.COM/RESOURCES/VIDEOS/ Element4 Gas Fireplaces EuropeanHome.com...
-
Page 39: Screen Installation
SCREEN INSTALLATION MODORE 100H MKII BIDORE 100H MKII TRISORE 100H MKII Upper Tabs Upper Tabs Upper Tabs Lower Tabs Lower Tabs Lower Tabs Magnets Magnets Magnets Long Screen Long Screen Long Screen Short Screen Short Screen Short Screen Lower Tab... - Page 40 The other magnet will be exposed to attach to the screen. This is what the screen will look like when it is attached correctly to the top Upper Tabs (view from inside of the standoff frame). Element4 Gas Fireplaces EuropeanHome.com...
- Page 41 This is what the screen will look like when it is attached correctly to the top Lower Tabs (view between the screen and the glass). The screen is installed properly in the photo above. Please make sure that all magnets are in the correct position and the tabs are secured. Element4 Gas Fireplaces EuropeanHome.com...
-
Page 42: Operating The Fireplace
& on when the fireplace is turned on.) Note! For normal operation the MANUAL knob on the gas valve cannot be in the MAN position; it must be fully in the ON position. Element4 Gas Fireplaces EuropeanHome.com... - Page 43 TO TURN ON FIRE 6. To select minutes press button. 7. To confirm press buttons ***PLEASE SEE NEXT PAGE FOR FURTHER INSTRUCTIONS*** simultaneously or wait. WARNING When pilot ignition is confirmed, motor turns automatically to maximum flame height. Element4 Gas Fireplaces EuropeanHome.com...
- Page 44 NOTE: At end of countdown time period, the fire turns off. The Countdown Timer only works in Manual, Thermostatic, and Eco Modes. Maximum countdown time is 9 hours and 50 minutes. Element4 Gas Fireplaces EuropeanHome.com...
- Page 45 Press button and hold until choose between , , , , , , , . displayed, temperature flashes. To confirm press button. To adjust set temperature press button. To confirm press button or wait. Element4 Gas Fireplaces EuropeanHome.com...
- Page 46 1. Install batteries. All icons are displayed and flashing. 2. To activate a function, press the relevant button and hold for 10 sec. 3. The function icon will continue to flash until activation is complete. Activation is complete when the function icon is displayed. Element4 Gas Fireplaces EuropeanHome.com...
- Page 47 Since it is a metal fireplace, the heat-up and cool-down cycles may produce some noises caused by the expansion and contraction of these metals. The premium materials and build quality of your fireplace will keep these sounds to a minimum. To see an Element4 fireplace starting and running normally please visit the link below.
-
Page 48: Maintenance
PANEL(S) BEFORE LIGHTING THE FIRE! Remove the ROPE GASKET starting from one end down to the other end To see how to remove the glass from an Element4 fireplace please visit the link below. WWW.EUROPEANHOME.COM/RESOURCES/VIDEOS/ The ROPE GASKET will be... - Page 49 Adjust the remaining glass panels left to right until there is no corner gap. Step 4. While ensuring that the glass panels are tight and square to each another, carefully install the remaining rope gaskets. PROPERLY PLACE ROPE GASKET(S) AND SEAL THE GLASS PANEL(S) BEFORE LIGHTING THE FIRE! Element4 Gas Fireplaces EuropeanHome.com...
-
Page 50: Burner
The area around the pilot should be inspected for cleanliness. Lint or foreign material must be removed with a brush or vacuum. Pilot Injector Natural - Marking 31.2 Pilot Injector Propane - Marking 27.1 Thermocouple Ignitor Rod Thermocouple Pilot Assembly Ignitor Rod (styles vary) Pilot Assembly Detail Element4 Gas Fireplaces EuropeanHome.com... -
Page 51: Thermocouple
MAINTENANCE THERMOCOUPLE MAINTENANCE The Element4 fireplaces have two thermocouples; one next to the pilot and one opposite the pilot side of the main burner. The completeness and operation of both must be checked. A qualified installer must confirm that both thermocouples are in place and not damaged. -
Page 52: Warranty
European Home is a division of Europa Ja, Inc. PRODUCT INSTALLATION RECORD Installer: Please complete this form. Customer: Please retain this information. Model Modore 100H MKII Bidore 100H MKII Trisore 100H MKII (check one) Purchased From Date of Purchase Installed By... -
Page 53: Massachusetts Certification
Gas Fitters has issued approval number G1-0515-495 for this appliance. The following must be observed when installing the Element4 fireplaces within the Commonwealth of Massachusetts: (a) For all side wall horizontally vented gas fueled equipment installed in every dwelling, building or structure used in whole... - Page 54 APPENDIX TWO Element4 Gas Fireplaces EuropeanHome.com...
- Page 55 No reaction to remote command. Do not coil the ignition cable. Shorten the ignition cable, if possible. Ignition sequence stops, no pilot flame. Test the batteries, replace if necessary. Remote command is possible. Quality 1.5V AA alkaline recommended. (continued) Element4 Gas Fireplaces EuropeanHome.com...
- Page 56 Do not coil the ignition cable. Remove hearth panel and glass and check for proper pilot operation. If pilot establishes Element4 ‘140’ models ONLY: Pilot flame with panel off then install panel and glass under hearth panel not establishing. and adjust pilot flame (hi/lo) for best operation.
- Page 57 The valve will turn to pilot flame if the set temperature and the ambient temperature remain the same over a 6 hour period. (continued) Element4 Gas Fireplaces EuropeanHome.com...
- Page 58 Check venting for complete integrity. Reduce the primary air opening until flames have blue Too much primary air. base and yellow upper two-thirds. Flames are stable but too small and blue. NORMAL OPERATION Element4 Gas Fireplaces EuropeanHome.com...
- Page 59 Increase the flame height: Press and hold the UP button. • Decrease the flame height: Press and hold the DOWN button. • For fine adjustment tap the UP or DOWN button as necessary. Figure 5.2 • Turn fireplace OFF: Press the ON/OFF button. Element4 Gas Fireplaces EuropeanHome.com...
- Page 60 Frequent ON and OFF cycles will limit life expectancy of the valve and will increase battery consumption. The fireplace should be powered by the AC adapter for improved reliability and customer satisfaction. Element4 Gas Fireplaces EuropeanHome.com...
- Page 61 WALL ACCESS DOOR 34 WALL SWITCH 59 (Appendix 3) KEY INSTALLATION POINTS 6 WARRANTY 52 LISTING LAbEL 8 LP (P ROPANE ONvERSION MAINTENANCE urner Lass iLot herMocoupLes MANTELS 16 NON-COMbUSTIbLE MATERIALS iniMuM Learances Element4 Gas Fireplaces EuropeanHome.com...
- Page 62 Imported and distributed in North America by: EUROPEAN HOME a division of Europa Ja, Inc. 30 Log Bridge Road Building 300 - Suite 303 Middleton, MA 01949 www.europeanhome.com IGE45II-170202 Rev. B Element4 Gas Fireplaces EuropeanHome.com...
Need help?
Do you have a question about the Bidore 100H MKII and is the answer not in the manual?
Questions and answers