Techart 070.530.510.CCC Assembly Instructions Manual
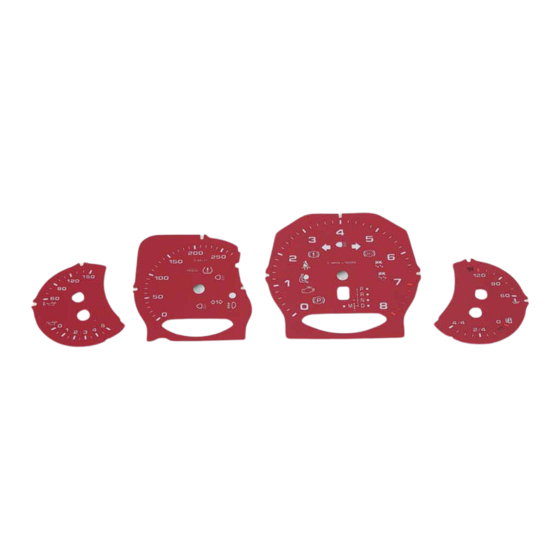
Set of instrument dials for panamera s manual transmission (km/h) for panamera s manual transmission (miles) for panamera s with pdk (km/h) for panamera s with pdk (miles) for panamera s4 with pdk (km/h) for panamera s4 with pdk (miles) for panamera turbo
Table of Contents
Advertisement
Quick Links
ASSEMBLY INSTRUCTIONS
TECHART Set of Instrument Dials
Part-no. 070.530.510.CCC
Part-no. 070.530.511.CCC
Part-no. 070.530.520.CCC
Part-no. 070.530.521.CCC
Part-no. 070.530.530.CCC
Part-no. 070.530.531.CCC
Part-no. 070.530.540.CCC
Part-no. 070.530.541.CCC
Part-no. 070.530.550.CCC
Part-no. 070.530.560.CCC
Part-no. 070.530.561.CCC
Part-no. 070.530.570.CCC
Part-no. 070.530.571.CCC
for Panamera S manual transmission (km/h)
for Panamera S manual transmission (miles)
for Panamera S with PDK (km/h)
for Panamera S with PDK (miles)
for Panamera S4 with PDK (km/h)
for Panamera S4 with PDK (miles)
for Panamera Turbo with PDK (km/h)
for Panamera Turbo with PDK (miles)
for Panamera Diesel with PDK (km/h)
for Panamera V6 Manual transmission (km/h)
for Panamera V6 Manual transmission (miles)
for Panamera V6 and 4 with PDK (km/h)
for Panamera V6 and 4 with PDK (miles)
Advertisement
Table of Contents

Related Manuals for Techart 070.530.510.CCC


Summary of Contents for Techart 070.530.510.CCC
- Page 1 ASSEMBLY INSTRUCTIONS TECHART Set of Instrument Dials Part-no. 070.530.510.CCC for Panamera S manual transmission (km/h) Part-no. 070.530.511.CCC for Panamera S manual transmission (miles) Part-no. 070.530.520.CCC for Panamera S with PDK (km/h) Part-no. 070.530.521.CCC for Panamera S with PDK (miles) Part-no. 070.530.530.CCC for Panamera S4 with PDK (km/h) Part-no.
-
Page 2: Table Of Contents
Installation ..............................6 Preparing the vehicle ........................6 Component overview ..…………………………………………………………………………………7 Dismantle combi-instrument …………………………………………………..……………………….8 Disassemble combi-instrument, assemble TECHART Set of Instrumenten-Dials………………13 Assemble and install combi-instrument ..................15 Perform final work ........................15 TECHART Version 02, dated June 24, 2013 Page 2 of 16... -
Page 3: I Important Safety Information
Do not eat, drink or smoke when handling windshield cleaning agents/antifreeze. Do not breathe in vapors and ensure adequate ventilation. Keep windshield cleaning agents/antifreeze only store them in sealable original containers. TECHART Version 02, dated June 24, 2013 Page 3 of 16... - Page 4 - the airbag unit must not touch fat, oil, detergents, liquids or similar substances - do not expose the airbag unit to more than 90° Celsius - do not remove the short-circuit spring of the plug contacts TECHART Version 02, dated June 24, 2013 Page 4 of 16...
-
Page 5: Preparation
Use the table to check whether all of the required parts are present. Once parts have been removed from their original packaging, ensure that they are properly handled and stored. TECHART Version 02, dated June 24, 2013 Page 5 of 16... -
Page 6: Installation
Move the steering column adjustment completely downwards and towards the back (maximum working space). Switch off the ignition and disconnect the battery when working on the vehicle electrical/electronics system. TECHART Version 02, dated June 24, 2013 Page 6 of 16... -
Page 7: Component Overview
D - Steering column panel bottom E - Trim right F - Lower panel combi-instrument in connection with the upper steering column panel G - Upper panel combi-instrument Fig. 01 Fig. 02 TECHART Version 02, dated June 24, 2013 Page 7 of 16... -
Page 8: Dismantle Combi-Instrument
Disconnect the main plug at the steering wheel. Loosen the main fixing screw of the steering wheel, mark the steering wheel center position and remove the steering wheel. Fig. 04 TECHART Version 02, dated June 24, 2013 Page 8 of 16... - Page 9 Fig. 06 Loosen the 2 upper screws. Disconnect the plug at the switch for the steering column adjustment. 10 Remove the lower steering column panel D. Fig. 07 TECHART Version 02, dated June 24, 2013 Page 9 of 16...
- Page 10 13 Loosen the 2 screws at the lower combi-instrument-panel F. 14 Unclip the panel at the combi- instrument and remove it together with the upper steering column panel F. Fig. 10 TECHART Version 02, dated June 24, 2013 Page 10 of 16...
- Page 11 16 Dismount air nozzle B left, for that remove two screws left. Fig. 11 17 Remove one screw on the right. 18 Detach air nozzle. Fig. 12 TECHART Version 02, dated June 24, 2013 Page 11 of 16...
- Page 12 21 Disconnect main plug and the CAN- Bus plug. 22 Cover the steering column with a soft cloth; remove the combi- instrument carefully and without damage. Fig. 14 TECHART Version 02, dated June 24, 2013 Page 12 of 16...
-
Page 13: Disassemble Combi-Instrument, Assemble Techart Set Of Instrumenten-Dials
ASSEMBLY INSTRUCTIONS TECHART Set of Instrument Dials Disassemble Combi-instrument, assemble TECHART Set of Instrument-Dials Remove button for resetting the trip recorder. Fig. 15 Loosen the fixing flaps of the combi-instrument-cover (Fig. 16 + Fig. 16 Fig. 17 TECHART Version 02, dated June 24, 2013... - Page 14 Turn all hands carefully towards the zero-point and pull carefully upwards at the same time Fig. 19 Carefully lever the center sleeve H with a small screwdriver upward Fig. 20 TECHART Version 02, dated June 24, 2013 Page 14 of 16...
-
Page 15: Assemble And Install Combi-Instrument
Use the PIWIS II system tester to read out all of the fault memories of the individual vehicle components and first rectify any faults displayed. Functions control of the combi-instrument and finally perform a test drive. TECHART Version 02, dated June 24, 2013 Page 15 of 16... - Page 16 FAX +49 (0) 7152 / 9339-33 info@techart.de www.techart.de Änderungen und Irrtümer vorbehalten. Subject to change at any time without prior notice. Copyright 2013 by TECHART Automobildesign GmbH Artikel-Nr./Part No. 070.530.510.099 TECHART Version 02, dated June 24, 2013 Page 16 of 16...
Need help?
Do you have a question about the 070.530.510.CCC and is the answer not in the manual?
Questions and answers