Table of Contents
Advertisement
Advertisement
Table of Contents

Related Manuals for LaserPecker LX1


Summary of Contents for LaserPecker LX1
- Page 1 LX1& LX1& LX1 Max LX1 Max USER MANUAL L e t C r e a t i v i t y F l y...
- Page 2 Let Creativity Fly LaserPecker values self-expression and spreading love through creativity. We are dedicated to provid- ing you with outstanding portable and versatile laser engravers and cutters to unleash your poten- tial creativity and turn your vision into reality...
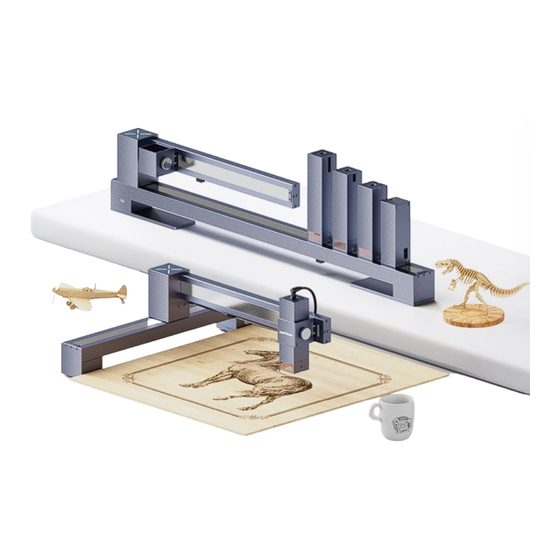
- Page 3 The LX Series features a powerful laser cutting capability, as well as a generous maximum working area. The unique foldable frame design makes setup work, and storage eXtra fast and easy. With the LaserPecker LX1, it's now even easier for you to "Let Creativity FLY!"...
-
Page 4: Table Of Contents
2.4 Safety Label 2.5 Switch Module 2.6 Fireware Upgrade 2.7 Warranty Terms 2.8 Copyright 2.9 Specifications LX1 Quick Use 3.Product Accessories List 4. Get to Know LX1 5. LX1 Fast Assembly 6. Software Connection 7. Set Focal Length 8. Machine Maintenance... -
Page 5: After-Sales Services
1.1 After-Sales Services Technical support for this product is available globally. Please contact us if you encounter any problems with your LX1 & LX1 Max and we will get back to you as soon as possible. Email: support@laserpecker.com Tel: +86 0755-28913864 1.2 APP Software Download... -
Page 6: Disclaimer
Personal injury, property or product damage caused by improper operation, failure to follow instruction manual or other uncertainties. · The work user created by LaserPecker prodects infringes the intellectual property rights of the third party or violate the relevant laws and regulations. ·... - Page 7 Laser Engraving Safety · Installation specification: Before operating LX1, please secure the main unit based on the user manual. Please place the product on a stable and flat table or workbench. The vibration of the machine will affect the engraving quality.
-
Page 8: Safety Label
2.3.4 Emergency Response Please take the following measures when there is open fire during engraving (LX1 is capable of detecting high temperature. The machine will cease operation when the temperature reaches 50°C). 1.Cut off the power supply 2.Douse the flames with fire extinguisher Inhale smoke and particulate matter 1.Fumes and particulates that can irritate the respiratory system may be generated when engraving or... -
Page 9: Switch Module
2.6 Firmware Upgrade You can upgrade the firmware online by connecting the LaserPecker APP to your device via Bluetooth. Update prompt for new firmware will show up when connecting the machine. It is recommended to upgrade the firmware to the latest version timely. -
Page 10: Copyright
2.8 Copyright · The copyright of this manual involving the right of software and hardware of the product belongs to Shenzhen Hingin Technology Co., Ltd (hereinafter referred to as “Hingin”). LaserPecker is the registered trademark of Hingin. · The information in this manual is subject to change without notice. Please visit our official website https://www.laserpecker.cn for latest update. -
Page 11: Specifications
Laser Class under Class 1 LP Protection Cover LX1 Max Unfolded: 578mm*558mm*196mm LX1 Max Frame Folded: 578mm*94.8mm*196mm LX1 Max Frame with Protection Cover: 647mm*632mm*315mm Size LX1 Unfolded: 578mm*558mm*196mm LX1 Frame Folded: 578mm*94.8mm*196mm LX1 Frame with Protection Cover: 647mm*632mm*315mm Whole Unit Weight LX1:5kg LX1 Max:5.76kg... -
Page 12: Product Accessories List
3.Product Accessories List Standard Suit ( Main unit+Single Laser Module) Main Frame*1 Laser Module*1 AC Cord/ Power Adapter*1 USB to Type-C cable 1.5m*1/ Type-C cable *2 Safety Goggles*1 Key H2.0/H2.5/H3.0 *1 Material... - Page 13 Optional Add-ons 10W 450nm Module 20W 450nm Module 2W 1064nm Module Artist Module Rotary Extension*1 Riser*4 + Screws*8+ Key Engraving Bed & Laser Protection Cover(LX1)*1 Cutting Plate(LX1)*1 Engraving Bed & Laser Protection Cover(LX1 Max)*1 Cutting Plate(LX1 Max)*1...
-
Page 14: Get To Know Lx1
4.Get to Know LX1 1.Main Frame LED Indicator Power Interface of Main Unit Emergency Stop Button Power Button Y Axis X Axis Dust-proof Sheet Frame Leg Magnetic Protection Cover Screw Lock of Laser Module Ranging Rod... - Page 15 2.Main Frame Screw Lock of X Axis Grease Fitting X Axis Cord Storage Slot Y Axis Cord Storage Slot...
-
Page 16: Lx1 Fast Assembly
5.LX1 Fast Assembly 1.Unbox the product 2.Rotate the two frame legs 90 degrees 90° 90°... - Page 17 3. Unscrew the screw lock of X axis 4. Rotate the X axis 90 degrees and screw the lock 90°...
- Page 18 5. Unscrew the screw lock of laser module, install the module to the holder ①Unscrew the screw lock of laser module ②Install the laser module to the holder ③Screw the lock of laser module...
- Page 19 6. Diagram Power Interface Connection Connect as shown in the picture: Laser module connection interface Connect to power Y axis connection interface Accessory connection interface Connect to computer (PC software) 7. LED Indicator Description Solid Blue: Bluetooth is connected Blinking Blue: Bluetooth is disconnected Solid Green: In preview Multi Color: Data is transmitting Streaming Light: Engraving in progress...
-
Page 20: Software Connection
Space(LDS) and connect the device in the APP. PC Software Connection After assembling the device and powering it on, open the official PC Software LaserPecker Design Space(LDS). Connect the device to the PC software via USB cable or official Bluetooth dongle. -
Page 21: Set Focal Length
7.Set Focal Length Focusing in Engraving Mode When engraving, put the ranging rod to the lowest positionand make sure it's button touches the surfaces of the material. Focusing in Cutting Mode Adjust the position according to thickness of material when cutting Reference for thickness adjustment Adjust the... -
Page 22: Machine Maintenance
2. Change Pen in Artist Module * Please refer to in-APP calibration for more calibration Slide down the regulator to tighten up the pen Slide up the regulator to change the pen 8.Machine Maintenance Fill the back and bottom of the X axis with lubricant when the machine is stuck in operation. - Page 24 Shenzhen Hingin Technology Co., Ltd We provide global online technical support services for this product. If you encounter any problems during your use, please contact us via: Email:support@laserpecker.net Tel: +86 0755-28913864...
Need help?
Do you have a question about the LX1 and is the answer not in the manual?
Questions and answers
it wont cut round or a circle. turns into a triangle