Table of Contents
Advertisement
Advertisement
Table of Contents

Related Manuals for Prolux CTX


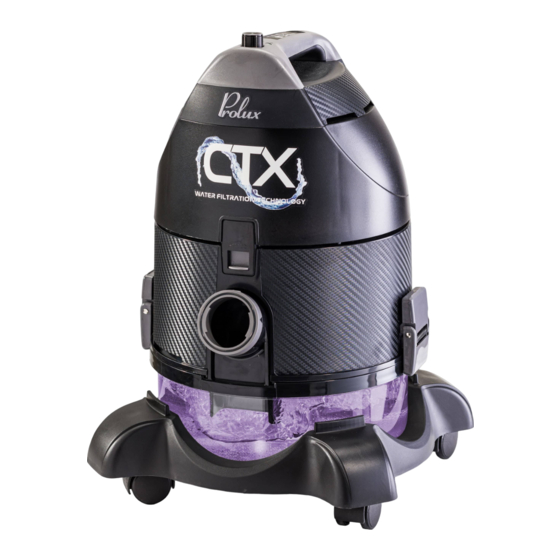
Summary of Contents for Prolux CTX
- Page 2 We wanted you to go to your closet and pull out your new Prolux decades later and say, “Wow I am so glad I bought this”. When you empty out your water bowl each time after you vacuum and say, “wow I can’t believe how much dirt this picked up”...
- Page 3 Quick Assembly For a quick 1-minute video that shows you how to assemble your new vacuum visit https://youtu.be/5cFbR5w1OoM or scan or for a more in-depth video (13 minute demonstration) visit https://youtu.be/77k-ieCxzEs or see image steps for assembly below...
- Page 4 Why do I have to register my warranty within 90 days to get my Lifetime warranty? Great question Do you know what normally kills a vacuum cleaner? 1) Vacuum Bag is overfilled which causes the motor to overheat (good thing this is bagless). 2) Filters needing changed and are clogged which overheats the motor (good thing this does not use filters).
-
Page 5: Frequently Asked Questions
The problem is that they fail (normally within 3 years). We designed the Prolux CTX to last a lifetime, so we did not include a cord rewind feature. 7. Why won’t my electric power nozzle turn on? No worries its always something simple. - Page 6 Specifications …………………………………………..7 Safety & Precautions …………………………………... 8-10 Description of Parts ……………………………………. 12 How to operate & use …………………………………...13-18 Troubleshooting ………………………………………... 19 Warranty ………………………………………………... 20-22 SPECIFICATIONS...
-
Page 7: Safety Instructions
• Water UV Filtration – Not only does the CTX use water to filter with (like nature), it will also have a Nano silver (anti-viral/anti-microbial) germ killing lining inside the water bowl and also an added germ killing LED UV light which shines into the water bowl giving the CTX 3 stages of filtration. - Page 8 Failure to do this could cause a risk of injury and would defeat the utility of the appliance. • Your CTX is provided with a safety interlock switch to prevent operating the appliance without attaching the water container. Because the turbine operates at high speed, this is to protect you from coming into contact with the moving Hydro Turbine.
- Page 9 NEVER vacuum water with the electrical hose. Instead use the non-electrical hose for vacuuming up water. SPECIAL CARE & SAFETY INSTRUCTIONS WATER: Do not operate the CTX for too long without changing the water. When you notice that the water is...
- Page 10 Turbine. Always place it back after cleaning it. SERVICING OF DOUBLE INSULATED APPLIANCES: For your safety and protection, your CTX is a DOUBLE INSULATED appliance. NEVER attempt to service the electrical parts of the appliance. There are special requirements for servicing DOUBLE INSULATED appliances and failure to do so can cause safety hazards with your unit as well as voiding the warranty.
-
Page 11: Description Of Parts
Description of Parts... -
Page 12: Operation And Handling
1. Power Switch 10. Hose Handle Release 19. Hard Floor Tool 2. Power Hose Plug In 11. Wand Extension Button 20. Crevice Tool 3. Suction Port 12. Main Wand 21. Upholstery Tool 4. Hose/Cord Hanger 13. Wand Release Pedal 22. Duster Tool 5. - Page 13 General guidelines for using the CTX: Fill up the water bowl with cold water until it almost covers the top of the central post inside the water bowl (fig 1) The motor unit is then placed on top of the water bowl (fig 2). The suction port of the bowl should be lined up with the notch in the motor unit.
-
Page 14: Using The Attachments
To empty the water bowl: 1. Release both latches by pulling the upper part of the latch down and the lower part up. You can then remove motor unit from the water bowl. 2. Carefully pick up the water bowl by the intake port end, remove it from the wheel dolly and empty the dirty water into the sink or toilet. - Page 15 Using the Hoses The CTX will come with 2 hoses, 1 electrical hose used with the powerhead for dry pickup and 1 non-electric hose used with the attachments and for wet pick up. Both hoses can be used with the attachments, but generally we recommend using the non-electric hose since it’s a lighter hose.
- Page 16 MAIN ELECTRIC HOSE – Use with the electric powerhead and other attachments when needed. Just plug the hose cord into the plug in on the main motor unit and flip the switch on the handle to the ON setting to turn powerhead on TOOL HOSE –...
- Page 17 Head Pivot – Pivot and swivel neck, fully articulating allows you to maneuver Pivot Release – The pivot release pedal will the head with little effort. Will also allow allow you to drop the head’s pivot. This you to get under furniture to really clean model of head has a safety feature where the your carpet.
- Page 18 REMEMBER THE FOLLOWING WHEN USING YOUR VACUUM CLEANER: 1. Before using the machine pick up by hand any hard or sharp objects such as pins, hairpins, thumbtacks, pieces of pencil, etc. that could harm the spinning brush roll. 2. Do not lubricate the motor. The motor has permanent lubrication and is sealed. 3.
- Page 19 3. Handheld Shampooer – This attachment can be used to spray cleaning solution or shampoo onto your upholstery, carpets, stairs, etc to then be hand cleaned. To use the sprayer simply fill it up with a mixture of water and cleaning solution or shampoo, attach the sprayer to the end of the non-electric tool hose wand or the plastic wand extensions (Fig 1).
-
Page 20: Troubleshooting
Troubleshooting Problem Possible Cause Solution Check and make sure the water bowl is securely latched to the main Safety Switch is motor unit and the safety switch on the underside of the motor unit is Not Fully fully engaged. Manually engaging the switch is an easy way to test and Engaged make sure the motor is still working properly. - Page 21 The reason Prolux does this is 1) To know who the original owner is and 2) The #1 killer of vacuums and cleaning appliances is dirty filters, bags, water separator, or brush roll, which then in turn overheats the motor. By registering your warranty with your email address, you will automatically get maintenance notifications when it’s time to maintain your vacuum.
- Page 22 10 years and on 9. Prolux Rebuild Program – As your vacuum gets older, nothing may be wrong with it and it still runs, but not as good as it used to. This does not qualify the vacuum for any warranty issues, but it does qualify for our Prolux Rebuild Program. This program is cheaper than buying new and allows you to ship your vacuum back to Prolux to be rebuilt to like new condition.
- Page 23 Product Warranty Registration Please use the link below to register your Prolux product: https://proluxcleaners.com/pages/warranty For more information on this product, including warranty info and to contact Prolux Customer Service, follow the link below: https://www.proluxcleaners.com Environmental tips Once any electronic product is no longer functional, it should be disposed of in such a way as to cause minimum environmental impact, in accordance with the regulations of your local authority.
Need help?
Do you have a question about the CTX and is the answer not in the manual?
Questions and answers