Table of Contents

Subscribe to Our Youtube Channel
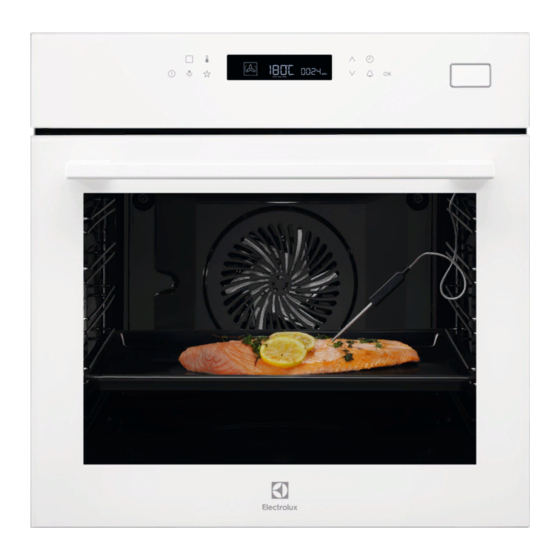
Related Manuals for Electrolux EOB7S31V


Summary of Contents for Electrolux EOB7S31V
- Page 1 Questo manuale d’istruzione è fornito da trovaprezzi.it. Scopri tutte le offerte per Electrolux EOB7S31Z cerca il tuo prodotto tra le migliori offerte di Forni User Manual Steam oven EOB7S31V EOB7S31Z electrolux.com/register...
-
Page 2: Table Of Contents
WE’RE THINKING OF YOU Thank you for purchasing an Electrolux appliance. You’ve chosen a product that brings with it decades of professional experience and innovation. Ingenious and stylish, it has been designed with you in mind. So whenever you use it, you can be safe in the knowledge that you’ll get great results every time. -
Page 3: Safety Information
SAFETY INFORMATION Before the installation and use of the appliance, carefully read the supplied instructions. The manufacturer is not responsible for any injuries or damage that are the result of incorrect installation or usage. Always keep the instructions in a safe and accessible location for future reference. -
Page 4: Safety Instructions
similar accommodation where such use does not exceed (average) domestic usage levels. Only a qualified person must install this appliance and • replace the cable. Do not use the appliance before installing it in the built-in • structure. Disconnect the appliance from the power supply before •... - Page 5 • Before mounting the appliance, check if • Make sure not to cause damage to the the oven door opens without restraint. mains plug and to the mains cable. • The appliance is equipped with an electric Should the mains cable need to be cooling system.
- Page 6 • Open the appliance door carefully. The • Make sure the appliance is cold. There is use of ingredients with alcohol can cause the risk that the glass panels can break. a mixture of alcohol and air. • Replace immediately the door glass •...
-
Page 7: Product Description
• Use original spare parts only. • Disconnect the appliance from the mains supply. 2.8 Disposal • Cut off the mains electrical cable close to the appliance and dispose of it. • Remove the door catch to prevent WARNING! children or pets from becoming trapped in Risk of injury or suffocation. -
Page 8: Control Panel
To measure the temperature inside food. Grill- / Roasting pan Telescopic runners To bake and roast or as a pan to collect fat. To insert and remove trays and wireshelf Food Sensor more easily. 4. CONTROL PANEL 4.1 Electronic programmer 7 8 9 10 Use the sensor fields to operate the oven. - Page 9 Sensor Function Description Field Display Shows the current settings of the oven. To move up in the menu. Down To move down in the menu. Clock To set the clock functions. Minute Minder To set the Minute Minder. To confirm the selection or setting. 4.2 Display A.
-
Page 10: Before First Use
4.3 Heat up indicator When the oven is at the set temperature, the bars go off the display. If you turn on the heating function, appears. The bars show that the temperature in the oven increases or decreases. 5. BEFORE FIRST USE 5.1 Initial Cleaning WARNING! Refer to Safety chapters. -
Page 11: Daily Use
When the water hardness exceeds the Refer to the "Additional functions" chapter, values in the table, fill the water drawer with Using the settings menu. bottled water. Test strip Water Hardness 1. Take the 4 colour change strip supplied with the steam set in the oven. 2. - Page 12 requirements according to EU 65/2014 and EU 66/2014. Tests according to EN 60350-1. Oven function Application The oven door should be closed during To defrost food (vegetables and cooking so that the function is not interrupted fruit). The defrosting time de‐ and the oven operates with the highest pends on the amount and size energy efficiency possible.
-
Page 13: Clock Functions
The Fast Heat Up is available only for some 3. Push the water drawer to its initial heating functions. If Faulty Tone is turned on position. in the settings menu, the signal sounds if the 4. Turn on the oven. Fast Heat Up is not available for the set 5. - Page 14 Clock function Application Time Delay To combine Duration and End Time function. Minute Minder To set a countdown time. This function has no effect on the operation of the oven. You can set the Minute Minder at any time and also when the oven is off.
-
Page 15: Automatic Programmes
3. Press to set the Minute Minder When the Time Delay function is turned on, the display shows a to confirm. symbol of the heating function, 4. Press or the Minute Minder starts with a dot and . The dot automatically after 5 seconds. -
Page 16: Using The Accessories
5. You can change the default weight value 1. Activate the appliance. with . Touch 2. Touch 6. When the set time ends, an acoustic 3. Install the core temperature sensor. Refer to "Core temperature sensor". signal sounds for two minutes. flashes. - Page 17 When you cook with the core temperature sensor, you can change the temperature shown in the display. After you put the core temperature sensor in the socket and set an oven function and temperature, the display shows the current core temperature.
- Page 18 bottom of a baking dish. You can set the core temperature only when flashes. If is in the display but does not flash before you set the core temperature, touch to set a new value. 8. Set the oven function and the oven temperature.
-
Page 19: Additional Functions
Wire shelf: Push the shelf between the guide bars of the shelf support. Baking tray / Deep pan: Push the tray between the guide bars of the shelf support. Wire shelf, Baking tray / Deep pan: Push the tray between the guide bars of the shelf support and the wire shelf on the guide bars above. - Page 20 2. Press and hold at the same 3. Touch and hold at the same time for 2 sec. time for 2 seconds. The signal sounds. A signal sounds. The display shows SAFE. Lock comes on in the display. To turn off the Child Lock function repeat To turn off the Function Lock repeat step 3.
-
Page 21: Hints And Tips
• Night brightness - when the appliance is Minute Minder function ends, the deactivated, the brightness of the display display goes back to the night is lower between 10 PM and 6 AM. brightness. • Day brightness: 10.7 Cooling fan –... - Page 22 Use the second shelf position. VEGETABLES VEGETABLES Set the temperature to 99 °C. Set the temperature to 99 °C. (min) (min) 30 - 40 Sweet corn on the cob 8 - 10 Broccoli, florets, preheat the empty 35 - 45 Black salsify oven 35 - 45...
- Page 23 SIDE DISHES / ACCOMPANIMENTS FISH Set the temperature to 99 °C. (min) (°C) 20 - 30 Mussels (min) 20 - 30 Salmon fillets 20 - 30 Trout, 0.25 kg 35 - 45 Bread dumpling 30 - 40 Prawns, frozen 75 - 85 35 - 45 Potato dumplings 40 - 45...
- Page 24 1. Set the function: Turbo Grilling to roast meat. 2. Add the prepared vegetables and side EGGS dishes. 3. Decrease oven temperature to around 90 °C. You can open the oven door to the Set the temperature to 99 °C. first position for approximately 15 minutes.
- Page 25 (°C) (min) (°C) (min) Terrine 40 - 50 Goose, 3 kg, use the 130 - 170 first shelf position 11.5 Humidity Low 11.6 Steam Regenerating Use the second shelf position unless specified otherwise. Use the second shelf position. (°C) (min) Set the temperature to 110 °C.
- Page 26 Baking results Possible cause Remedy The cake sinks and becomes The oven temperature is too high. Next time set slightly lower oven tempera‐ soggy or streaky. ture. The oven temperature is too high Next time set a longer baking time and and the baking time is too short.
- Page 27 CAKES / PASTRIES / BREADS (°C) (min) Fruit flans made of short pastry 160 - 170 40 - 80 Preheat the empty oven. Use the function: Conventional Cooking. Use a baking tray. CAKES / PASTRIES / BREADS (°C) (min) Swiss roll 180 - 200 10 - 20 Rye bread:...
- Page 28 BISCUITS (°C) (min) Pastries made of egg white / True Fan Cooking 80 - 100 120 - 150 Meringues Rolls, preheat the empty oven Conventional Cooking 190 - 210 10 - 25 11.10 Bakes and gratins Use the first shelf position. (°C) (min) Baguettes topped with mel‐...
- Page 29 BIS‐ CUITS / SMALL (°C) (min) 2 positions 3 positions CAKES / PAS‐ TRIES / ROLLS Short pastry biscuits 150 - 160 20 - 40 1 / 4 1 / 3 / 5 Biscuits made of 160 - 170 25 - 40 1 / 4 sponge cake mixture Puff pastries, pre‐...
- Page 30 PORK Use the function: Turbo Grilling. (kg) (°C) (min) Shoulder / Neck / Ham joint 1 - 1.5 160 - 180 90 - 120 Chops / Spare rib 1 - 1.5 170 - 180 60 - 90 Meatloaf 0.75 - 1 160 - 170 50 - 60 Pork knuckle, precooked...
- Page 31 GAME Use the function: Conventional Cooking. (kg) (°C) (min) Saddle / Hare leg, preheat up to 1 30 - 40 the empty oven Venison saddle 1.5 - 2 210 - 220 35 - 40 Haunch of venison 1.5 - 2 180 - 200 60 - 90 POULTRY...
- Page 32 11.14 Crispy baking with: Pizza Function PIZZA PIZZA Preheat the empty oven before cook‐ ing. Use the first shelf position. Use the second shelf position. (°C) (min) (°C) (min) Tarts 180 - 200 40 - 55 Pizza, thick 180 - 200 20 - 30 Spinach flan 160 - 180...
- Page 33 GRILL Use the function: Grill (°C) (min) (min) 1st side 2nd side Roast beef 210 - 230 30 - 40 30 - 40 Beef fillet 20 - 30 20 - 30 Pork loin 210 - 230 30 - 40 30 - 40 Veal loin 210 - 230 30 - 40...
- Page 34 1. Sear the meat for 1 - 2 minutes on each 4. Select the function: Slow Cooking. You side in a pan over high heat. can set the temperature between 80 °C 2. Put the meat in the roasting pan or and 150 °C for the first 10 minutes.
- Page 35 11.19 Preserving Use the function Bottom Heat. VEG‐ Use only preserve jars of the same ETABLES (min) (min) dimensions available on the market. Cooking Continue to Do not use jars with twist-off and bayonet time until cook at type lids or metal tins. simmering 100 °C Use the first shelf position.
- Page 36 11.21 Food Sensor BEEF Food core temperature (°C) Rare Medium Well done Roast beef Sirloin BEEF Food core temperature (°C) Less Medium More Meatloaf PORK Food core temperature (°C) Less Medium More Ham / Roast Saddle chop / Pork loin, smoked / Pork loin, poached VEAL Food core temperature (°C)
- Page 37 GAME Food core temperature (°C) Less Medium More Hare leg / Hare, whole / Venison leg POULTRY Food core temperature (°C) Less Medium More Chicken Duck, whole / half / Turkey, whole / breast Duck, breast FISH (SALMON, TROUT, Food core temperature (°C) ZANDER) Less Medium...
- Page 38 Ramekins Pizza pan Baking dish Flan base tin Ceramic Dark, non-reflective Dark, non-reflective Dark, non-reflective 8 cm diameter, 5 28 cm diameter 26 cm diameter 28 cm diameter cm height 11.23 Moist Fan Baking For the best results follow suggestions listed in the table below.
- Page 39 BAKING ON ONE LEVEL. Baking in tins (°C) (min) Apple pie, 2 tins Ø20 cm True Fan Cooking 60 - 90 Apple pie, 2 tins Ø20 cm Conventional Cooking 70 - 90 BAKING ON ONE LEVEL. Biscuits Use the third shelf position. (°C) (min) Short bread / Pastry strips...
- Page 40 GRILL Preheat the empty oven for 5 minutes. Grill with the maximum temperature setting. (min) Toast Grill 1 - 3 Beef steak, turn halfway through Grill 24 - 30 FAST GRILLING Preheat the empty oven for 3 minutes. Grill with the maximum temperature setting. Use the fourth shelf position.
-
Page 41: Care And Cleaning
Set the temperature to 99 °C. Container (Gas‐ (kg) (min) tronorm) Broccoli, preheat the 1 x 1/2 perforated 13 - 15 Put the baking empty oven tray on the first shelf position. Broccoli, preheat the 2 x 1/2 perforated 2 x 0.3 2 and 4 13 - 15 Put the baking... - Page 42 12.2 How to remove: Shelf supports Remove the shelf supports to clean the oven. Step 1 Turn off the oven and wait until it is cold. Step 2 Carefully pull the shelf supports up and out of the front catch. Step 3 Pull the front end of the shelf support away from the side wall.
- Page 43 12.5 How to use: Steam Cleaning - S2 Before steam cleaning: Turn off the oven and wait until it is Remove all accessories. Clean the bottom of the cavity and cold. the inner door glass with a soft cloth with warm water and a mild deter‐ gent.
- Page 44 Step 6 Select S3. Duration: 1 h 40 min Step 7 When the function ends, empty the deep pan. When this function works, the lamp is off. When descaling ends: Turn off the oven. When the oven is cold, Leave the oven door Turn on the function: Rinsing.
- Page 45 12.10 How to remove and install: CAUTION! Door Carefully handle the glass, especially around the edges of You can remove the door and the internal the front panel. The glass can glass panels to clean it. The number of glass break.
-
Page 46: Troubleshooting
Before you replace the lamp: Step 1 Step 2 Step 3 Turn off the oven. Wait until the Disconnect the oven from the Put a cloth on the bottom of the cav‐ oven is cold. mains. ity. Top lamp Step 1 Turn the glass cover to remove it. - Page 47 Problem Possible cause Remedy The oven does not heat up. The necessary settings are not set. Make sure that the settings are cor‐ rect. The oven does not heat up. The automatic switch-off is activa‐ Refer to "Automatic switch-off". ted. The oven does not heat up.
-
Page 48: Energy Efficiency
......... Serial number (S.N.) ......... 14. ENERGY EFFICIENCY 14.1 Product Information and Product Information Sheet* Supplier's name Electrolux EOB7S31V 944184891 Model identification EOB7S31Z 944184890 Energy Efficiency Index 81.0 Energy efficiency class Energy consumption with a standard load, conventional mode 1.09 kWh/cycle... - Page 49 Heat source Electricity Volume 70 l Type of oven Built-In Oven EOB7S31V 37.5 kg Mass EOB7S31Z 37.5 kg * For European Union according to EU Regulations 65/2014 and 66/2014. For Republic of Belarus according to STB 2478-2017, Appendix G; STB 2477-2017, Annexes A and B.
-
Page 50: Environmental Concerns
15. ENVIRONMENTAL CONCERNS appliances marked with the symbol with Recycle materials with the symbol . Put the household waste. Return the product to the packaging in relevant containers to your local recycling facility or contact your recycle it. Help protect the environment and municipal office. - Page 52 electrolux.com...
Need help?
Do you have a question about the EOB7S31V and is the answer not in the manual?
Questions and answers