ESX VISION ANDROID Series Installation Manual
Smart naviceiver
Hide thumbs
Also See for VISION ANDROID Series:
- Owner's manual (36 pages) ,
- Installation manual (17 pages) ,
- Owner's manual (36 pages)

Related Manuals for ESX VISION ANDROID Series


Summary of Contents for ESX VISION ANDROID Series
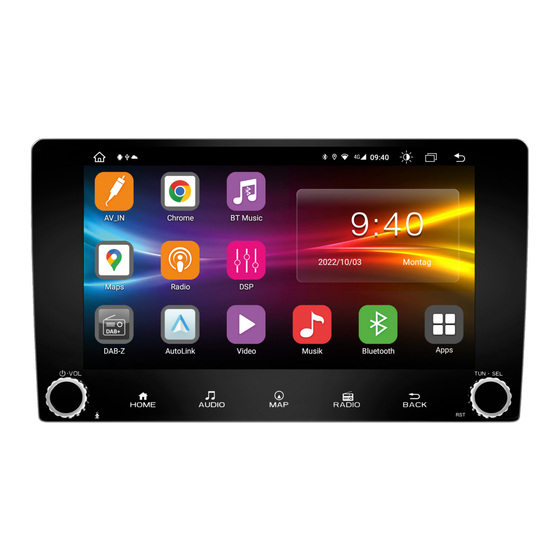
- Page 1 VN940-4G SMART NAVICEIVER MOBILE INTERNET READY V I S I O N A N D R O I D S E R I E S ™...
-
Page 2: Important Notes
IMPORTANT NOTES This guide is an aid for the professional installation of the device. Please note the following notes before installation: • Always handle all parts of the device and the components of your vehicle with care. • Under all circumstances observe the regulations of the vehicle manufacturer and do not make any changes to the vehicle which could impair driving safety. -
Page 3: Installation Hints
Lay the supplied cable sets and antennas in the vehicle. Please note the information on the next page. Then connect all cable sets, antennas and dongles to the ESX main device as described on page 6. Then plug in the cable plug from the radio slot of the vehicle on the ESX main unit or on its vehicle-specific system cable set. -
Page 4: Scope Of Delivery
SCOPE OF DELIVERY ITEM FIGURE QUANTITY Main device Art.-Nr. VN940-4G System cable set with ISO connector (20-pin plug) Art. No. ZEOS-A80650-022 V cable set 1 with audio and video connections incl. rear view camera (14-pin plug) Art. No. ZERW-120014-207 USB port 1 (4-pin plug) Art. - Page 5 SCOPE OF DELIVERY ITEM FIGURE QUANTITY Y-adapter for the external microphone and the receiver of the separately available remote control (6-pin plug) Art. No. ZERW-121506-200 External microphone (Mini jack) Art. No. ZECL-035201-330 GPS antenna Art. No. ZESW-011701-007 DAB antenna Art. No. VNA-ANT-DAB5 4G/LTE antenna Art.
-
Page 6: Wiring Diagram
WIRING DIAGRAM GPS antenna 4G/LTE antenna Fuse 10 A WiFi antenna DAB antenna Inputs for Optical stereo 20-pin system socket AV cable sets audio output (S/PDIF) Radio antenna plug from vehicle (FM/AM) System cable set (20-pin plug, black) Cable brown (BRAKE): Connection for handbrake signal (ground) Cable pink (REVERSE): Connection for reverse gear signal (+12V) - Page 7 WIRING DIAGRAM USB port 1 (4-pin plug, purple) Use this USB port for USB storage media. For example, the cable can be routed into the glove compart- ment so that the USB socket is accessible there. 4G/LTE dongle (6-pin plug, turquoise) Please note the information on page 10.
-
Page 8: General Installation Instructions
GENERAL INSTALLATION INSTRUCTIONS GPS antenna Remove the foil on The GPS antenna should be glued horizontally to the dashboard with the the bottom of the adhesive side down. Reception is not possible with a metal-coated pane. GPS antenna Choose a level spot with a clear view of the sky. The location should be about 50 - 70 cm away from the main unit, otherwise the GPS measurement accuracy will decrease. - Page 9 rt werden. Verstärkereinheit GENERAL INSTALLATION INSTRUCTIONS DAB antenna Naviceiver/Radio – Warten Sie, bis die Glasober äche vollständig der Frontsäule. In newer vehicles, the original vehicle antenna can usually be used for both analogue and digital radio trocken ist, bevor Sie fortfahren. reception.
- Page 10 SETUP THE 4G/LTE INTERNET CONNECTION First lay the two 4G/LTE antennas inside the dashboard towards the windshield, one an- tenna for the left and one for the right. Ideally, you should stick the antennas to the windshield to ensure optimal reception. Then insert your SIM card in the 4G/LTE dongle: Open the dongle by pushing the flap to the Now open the metal flap carefully with a...
- Page 11 SETUP THE 4G/LTE INTERNET CONNECTION Then turn on the device to test the 4G/LTE connection. After the device has started, enter your 4-digit After successful entry, the SIM card is un- PIN code of the SIM card here. Confirm the locked.
-
Page 12: Rear View Camera Settings
REAR VIEW CAMERA SETTINGS If you have connected a compatible reversing camera to the camera input of the device, the camera image is automatically displayed when reverse gear is engaged. This view is also shown when pressing the camera direct button. If your rear view camera does not have dynamic To do this, open the Car Infotainment menu guidelines, you can use the device‘s static parking... - Page 13 REAR VIEW CAMERA SETTINGS If you have connected a compatible additional camera to the second camera input of the device, this will be displayed via the F-CAM app. This view is also shown when you press (twice) the camera direct button, but only if you have previously activated it.
- Page 14 HD CAMERA SETTING If you are using an ESX HD camera or a compatible AHD camera on cable set „A“ (14-pin plug, black), the settings in the ESX Naviceiver must be changed accordingly. Open the Settings from the app menu, then tap Tap on About Device below.
- Page 16 ESX Car Media Systems · Audio Design GmbH Am Breilingsweg 3 · D-76709 Kronau/Germany Tel. +49 7253 - 9465-0 · Fax +49 7253 - 946510 www.esxnavi.de - www.audiodesign.de © Alle Rechte vorbehalten. Technische Änderungen und Fehler vorbehalten.
Need help?
Do you have a question about the VISION ANDROID Series and is the answer not in the manual?
Questions and answers