Table of Contents
Advertisement
Quick Links
Advertisement
Table of Contents

Related Manuals for ESX VNC1045-DBJ


Summary of Contents for ESX VNC1045-DBJ
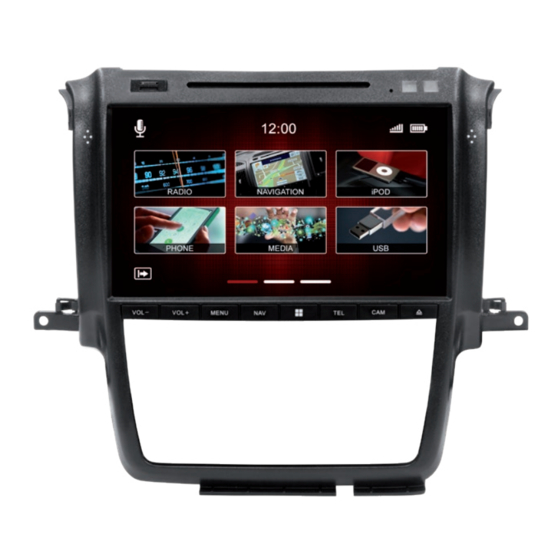
- Page 1 VNC1045-DBJ...
-
Page 2: Table Of Contents
INDEX Safety Information ......................... 4 Notes for the intended use ......................5 Specifications ..........................6 Operating elements ........................7 First steps ............................8 System settings ..........................9 Camera settings........................... 13 Mani menu ............................ 14 Navigation ............................ 15 Radio ............................. 16 Overview of FM functions ....................... - Page 3 INDEX File ..............................44 General ........................... 44 Key functions in the file menu ....................44 Audio ............................45 General ........................... 45 Fader - Balance - Delay ......................46 Bass - Middle - Treble ......................46 Equalizer ..........................47 Source ............................ 48 Further settings ........................49 Android Link ..........................
-
Page 4: Safety Information
SAFETY INFORMATION • In general, the assembly and installation of the device must be performed by a trained and technically skilled specialists, as the installation and connection of the device requires complex knowledge. • This device is only suitable for the operation in a vehicle with an on-board voltage of 12 volts, negative ground. -
Page 5: Notes For The Intended Use
SAFETY INFORMATION this is dangerous and could cause injury or damage to the equipment or vehicle. A repair should be done by trained and authorized personnel only. The device uses a Class 1 laser to read the disk. Eye contact with a laser is very dangerous to the human eye. •... -
Page 6: Specifications
SPECIFICATIONS Technical features: iPod: Operating system: WinCE with own developed iPod connection: Via USB/iPod charge cable firmware DynOS Operation via touchscreen: CPU: 833MHz Playlists: External connections: Video Output Select option: Playlist / Album / Artist / Audio Output Song / Podcast / Audio book A/V Input Alphabetical search: DVB-T2 Input Title information: Compatibility iPod: Classic - 80GB / 120GB / General features: 160GB (30pin) Direct access keys: Louder, quieter, menu, function key, Touch: 1G - 4G navigation, phone, camera, eject CD Video: 5G / 6G... -
Page 7: Operating Elements
OPERATING ELEMENTS Key assignment on the device VOL + Increases volume Starts navigation VOL - Reduces volume Starts phone menu MENU Main menu Starts camera menu Freely assignable multifunction key Ejects inserted CD/DVD Radio restart Press and hold the multifunction button for 10 seconds. -
Page 8: First Steps
FIRST STEPS Note: Before you use the device, you should save a backup copy of the navigation software on your PC. After switching on the device for the first time, the radio interface appears. How the touchscreen works Most functions of the device are controlled via the touchscreen. To facilitate operation, some functions and actions that you can perform on the touchscreen are indicated by icons in the instructions of this owner‘s manual. -
Page 9: System Settings
As soon as you check off the handbrake, you will see an information screen indicating that this is not allowed while driving. WARNING: Inform yourself in your country according to the specifications and legal regulations. If you activate this option without permission, this can lead to considerable fines. This is a setting that is not enabled by ESX for general use and assumes no liability. This setting is only activated by the user and owner, who thus assumes all responsibility for the activation. Region Here you can set the system language. - Page 10 SYSTEM SETTINGS Brightness There are several options for setting and controlling the brightness. This also includes the dimming function. First of all, touch the arrow down button to the right of the menu item Auto / Manual After you have touched the arrow, the submenu opens. Depending on the selected function, another option will be enabled in the settings.
- Page 11 SYSTEM SETTINGS Parking aid If no camera is installed Camera If at least one camera is installed If you select Off, nothing will happen when engaging reverse gear, the screen will remain in the menu you are currently in. If you select Camera, you will see the camera image when engaging the reverse gear. Please note that the representations of the systems offer only a supportive function.
- Page 12 SYSTEM SETTINGS Front Camera Enable If a front camera has been installed, this can be used to set how long the front camera remains switched on after leaving reverse gear. Video Input Adjust the brightness and contrast for video sources. Dual zone If you have activated the option, for example, the navigation will be displayed on the monitor of the device and a movie will be played in the passenger area.
-
Page 13: Camera Settings
CAMERA SETTINGS Touch the settings icon to make the following settings for the camera: Marker Show or hide the markers (red, yellow, green) Vehicle angle (indication depending on vehicle and year of construction, or not available) Show or hide vehicle angle Reset camera image mirroring Camera image mirroring Select line to adjust (1, 2 or 3) -
Page 14: Mani Menu
MAIN MENU The main menu is divided into three pages. You can reach the next page by pressing on the page navigation lines or by sliding. Depending on the selected user interface, the display of the functions may vary. Touch the screen with one finger and then move it to the right or left. This will move you to each page of the main menu. -
Page 15: Navigation
NAVIGATION Start the navigation Now go to the main navigation menu or press the NAV button on the device. The first start may take a moment. The owner’s manual for the navigation software can be downloaded from our website www.esxnavi.de in the download area. Carry out map update To perform a map update, you need to download software from the navigation software vendor. The software (Naviextras Toolbox) can be found for free at www.naviextras.com. -
Page 16: Radio
RADIO To open the Radio menu, press Radio on the first page of the main menu. Overview of FM functions Store stations Press and hold the station memory of your choice for 2 seconds. The station is then stored in this station memory. Changing station Station memory 1-15 Slide left or right to view all station memories Back to main menu Show / change frequency band Band... -
Page 17: Switching Between Bands
RADIO Change frequency band To change the frequency band (for example, FM to DAB+), press the „FM Band“ key. Subsequently, another window opens. Select „DAB+“ here. Overview of DAB+ functions Store stations Press and hold the station memory of your choice for 2 seconds. -
Page 18: Settings Fm
RADIO FM settings A short touch of the box next to the caption will activate the option. A check mark will show you that the option is selected. High-Cut The high-cut function automatically converts the signal from stereo to mono. TA = Traffic Announcement If this option is activated, traffic announcements are automatically imported into the running program. With a pop- up menu you have the option to turn off the traffic news or continue listening. Set the value by how many volume... -
Page 19: Settings Dab
RADIO AF = Alternative frequency When AF is activated, the radio automatically switches to another frequency with better reception. Auto The radio always switches to a radio station, which currently promises the best reception, even if a regional program is interrupted. Manual: With a manual alternative frequency setting, the radio switches only to alternative frequencies of the current station with an identical regional program. -
Page 20: Disc/Dvd
DISC/DVD Insert a CD or DVD in the drive. After loading the media, the movie starts playing or the start menu of the movie is displayed. To eject the CD/DVD, press the eject button on the front of the device. If you do not want to eject the media, but want to return to the previous menu, briefly press the MENU button on the front of the device. - Page 21 DISC/DVD By briefly pressing the displayed functions you can make the following selection: Previous song Repeat all titles within the folder Shuffle Next song With this setting, titles are played randomly from the folder you are cur- rently in. The shuffle icon will appear Play/Pause in the upper part of the window as confirmation of the selection. Repeat title Press once - The song is repeated Sub menu once.
- Page 22 DISC/DVD CD/DVD video playback To access the control bar during video playback, briefly tap the screen. Then you have the following functions to choose from: Previous chapter Change audio channels Next chapter Control center Play/Pause Shuffle Stop Open playlist Repeat video Without function Press once - the video is repeated once. Press twice - the video is repeated Back to main menu constantly.
-
Page 23: Phone
Phone pairing To access the phone menu, press the phone key on the sceen or the TEL key on the device. To use the phone or Bluetooth feature, first connect your smartphone to the ESX device. Turn on the Bluetooth option on your smartphone and search for nearby devices. If your smartphone has completed the search, you should see the display ESX-VNC. Pair the smartphone with the device. -
Page 24: Key Functions In The Phone Menu
PHONE Key functions in the phone menu By briefly pressing the keys you can make the following selection: Delete entry Each time you press the button, the last digit of the entered numbers is deleted. Accept a call Accept incoming calls or dial numbers. Hang up call End calls or reject incoming calls. Call favorites Activate Google Voice or Siri on your smartphone Call history... -
Page 25: Call History
PHONE Call history Here the last incoming and outgoing calls are displayed. The contacts are displayed with the following symbols. Display the last incoming calls. The last 20 calls are displayed. Display the last outgoing calls. The last 20 calls are displayed. Display the missed calls. - Page 26 PHONE Phone book By briefly pressing the keys you can make the following selection: Select keyboard layout You have the option between: Cyrillic, Greek, Latin Delete last entry Search (open/close keyboard) Search your phone contacts Switch between numbers/special characters and letters Touching one of the letters or symbols of the displayed virtual keyboard is considered as input for the search and will be displayed in the upper line.
-
Page 27: Call Contact From The Phone Book
PHONE Call contact from the phone book You can use the following functions with the three functions below the contact. Call contact Select another phone number stored under the contact. Depending on how many numbers you have assigned to a contact, you can use this key to select the stored numbers. -
Page 28: Ipod
iPOD First connect an iPod to a free USB port on the device. Use only USB cables approved by Apple . Otherwise, it ® may cause malfunction or your iPod will not be recognized by the device. You can only access the menu if you have connected an iPod to the device via the USB port. -
Page 29: Key Functions In The Ipod Menu
iPOD Key functions in the iPod menu By briefly pressing the displayed functions you can make the following selection: Previous song Repeat all titles within the folder Shuffle Next song With this setting, titles are played randomly from the folder you are cur- rently in. The shuffle icon will appear Play/Pause in the upper part of the window as confirmation of the selection. -
Page 30: Key Functions In The Ipod Submenu
iPOD Key functions in the iPod sub menu Scroll up and down to browse the songs, artists, or playlists in the displayed list. By briefly pressing the displayed functions you can make the following selection: Opens the content of the iPod by albums All stored albums are displayed by name. Opens the content of the iPod by artists All stored artists are displayed by name. -
Page 31: Menu Albums
iPOD Menu albums If you have opened the menu albums, all stored albums will be displayed by name as shown above. A short press on the name of an album will open all songs stored in the album and will be displayed. With another pressure on one of the stored songs, the selected song will be played. -
Page 32: Menu Artists
iPOD Menu artists If you have opened the menu for artists, you will see all stored artists with names as shown above. A short press on the name of an artist opens a new window with either all albums of the artist or the stored songs, if no album has been deposited. -
Page 33: Menu Playlists
iPOD Menu playlists If you have opened the menu albums, all stored playlists with songs will be displayed as shown above. A short press on a playlist starts the playback. Scroll up and down to browse the playlists and songs in the displayed list. If you want to search the contents of the folder, use the search function in the menu. -
Page 34: Menu Songs
iPOD Menu songs If you have opened the menu songs, all stored songs will be displayed as shown above. By a short press on the title of a song starts its playback. On the left of the song title, a symbol appears, to show you which song is currently being played. -
Page 35: A2Dp (Bluetooth Audio Streaming)
A2DP (BLUETOOTH AUDIO STREAMING) To use the A2DP feature, you need to pair your smartphone with the device via Bluetooth. The smartphone must support the A2DP playback therefor. The playback window provides information about the title, artist, and album. These are only displayed if the played songs contain this information. -
Page 36: Usb & Sd Menu
USB & SD To access the USB or SD menu, press USB or SD on the screen. You can only access the respective menu if you have also connected an SD card or USB stick to the device. Insert the SD card only into the upper SD card slot on the front of the unit. -
Page 37: Key Functions In The Usb & Sd Submenu
USB & SD Button functions in the USB & SD submenu Scroll up and down to browse the artists, albums and songs in the displayed list. By a short press on the symbols you can make the following selection: Opens all information of the medium Opens all music files on the medium in a directory structure Opens the input menu for searching... -
Page 38: Menu Albums
USB & SD Menu albums If you have opened the menu albums, all stored albums will be displayed by name as shown above. A short press on the name of an album will open all songs stored in the album and will be displayed. With another pressure on one of the stored songs, the selected song will be played. -
Page 39: Menu Artists
USB & SD Menu artists If you have opened the menu for artists, you will see all stored artists with names as shown above. A short press on the name of an artist opens a new window with either all albums of the artist or the stored songs, if no album has been deposited. -
Page 40: Menu Songs
USB & SD Menu songs If you have opened the menu songs, all stored songs will be displayed as shown above. By a short press on the title of a song starts its playback. On the left of the song title, a symbol appears, to show you which song is currently being played. -
Page 41: Menu Video
USB & SD Menu video By a short press on the title of a movie starts the playback. Scroll up and down to browse the videos in the displayed list. By a short press on the symbols you can make the following selection: >... -
Page 42: Menu Picture
USB & SD Menu pictures A short press on one of the pictures shows it in large format. Scroll up and down to browse through the images in the displayed table. Save bootlogo You can define any JPEG image as the startup image / bootlogo. Simply open the desired image on your medium and press the „Boot- logo“... -
Page 43: Menu Usb & Sd Folder Structure
USB & SD Menu USB & SD folder structure Scroll up and down to browse the directories in the displayed list. A short press opens a folder in the displayed list. If you select a folder, you can go to the other subdirectories and call up the content there. Touch the keyboard icon to open the search function. By typing in the keyboard, you can search for files and folders. -
Page 44: File
FILE In this menu you can copy or delete files between different storage media. You can save the files e.g. from a connected SD card to a connected USB stick. First, touch a button (for example, Media-SD). You will get an overview of all files on the SD card. These are displayed in a folder structure. Here you can now select and copy, paste or delete files. Function in the file menu Copy Delete Copy one or more files Delete the selected files Paste Paste one or more files Back to the previous menu Select All Back to main menu Selection of all files... -
Page 45: Audio
AUDIO The device offers you a new variety of options to adjust the sound to your needs. Some options take you to a new menu window, where further settings can be made. Scroll up and down to browse through the options. A short press selects an option. -
Page 46: Fader - Balance - Delay
AUDIO Fader – Balance – Delay In this menu, you can adjust the speakers to your seating position. Time Correction Sound distribution The cursor shows the current sound distribution in the interior. To change the sound distribution, briefly tap in the interior view on the desired position or use the arrow keys to step through the change. -
Page 47: Equalizer
AUDIO Equalizer In this menu you have the possibility to adjust the sound character of the audio source. Set the different frequency ranges according to your taste. You can choose between the presets FLAT, POP, CLASSIC and ROCK. You can make your own settings via the USER button. -
Page 48: Source
AUDIO Source Here you can adjust the volume level of the several audio sources. In the 0 position, the set volume of the radio is adopted. In the ranges above or below 0 it will be automatically adjusted by this value. With an up and down movement, you can bring the faders in the desired position. -
Page 49: Further Settings
AUDIO Further settings Navi Volume setting of navigation announcements via the sound system. Note: If you want to hear navigation announcements, this fader should never be set to “0” position. This level adapts to your set navigation volume. Confirmation tone Here you can activate or deactivate the key tones or adjust the volume of the key tones. -
Page 50: Android Link
ANDROID LINK Settings on the smartphone To use Android Link, you need to enable Developer Options on your smartphone: Go to the phone settings and select „About phone“. 1. Tap on „Build-Number“ to enable the „Developer Options“ (Pop-Up appears) 2. Select „Developer Options“ 3. -
Page 51: Android Link Operation
ANDROID LINK Android Link operation Main menu 2 - select Android Link Android Link functions Select the Android Link button in main menu 2. here you can see the functions of the Android Then the Android smartphone is connected and Link menu. -
Page 52: Firmware Update
Only use storage media which are 100% correct. If an error occurs on an SD card or a defect in the card, may result in an update error and the device will be damaged. Check the download section under www.esxnavi.de for more information. Only use updates for the VNC1045-DBJ that have been approved by ESX. Use an SD card for a firmware update. This SD card must be formatted FAT32 and there should be no additional data on the SD card. -
Page 53: Voice Control
The update has been successfully. VOICE CONTROL The voice control icon activates SIRI (Apple) or Google Voice (Android) on your smartphone. Then you can retrieve all the commands of the respective operating system as usual and have them played back on the ESX device. For example, make calls. To activate voice control, press the microphone icon found in the three main menus on the upper left screen. -
Page 54: Station Logos
Insert an SD card into the computer. You may need a USB SD card adapter to do this. Download the logos of the radio stations you want to use. These can be found on the homepage of the radio stations or on the Internet. These files are not provided by ESX. Note the file size that the images do not exceed an aspect ratio of 122 x 92px. You may need to edit the images to resize them. The files must be saved in .jpg/.bmp or .png format. - Page 55 RADIO STATION LOGOS Logos for DAB+ must be saved under DAB The two folders must be in the main directory of the SD card.
-
Page 56: Start Screen / Boot Logo
BOOTLOGO You can define any JPEG image as the bootlogo. Simply open the desired image on your SD card or USB stick and press the „Bootlogo“ button in the lower left corner of the screen. In the optimal case, the bootlogo should have a resolution of 1024 x 600 px and should not exceed a size of 500 kB. Only images in JPEG format can be used for this function. As soon as the selected image has been saved as bootlogo, it‘s confirmed by the green symbol in the lower left corner. If you want to delete this again, press the symbol again. As soon as an image has been saved as the bootlogo, you will recognize this by the red symbol. -
Page 57: Troubleshooting / Frequently Asked Questions
TROUBLESHOOTING / FREQUENTLY ASKED QUESTIONS If you have any problems with the device, contact your dealer or the Audio Design service department under Tel. +49 7253 - 94 65 95 or by e-mail at navi@esxaudio.de. Inform yourself in advance on our FAQ page if the problem has already been described. We have listed the frequently asked questions there. -
Page 58: General Information
GENERAL NOTES Care and Maintenance This device is equipped with high precision and sensitive technique and should always be treated with caution. Please note the following tips to avoid endangering the warranty and extend the life of the appliance. • Children under 12 should not operate the device. Keep the device and all accessories away from small children. • Keep the device and its components dry. The effects of water, liquid or moisture can cause damage to the vehicle, the device itself or injury. • Keep the device and its components away from excessive heat. High temperatures may shorten the life of appliance of the electrical components. • Keep the device and its components away from excessive cold. Extreme temperature changes and moisture inside the device may cause the breaking of certain components. Do not to drop the device and avoid violent shocks or excessive shaking. • Do not use strong chemical cleaners, solvents or water to clean the device. Use a slightly moistened cotton cloth with soft surface. • Replace a blown fuse only with a new one with the same values . However, before you replace a defective fuse, check at first what is the cause of the short circuit. Start with the power supply cable. If the fuse blows again, a malfunction consists inside the device. In this case you should contact your authorized dealer. Important note: In case of loss or damage to the micro SD memory card that contains the navigation software, expires the associated navigation license. In this case, a new software license must be purchased along with a new micro SD memory card. - Page 59 GENERAL NOTES Legal Notice • ESX or Audio Design GmbH are in no way affiliated with the manufacturer or any of its subsidiaries or affiliated companies connected to, or is acting on its behalf or with its authorization. • All registered product names, trade marks and brands are the property of their respective owners. • This owner‘s manual was made with the utmost care. • If you need to dispose the device, be aware that no electronic devices should be deposed in the household waste. Dispose the device in an appropriate recycling facility according to the local waste regulations. Consult if necessary your local authority or dealer. • Technical changes and errors reserved. Due to the ongoing development of this device, it is possible that the information in this manual is incomplete or is not matching to the delivery status. Please visit periodically www.esxnavi.de on the internet, to check if additional information and software updates are available. Customer service In general, the assembly and installation of the device should be made by a trained and technically skilled specialists. If you have any problems with operating the device, contact your specialist dealer or the Audio Design Service Depart- ment under Tel. +49 7253 - 94 65 95 or by E-Mail to navi@esxaudio.de. Declaration of Conformity...
- Page 60 ESX Car Media Systems · Audio Design GmbH Am Breilingsweg 3 · D-76709 Kronau/Germany Tel. +49 7253 - 9465-0 · Fax +49 7253 - 946510 www.esxnavi.de - www.audiodesign.de ©2018 All Rights Reserved Reprinting and reproduction, even in parts, is prohibited.
Need help?
Do you have a question about the VNC1045-DBJ and is the answer not in the manual?
Questions and answers