ESX VISION ANDROID Series Owner's Manual
Smart naviceiver
Hide thumbs
Also See for VISION ANDROID Series:
- Owner's manual (36 pages) ,
- Installation manual (17 pages) ,
- Installation manual (17 pages)

Related Manuals for ESX VISION ANDROID Series


Summary of Contents for ESX VISION ANDROID Series
- Page 1 VN940-4G SMART NAVICEIVER MOBILE INTERNET READY V I S I O N A N D R O I D S E R I E S ™...
-
Page 2: Table Of Contents
INDEX Always follow the instructions in this manual before using the device. Please keep this manual easily accessible in the vehicle for future reference. Disclaimer .............................3 Intended use of the device ........................3 Disposal..............................3 Declaration of conformity ........................3 General Information ..........................4 Safety Information ..........................5 1. -
Page 3: Disclaimer
ATTENTION: Your ESX device has an internal memory with a limited capacity. By downloading apps, pictures and music you fill up this memory. When the memory is full, there is a possibility that apps may stop working or be of limited use. -
Page 4: General Information
GENERAL INFORMATION Legal Notice • ESX or Audio Design GmbH are in no way affiliated with the car manufacturer or any of its subsidiar- ies or affiliated companies connected to, or is acting on its behalf or with its authorization. -
Page 5: Safety Information
SAFETY INFORMATION • Note any time the traffic regulations of the country in which the device is operated. • Please ensure, that with the engine turned off the vehicle‘s battery does not discharge fully. The de- vice is another electrical consumer which must be operated with the engine running, other-wise the vehicle‘s battery will be discharged and the vehicle can not be started. -
Page 6: Brief Overview
1. BRIEF OVERVIEW 1.1 FUNCTION KEYS Internal microphone Number Function Description Switching on or off Press and hold the button for more than 3 seconds to turn the device with or without ignition on or off without ignition. Mute Press the button briefly during operation to switch the mute function on or off. -
Page 7: Operation
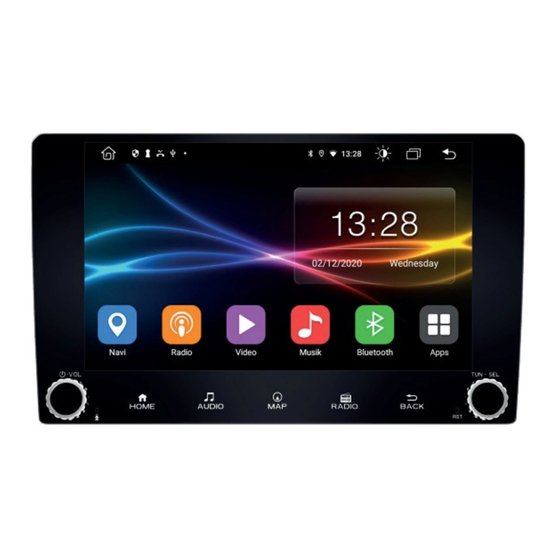
1. BRIEF OVERVIEW 1.2 OPERATION This device has five freely assignable main menus that you can access with a swipe to the right or left to the edge of the screen. You can recognize the main menus by their colored background. You can start any app or widget by briefly tapping the respective icon. -
Page 8: Time And Date Settings
1. BRIEF OVERVIEW 1.4 TIME AND DATE SETTINGS This device has the function of automatically calibrating the current time via active GPS reception. You can also set the date, time zone, and format manually. If you tap on the widget with date and time in the main menu, you will also be taken directly to this menu. -
Page 9: Display / Key Illumination
1. BRIEF OVERVIEW 1.6 DISPLAY / KEY ILLUMINATION In the display menu you can make settings for the display brightness, the key illumination and the screen saver function. Apps > Settings > Car settings > Display 1.7 RESET BUTTON If the device no longer reacts to inputs, the system is overloaded or has crashed. Then reset the device by pressing the reset button (RST) on the front panel. -
Page 10: Basic Settings
2. BASIC SETTINGS 2.1 CUSTOMIZED MAIN MENU BASIC APPS IN THE MAIN MENUS In each of the five main menus there are six basic apps at the bottom, which you can freely define. To move or delete an app, press and hold it and drag the app to another location or move the app to the trash. - Page 11 2. BASIC SETTINGS APPS IN THE MAIN MENUS You can freely move any app or widget to the main panel of any main menu. In total, you can assign all five main menus to suit your needs. For example, pull Maps forward. You can access Tap on Apps in the lower right.
- Page 12 2. BASIC SETTINGS To place another widget in the free space, tap Tap on WIDGETS in the app menu, Apps in the lower right corner. To select the Media widget, swipe left to view the Drag the widget you want upwards. next page of the menu.
-
Page 13: Background Image
2. BASIC SETTINGS In order to place a new widget, the position must The right side of the main menu is now freely first be cleared again. To do this, drag the widget assignable again. to the bottom right. 2.2 BACKGROUND IMAGE You have the option of changing the background of the five main menus as you wish. -
Page 14: Split Screen
2. BASIC SETTINGS 2.3 SPLIT SCREEN Tap in the status bar on All currently used or recently used apps can be Select the app you want and slide the window all seen in this selection. the way to the left until it clicks into place. The primary app is now always displayed on the The secondary app on the right can be changed left. -
Page 15: Steering Wheel Control
2. BASIC SETTINGS 2.4 STEERING WHEEL CONTROL Here you can define the control buttons of your steering wheel and synchronize them with the device. Apps > Settings > Car settings > SWC Important note: Some vehicles compatible. The device is CAN bus compatible, but you may need a vehicle-specific adapter or module. -
Page 16: Internet Connection Via Wifi
2. BASIC SETTINGS 2.5 INTERNET CONNECTION VIA WIFI / HOTSPOT In order to be able to fully use the Android ™ operating system, such as Google Maps, it is useful to connect the device to the Internet via Wi-Fi. All you need is a smartphone with a mobile internet connection and the so-called hotspot function. -
Page 17: Internet Connection Via 4G/Lte
> Turn off the device and have your PIN code ready to unlock your SIM card > Then connect the 4G/LTE dongle with antennas to the device > Put your SIM card in the SIM card slot of the dongle (Refer to the Installation Guide of the ESX device) > Turn the device on again After the device has started, enter your 4-digit PIN After successful entry, the SIM card is unlocked. -
Page 18: Dsp / Audio Settings
2. BASIC SETTINGS 2.7 DSP / AUDIO SETTINGS Tap DSP in the app menu. Depending on the app, the audio settings are also located in the respective app menus, such as in the radio or music app. Here you can select different equalizer presets or In this menu you can activate a high and / or low change the EQ controls directly as you wish. -
Page 19: Set-Up Navigation
2. BASIC SETTINGS 2.8 SET UP NAVIGATION Here you can specify which navigation application is started when you press the MAP function key on the device or tap on the Navi app icon in the main menu. Apps > Settings >... -
Page 20: Rear View Camera
2. BASIC SETTINGS 2.9 REAR VIEW CAMERA If you have connected a compatible rear view camera to the camera input of the device, the camera image is automatically displayed when you engage reverse gear. This view is also shown when the camera direct button is pressed. -
Page 21: Additional Camera
2. BASIC SETTINGS 2.10 ADDITIONAL CAMERA If you have connected a compatible additional camera to the additional camera input of the device, this will be displayed via the F-CAM app. This view is also shown when pressing the camera direct button twice (refer to page 6), if the additional camera has been activated before. -
Page 22: 360° View (Depending On Equipment)
2. BASIC SETTINGS 2.11 360° VIEW (DEPENDING ON EQUIPMENT) If you have connected four compatible HD cameras to the camera inputs of the device, you can operate the all-round cameras accordingly using the 360° View app in the app menu. Tap the screen to reveal the control buttons for The four connected cameras can be selected with that menu. - Page 23 The record button is located at the bottom left. When the reverse gear is engaged, the above view is automatically displayed. This view is also With this, all four connected cameras are recorded shown when the camera direct button is pressed. in one image and saved as a TS-MPEG-2 file On the left you always see the all-round view of (transport stream) on the device in the Films...
-
Page 24: Infotainment
3. INFOTAINMENT 3.1 RADIO Press the Radio button on the device or tap Radio in the main menu to open the Radio menu. Symbol Function Description Volume Tap here to adjust the volume. Mono-/Stereo Operation Tap here to switch between mono and stereo operation. With weak stations, the reception quality usually improves in mono mode. -
Page 25: Dab+ Radio
3. INFOTAINMENT To save a station in the favorites, press for one The station is now in the favorites list. second on the desired position. 3.2 DAB+ RADIO In the app menu tap on DAB-Z. When using the device for the first time, you must first start the station search as requested. -
Page 26: Bluetooth / Bt Music
First you have to activate the Bluetooth function on your mobile ® phone. Tap Bluetooth in the main menu of the ESX device. At the top right, tap the magnifying glass to select your smartphone. Tap on the name of your smartphone. You will... - Page 27 You can also start BT Music directly from the app buttons below to stream music from your menu. smartphone to the ESX device. Important note: Some mobile phones require their music player to be started in order to use this function.
-
Page 28: Audio Player
3. INFOTAINMENT 3.4 AUDIO PLAYER Tap on the Music app in the main menu to start the audio player. The following formats are compatible: MP3 / AAC / FLAC / WAV / AMR / M4A / OGG The audio player accesses all files that can be found either on the internal device memory or optionally connected storage media (USB). -
Page 29: Video Player
3. INFOTAINMENT 3.5 VIDEO PLAYER Tap on Video in the main menu to start the video player. The following formats are compatible: MP4 / AVI / WMV / 3GP / FLV / SAF / MOV / MKV / MPG Symbol Function Description Screen adjustment Tap here to change the format of the current video or to fit it to the... -
Page 30: Media Connect / Phonelink (Depending On Equipment)
3.6 MEDIA CONNECT / PHONELINK (DEPENDING ON EQUIPMENT) If you have an iOS smartphone, you can connect it to the ESX device using its charging cable via one of the USB ports. In the settings of the iOS smartphone, you must grant the required approvals under the Car Play section. -
Page 31: Av-In
3. INFOTAINMENT 3.8 AV-IN If you have connected an external audio or video source to the AUX input of the device, click on AV-IN in the app menu. Then you have to start playback on the external audio or video source. Important note: While driving, the image signal of a video is not displayed for safety reasons. - Page 32 3. INFOTAINMENT 3.10 ES FILE EXPLORER In the app menu, tap ES File Explorer. Here you can see which files were saved in which In the file manager, files can then be copied, location. Just tap the location you want. moved or deleted as required to another storage medium.
-
Page 33: Updates
4. UPDATES 4.1 MCU / SYSTEM UPDATES After you have decompressed the downloaded update, copy the files to a USB stick. Insert the USB stick into the device. In the following dialog, tap upgrade. The update process starts. After the process is complete, tap restart to restart the device. - Page 34 ESX Car Media Systems · Audio Design GmbH Am Breilingsweg 3 · D-76709 Kronau/Germany Tel. +49 7253 - 9465-0 · Fax +49 7253 - 946510 www.esxnavi.de - www.audiodesign.de © All rights reserved. Technical changes, errors and mistakes reserved.
Need help?
Do you have a question about the VISION ANDROID Series and is the answer not in the manual?
Questions and answers