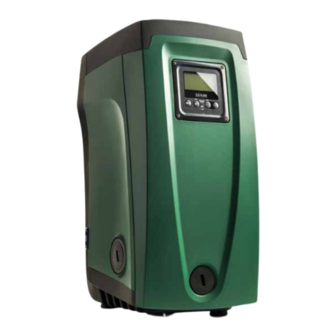
DAB E.SYBOX Assembly And Dismantling Manual
Hide thumbs
Also See for E.SYBOX:
- Installation manual ,
- Instruction for installation and maintenance (888 pages) ,
- Important information manual (80 pages)
Advertisement
Quick Links
Advertisement

Related Manuals for DAB E.SYBOX


Summary of Contents for DAB E.SYBOX
- Page 1 ASSEMBLY AND DISMANTLING GUIDE...
-
Page 3: Required Tools
REQUIRED TOOLS • V • a arious size flat screwdriVers llen key size • P • w hilliPs screwdriVers medium rench size and large size • m ulti griP Pliers • t orx screwdriVers size • r ubber hammer... - Page 4 DISMANTLING Pull up and remove the tran- sparent cover Take out the hex key tool Take out the flat tool...
- Page 5 Pull out the small key tool The small key may be used to unscrew the front display’s small screws. This will allow the user to rotate the display and adapt the view to the position of installation Put the hex key tool and flat tool together: the flat tool may be in- serted both in the hole no.
- Page 6 DISMANTLING With the resulting composite tool, unscrew the all the external caps...
- Page 8 DISMANTLING Note that the non-return valve access cap (left) has a bigger size than the other ones (1 ¼” vs 1”). Be careful not to mix them up when reassembling the pump Pull out the non-return valve. Use the composite tool (or pliers) Unscrew the self-priming valve access cap...
- Page 9 Pull the self-priming valve out (use pliers if you cannot do it manually) If the pump is working with a po- sitive suction head, trade places of the screw and the spring to exclude the self-priming effect and avoid noises during priming...
- Page 10 DISMANTLING To remove the front cover, un- screw the highlighted screws from the top cover and the bot- tom cover Lift the front cover, paying at- tention not to pull the flat cable excessively...
- Page 11 Unplug the display flat cable from the display board To remove the top cover, unscrew the two screws next to the filling hole and the other two highli- ghted in the next picture...
- Page 12 DISMANTLING Remove the top cover Remove the fittings on the sides with the help of a flat screwdriver, by inserting it as shown in the picture below...
- Page 13 Remove the side covers by pulling sideways first, and then up To remove the bottom cover, unscrew the two screws from the outside and the two from the inside, as seen in the following pictures...
- Page 14 DISMANTLING Using the T20 pin torx screwdri- ver, remove the metal band that secures the motor cable to the main board...
- Page 15 Unscrew the motor cable wires with the small flat screwdriver Use the same screwdriver to pull up and remove the ground wire Pay attention to the position of the motor cable, in particular the slots through which it passes (see pi- cture).
- Page 16 DISMANTLING Unscrew the power cable wires Unplug the pressure sensor (1) and flow sensor (2) connectors Lift and remove the extractor accessory in picture...
- Page 17 To easily remove the pressure vessel’s klammer, after pulling out the extractor, rotate it by 180° and reinsert it. Push it well till it clicks. Then pull it out again, and you will see it has caught and removed the klammer Easily pull out the pressure vessel Unscrew the two screws and wa- shers highlighted in this picture...
- Page 18 DISMANTLING Remove the other two screws by using the Allen key Gently lift and remove the main board block If an inspection/analysis of the electronic board is required, re- move the covers by opening the plastic joints with the help of a small flat screwdriver...
- Page 19 Before removing the pressure sensor, remove the protection cap to check the state of the con- nection wires Remove the pressure sensor by unscrewing it counterclockwise Unscrew the three circled screws to detach the suction duct...
- Page 20 DISMANTLING Pull out the klammer on the fil- ling duct side Lift and remove the sensors block...
- Page 21 Unscrew the six screws in picture to dismantle the flow sensor Lift the cover with a screwdriver inserted in the marked part Check/replace the O-ring...
- Page 22 DISMANTLING Remove and check the flowmeter To remove the pressure vessel’s support, first lift and detach the highlighted part Tilt it as shown in picture and lift to remove completely...
- Page 23 Remove the back cover first by unscrewing the two circled screws Then use the rubber hammer to detach the cover from the pump...
- Page 24 DISMANTLING Unscrew the six torx screws (T40 torx screwdriver) and use the rubber hammer to remove the pump body...
- Page 25 Remove the first stage box...
- Page 26 DISMANTLING Use the rubber hammer to deta- ch the outer cover Remove/replace the upper O-ring Lift and remove the cover...
- Page 27 Remove/replace the lower O-ring To remove the nut, keep it still with the wrench and at the same time rotate the shaft, using the big flat screwdriver, from the access on the bottom (or vice versa...
- Page 28 DISMANTLING After removing the nut, remove the washer Using two screwdrivers as levers, lift and remove the first stage You should be able to remove the other stages (or most of them) all together, otherwise keep using the screwdrivers to facilitate the operation...
- Page 29 If required, dismantle the stages in their single parts: diffuser (con- veyor, left, and diffuser box, right) and impeller (middle) Remove the last stage box Remove the washer...
- Page 30 DISMANTLING Remove the mechanical seal’s rotating part Unscrew the three screws of the bottom motor cover Remove the torx screws (use the T20 pin torx screwdriver) to undo the motor casing...
- Page 31 By means of the rubber hammer, remove the casing Remove/replace the O-ring...
- Page 32 DISMANTLING Unscrew the fours screws (three fastening screws + ground wire) and remove the bottom motor support...
- Page 34 ASSEMBLING Assemble the motor support by screwing the four screws in the pictures (three fastening screws + ground wire) Insert the motor cable and the ground wire in the hole of the lower motor cover, and let it slip in position...
- Page 35 Respect the correct orientation, which is represented in picture Screw the three screws and close the cover Reposition the motor vertically, install the O-ring...
- Page 36 ASSEMBLING Insert the main motor casing, aligning the parts as shown in picture Using the two multi-grip pliers, tighten the two parts, acting on opposite sides at the same time (be careful not to damage the plastic) Fasten the two torx screws...
- Page 37 Insert the mechanical seal, first the fixed part (if it had been remo- ved), then the rotating part Push the seal into position: pay attention to the correct insertion of all components Insert the washer...
- Page 38 ASSEMBLING Insert the bottom stage box Insert all the stages...
- Page 39 Always push downwards to make sure all the hydraulic parts are well packed Insert the nut washer Insert the nut and secure it by holding it still with a wrench and screwing through the shaft’s bot- tom access hole using the big flat screwdriver...
- Page 40 ASSEMBLING Install the O-ring Insert the plastic body covering the hydraulics, aligning it correct- ly as shown in picture By means of the two mul- ti-grip pliers, tighten the body downwards, acting on opposite sides at the same time (be care- ful not to damage the plastic)
- Page 41 Insert the top stage box Install the pump body’s O-ring Insert the pump body in the right position (see picture)
- Page 42 ASSEMBLING Using the two multi-grip pliers (and the rubber hammer if requi- red), close the pump body Insert and screw the six torx screws, alternating the sides for a more uniform tightening NOTE: Optimal torque range: 5.8 – 6.2 Nm...
- Page 43 While screwing, keep the nut in position Place the pump on the back cover First insert the part highlighted in picture...
- Page 44 ASSEMBLING Then push downwards from the top part of the pump Tighten the two screws in pictu- To install the pressure vessel’s support, insert from position no. 1 first, then push down position no. 2 and slot in the component NOTE: this component will not fit any 0.5 cm possible position.
- Page 45 Replace/install the O-ring of the filling duct Assemble the sensors block with the pump by pressing it in position Insert the klammer...
- Page 46 ASSEMBLING Insert the pressure vessel throu- gh its support and into its fitting Secure the vessel by inserting the klammer Insert the suction duct: there is only one right position, due to the particular shape of the compo- nent and the consequent posi- tions of the screws...
- Page 47 Push the part well in position Fasten the three screws Place the main board with the right alignment NOTE: spread new thermal paste on the heatsink before reinstalling the main board...
- Page 48 ASSEMBLING Screw the two hex screws using the Allen key Screw the two Phillips screws and do not forget the washers osition the motor cable as shown in picture, letting it pass through the right spots...
- Page 49 Insert the ground wire Insert and fasten (using the small flat screwdriver) the motor cable wires Insert the metal strip...
- Page 50 ASSEMBLING Secure the strip by screwing it to the board Insert and fasten the power cable wires Plug in the connectors of the flow (1) and pressure (2) sensors...
- Page 51 Insert the extractor accessory Insert the bottom cover Screw the four screws highlighted in this picture and in the following...
- Page 52 ASSEMBLING Insert the right-side cover Before inserting the left-side cover, place the cable gland in the right position...
- Page 53 Insert the left-side cover Insert the clip rings Insert the top cover...
- Page 54 ASSEMBLING Screw the two screws next to the filling-duct hole Screw the two screws highli- ghted in the picture Plug in the display flat cable at both extremities...
- Page 55 Insert the front cover To fasten the front cover, screw the two screws seen in this pictu- re, on the top-cover side, and the two in the following picture, on the bottom-cover side...
- Page 56 ASSEMBLING Before reinstalling the non-re- turn valve, check/replace the O-rings Use the composite tool to insert the non-return valve Close all the external caps by screwing them with the compo- site tool...
- Page 58 ASSEMBLING Insert the self-priming valve (Negative suction head position)
- Page 59 (Positive suction head positiion) Screw the cap...
Need help?
Do you have a question about the E.SYBOX and is the answer not in the manual?
Questions and answers