DAB e.sybox Instruction Manual
Hide thumbs
Also See for e.sybox:
- Installation manual ,
- Instruction for installation and maintenance (888 pages) ,
- Important information manual (80 pages)
Table of Contents
Advertisement
GB
ENGLISH
INDEX
Responsibility
2.1.2 Loading operation – Installation above head and below head
2.2.1 Hydraulic connections
2.2.3 Loading operation – Installation above head and below head
3.2 Configuration of the integrated inverter
4.1 Description of blockages
4.1.1 "BL" AAnti Dry-Run (Protection against dry running)
4.1.3 Anti-Freeze (Protection against freezing of water in the system)
4.1.4 "BP1" Blockage due to fault of the internal pressure sensor
4.1.5 PB" Blockage due to line voltage outside specifications
4.1.6 "SC" Blockage due to short circuit between the motor phases
5.1.2 Electrical connections of utility inputs and outputs
5.1.5 Association and disassociation of e.sybox and control unit
57
60
60
6.5 Enabling and disabling the motor
61
7.1 User Menu
61
7.1.1 Status
62
7.1.2 RS: Rotation speed display
62
63
64
65
65
66
7.1.8 PI: Power histogram
67
7.1.9 Multi-pump system
7.1.10 Output flow meter
67
7.1.11 VE: Version display
68
68
7.1.12 FF: Fault log display
69
7.2.1 CT: Display contrast
69
7.2.2 BK: Display brightness
69
70
7.2.4 LA: Language
70
71
71
7.3.1 SP: Setting the setpoint pressure
71
7.3.2 Setting the auxiliary pressures
72
7.3.2.1 P1: Setting the auxiliary setpoint 1
7.3.2.2 P2: Setting the auxiliary setpoint 2
72
7.3.2.3 P3: Setting the auxiliary setpoint 3
72
7.3.2.4 P4: Setting the auxiliary setpoint 4
72
72
7.4.1 Status
73
73
7.4.2 RI: Speed setting
7.4.3 VP: Pressure display
73
7.4.4 VF: Flow display
73
7.4.5 PO: Absorbed power display
74
7.4.6 C1: Phase current display
74
7.4.7 RS: Rotation speed display
74
7.4.8 TE: Dissipator temperature display
75
75
7.5.1 RP: Setting the pressure fall to restart
76
7.5.3 AD: Address configuration
77
80
81
82
82
82
82
82
82
82
82
83
83
83
83
83
83
83
83
84
84
84
84
84
84
84
84
84
85
85
85
85
85
85
85
86
86
86
86
86
86
86
86
86
86
Advertisement
Table of Contents

Related Manuals for DAB e.sybox


Summary of Contents for DAB e.sybox
- Page 1 7.4.8 TE: Dissipator temperature display 5.1.4 Control unit function setup 7.5 Installer Menu 5.1.5 Association and disassociation of e.sybox and control unit 7.5.1 RP: Setting the pressure fall to restart 6. The keypad and the display 7.5.2 OD: Type of plant 7.5.3 AD: Address configuration...
-
Page 2: Table Of Contents
7.6.15 Setup of the auxiliary digitali inputs IN1, IN2, IN3, IN4 11.2 Updating the firmware 7.6.15.1 Disabling the functions associated with the input 11.2.1 Updating between one e.sybox and another 7.6.15.2 Setting external float function 11.2.1.1 Manual updating 7.6.15.3 Setting auxiliary setpoint input function 11.2.1.2 Automatic updating... -
Page 4: Warnings
WARNINGS ty precautions in accordance with the regulations in force in the This manual refers to e.sybox and e.sybox 30/50 products. In the follow- country where the product is installed (for Italy CEI 64/2). ing discussion, the term e.sybox will be used when the characteristics are shared by both models. -
Page 5: Responsibility
ENGLISH RESPONSIBILITY Face A: a door allows access to the Technical Compartment. The door can be removed by inserting 2 fingers in the rubber grips, squeezing and rotat- The Manufacturer does not vouch for correct operation of ing the door around the hinges on the side opposite the grips (see Fig.2). the electropumps or answer for any damage that they may To put the door back in place, insert the hinges in their slots and close the cause if they have been tampered with, modified and/or run... -
Page 6: Description Of The Integrated Inverter
ENGLISH ”OUT” of face C. The power supply cable is for connection to the power The Inverter control ensures different functions, the most important of mains. which, for pumping systems, are the maintaining of a constant pressure value in delivery and energy saving. Face E: the 4 brass threads form the seat for the 4 support feet in the case •... -
Page 7: Integrated Electropump
(SP). The red curve If different values are set for the parameters SP and/or RP, regulate the shows the behaviour of the e.sybox with set point at 3.0 bar. valve of the expansion vessel releasing or letting in air until the above equation is satisfied again (e.g.: SP=2.0bar;... -
Page 8: Technical Characteristics
0 and Liquid temperature max 40 °C 85 litres/minute for e.sybox and between 0 and to for e.sybox 30/50. For WORKING higher flow rates the system works according to the characteristic curve of... -
Page 9: Installation
The system can take in water the level of which must not be at a 200 mm depth greater than 8m for e.sybox and 7 m for e.sybox 30/50(the height between the water level and the pump suction mouth). Do not connect any pipe to the 1¼’’ mouth that houses the non-return valve, see fig. -
Page 10: Hydraulic Connections
ENGLISH If the surface is not flat, unscrew the foot that is not touching and adjust If the vertical installation of the system is of the “over head” type, its height until it contacts the surface so as to ensure the stability of the it is recommended to fit a non-return valve in the suction section system. -
Page 11: Horizontal Configuration
ENGLISH door as soon as the water comes out (however it is recommended to fit a system. The system must in fact be placed in a safe and stable position, check valve in the section of the suction pipe and to use it to control the ensuring that its axis is vertical: it must not be in an inclined position. - Page 12 ENGLISH Figure 11 2.2.3 Loading Operation Installation above head and below head Figure 10 With reference to its position with respect to the water to be pumped, the instal- lation of the system may be defined “above head” or “below head”. In particular •...
-
Page 13: Commissioning
However, all these parameters and many others can be set by the user. There are many other operating modes and accessory functions. Thanks The intake depth must not exceed 8m for e.sybox and 7 m for to the different possible settings and the availability of configurable input e.sybox30/50. -
Page 14: Priming
8m in depth for e.sybox and 7 m for e.sybox 30/50 in a time of less than 5 minutes. As soon as the product detects a regular flow in delivery, it leaves the priming procedure and starts its regular work. -
Page 15: Description Of Blockages
ENGLISH time TB. This is indicated by the red “Alarm” led and by the letters “BL” on Alarm in the fault log the display. After having restored the correct flow of water you can try to leave the Display indication Description protective block manually by pressing the “+”... -
Page 16: Bp1" Blockage Due To Fault Of The Internal Pressure Sensor
ENGLISH of water with temperatures close to freezing point, to avoid breakages of 4.2 - Manual reset of error conditions the system. This is the reason why it is recommended to empty any elec- In error status, the user can cancel the error by forcing a new attempt, tropump that is going to remain unused during the winter. -
Page 17: Inverter Electronic Control And User Interface
When using the input or remote sensor functions, in the event of a commu- e.sybox, alone or in a pumping unit, may be connected by means of wire- nications downage or control unit error, the e.sysbox and control unit will less communication to a remote unit referred to below as a control unit. - Page 18 ENGLISH e.sybox response =10, 11, 12, No action System in No action System in 13 Kiwa function stop status F4 stop status No control Control unit associated (low input pres- unit asso- sure signal) ciated PR=0 No action No action...
-
Page 19: Control Unit Function Setup
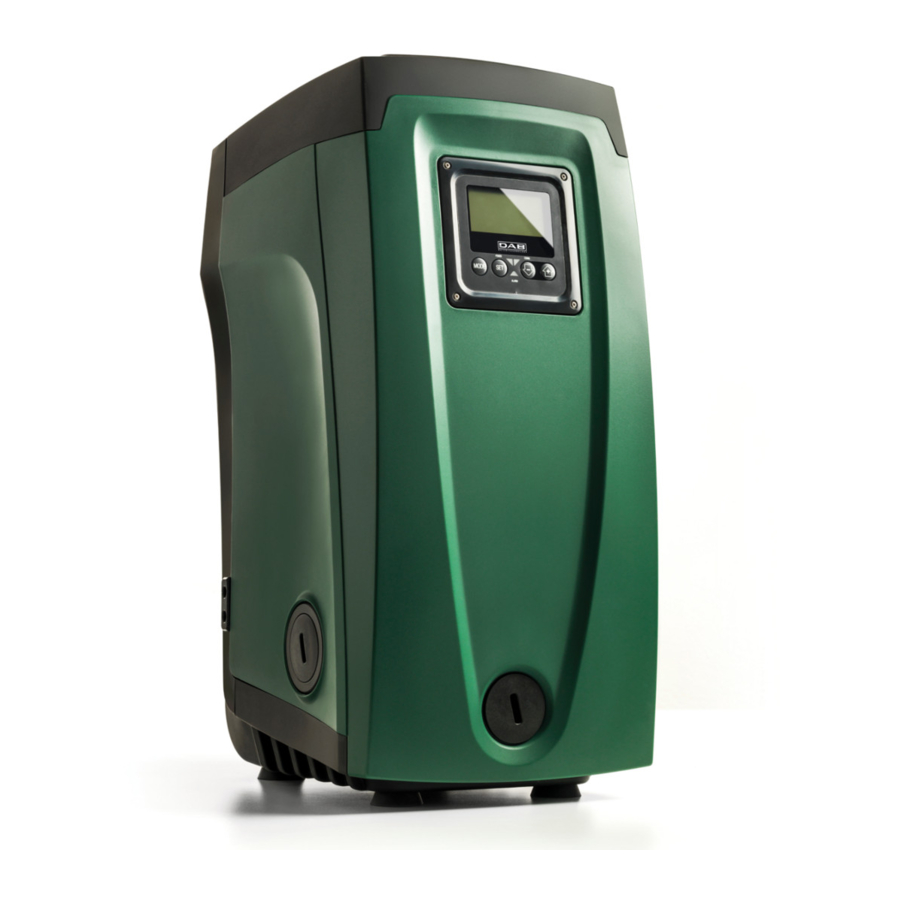
5.1.5 - Association and disassociation of e.sybox and control unit Figure 12: Aspect of the user interface The procedure for associating a control unit to an e.sybox is the same as for associating an e.sybox: The user interface is composed of a keypad with 128x240 pixel LCD dis- locate the AS page of the installer menu and hold down the “+”... -
Page 20: Direct Access With A Combination Of Keys
ENGLISH when configured to work in communication mode, communication is not available, is not detected, or there are problems. It blinks Decreases the current parameter (if it is an editable parameter). with a high frequency during association with other wireless de- vices. - Page 21 ENGLISH MENU NAME DIRECT ACCESS KEYS HOLD-DOWN TIME User On releasing the button Monitor 2 Sec Setpoint 2 Sec Manual 5 Sec Installer 5 Sec Technical 5 Sec assistance Reset factory 2 sec after switching on values appliance Reset 2 Sec Table 7: Access to the menus...
- Page 22 ENGLISH Reduced menu (visible) Extended menu (direct access or password) Manual Menu User Menu Monitor Menu Setpoint Menu Installer Menu Tech. Assist. Menu Main Menu set-minus-plus mode set-minus mode-set mode-set-minus mode-set-plus STATUS STATO MAIN Decrease pressure Block time for (Main Page) Contrast Setpoint pressure for restart...
- Page 23 ENGLISH Fault & Warning Anti Cycling (Log) Anti-blocking AntiFreeze Function input 1 Function input 2 Function input 3 Function input 4 Function output 1 Function output 2 Firmware update Reset faults and warnings Modify Password...
-
Page 24: Access By Name With A Drop-Down Menu
ENGLISH Identifying colours Modification of parameters in multi-pump assemblies Set of sensitive parameters. These parameters must be aligned so that the multi-pump system can start. The modification of one of these on any devices re- sults in automatic alignment on all the other devices without any question. -
Page 25: Structure Of The Menu
ENGLISH Warning indications Indications of the functions associated with the inputs Specific icons The error conditions are indicated in Table 2, page 76. The other displays are indicated in Table 9. Error or status conditions shown on the main page Identifying code Description Motor running... -
Page 26: Blocking Parameter Setting By Password
ENGLISH The other menu pages vary with the associated functions and are de- 6.4 - Blocking parameter setting by Password scribed later by type of indication or setting. Once you have entered any The device has a password-enabled protection system. If a password is menu, the bottom of the page always shows a summary of the main oper- set, the parameters of the device will be accessible and visible but it will ating parameters (running status or any fault, current speed and pressure). -
Page 27: Po: Absorbed Power Display
ENGLISH 7.1.9 - Multi-pump system 7.1.5 - PO: Absorbed power display Displays the system status when in the presence of a multi-pump instal- Power absorbed by the electropump in [kW]. lation. If communication is not present, an icon depicting communication A flashing round symbol may appear under the symbol of the measured absent or interrupted is displayed. -
Page 28: Monitor Menu
Press SET to leave this menu and return to the main menu. can access the MONITOR MENU. The adjustment range is 1-6 bar (14-87 psi) for e.sybox and 1-4 bar for In this menu, by pressing the MODE key, the following values are dis- e.sybox 30/50 (14-58 psi). -
Page 29: P1: Setting The Auxiliary Setpoint 1
ENGLISH The auxiliary setpoints can be used only through the control unit. the parameter concerned. Press SET to leave this menu and return to the main menu. 7.3.2.1 - P1: Setting the auxiliary setpoint 1 Entering the manual menu by pressing the SET + - keys puts the machine Pressure at which the system is pressurised if the auxiliary setpoint func- into forced STOP condition. -
Page 30: Vp: Pressure Display
ENGLISH 7.4.3 - VP: Pressure display For example if the setpoint pressure is 3.0 [bar] and RP è 0.5 [bar] the Plant pressure measured in [bar] or [psi] depending on the measuring sys- pump will restart at 2.5 [bar]. tem used. RP can be set from a minimum of 0.1 to a maximum of 1 [bar]. -
Page 31: Ms: Measuring System
(irrespective of the result of association); if not de- • e.sy Other e.sybox pump for operation in a pump set vice can be seen within the space of 1 minutes, the machine automatically • composed of max 4 elements leaves association status. -
Page 32: Pr: Remote Pressure Sensor
In order to execute its intended functions, the remote sensor must be con- 7.6.2 - T1: Low pressure delay (kiwa function) nected to a control unit, which in turn must be associated to the e.sybox, Sets the time when the inverter switches off after receiving the low pressure see point 5.1 - Operation with control unit... -
Page 33: T2: Delay In Switching Off
ENGLISH 7.6.3 - T2: Delay in switching off chain; this means that if devices are added to or removed from the chain, Sets the delay with which the inverter must switch off after switch-off con- NA always has the value of the number of devices present, automatically ditions have been reached: plant under pressure and flow rate lower than detected. -
Page 34: Examples Of Configuration For Multipump Systems
ENGLISH The state of configuration as a reserve can be seen as follows: on the Mul- 3 set active (NA=3), 2 simultaneous (NC=2) and 1 as reserve (IC=reserve ti-pump System page, the top of the icon is coloured; on the AD and main on two devices), pages, the communication icon representing the address of the device The result obtained is the following: at the most 2 devices will start at the... -
Page 35: Ay: Anti Cycling
ENGLISH 7.6.12 - AY: Anti Cycling 0 (disable) As described in paragraph 9, this function is for avoiding frequent switch- 0 (disable) ing on and off in the case of leaks in the system. The function can be ena- bled in 2 different modes, normal and smart. In normal mode the electronic 0 (disable) control blocks the motor after N identical start/stop cycles. -
Page 36: Disabling The Functions Associated With The Input
ENGLISH Low pressure signal input NC, Behaviour of the external float function depending on INx and on the input automatic and manual reset Low pressure input NO only manual Value of Input configu- Shown on reset Parameter Input status Operation ration display Low pressure input NC only manual... - Page 37 ENGLISH When several auxiliary setpoint functions are configured at the same time for at least 1 sec. on different inputs, the system will show Pi when at least one function is When the system is disabled, for the function to be deactivated (re-en- activated.
-
Page 38: Setting Low Pressure Detection (Kiwa)
ENGLISH 7.6.15.5 - Setting low pressure detection (KIWA) Block of system The minimum pressure switch that detects low pressure can be connected for low pressure to any input (for the electrical connections refer to the control unit manu- Active with low Absent on intake, Auto- signal on input... -
Page 39: O1: Setting Output 1 Function
If the password is lost there are 2 possibilities for editing the parameters 7.6.19 FW: Firmware update of the device: This menu page allows you to update the e.sybox firmware. For the pro- cedure see chapter 11. • Make a note of the values of all the parameters, reset the device with the factory values, see paragraph 8.3. -
Page 40: Password For Multipump Systems
ENGLISH • Make a note of the number present on the password page, send 8 - RESET AND FACTORY SETTINGS a mail with this number to your service centre, in a few days you 8.1 - General system reset will be sent the password to unlock the device. To reset the system, hold down the 4 keys simultaneously for 2 sec. - Page 41 Table 21: Factory settings Measuring system 0 (International) Blockage time for water lack [s] Low pr. delay (KIWA) [s] Delay in switching off [s] Proportional gain coefficient Integral gain coefficient 3050 for e.sybox Maximum speed [rpm] 3200 for e.sybox 30/50...
-
Page 42: Particular Installations
ENGLISH that the respective O-Ring is always correctly in its seat. 9 - PARTICULAR INSTALLATIONS 7. fill the pump, connect the power supply, start the system. 9.1 - Inhibiting self-priming The product is made and supplied with the capacity of being self-priming. With reference to par. -
Page 43: Wall Installation
(wire- less). DAB supplies an accessory kit for Quick Connection of the system. This is The group may be made up of a maximum of 4 devices. a quick coupling base on which to make the connections to the plant and A multipump system is used mainly for: from which the system can be simply connected or disconnected. -
Page 44: Wireless Communication
• maximum speed (parameter RM) various devices. For example, in the case of manual assignment of the The firmware of the connected e.sybox units must all be the same. Once addresses, these must absolutely be different one from the other. -
Page 45: First Start Of The Multipump System
ENGLISH • GI Integral gain List of parameters with optional alignment: • GP Proportional gain • I1 Input 1 setting • LA Language • I2 Input 2 setting • MS Measuring system • I3 Input 3 setting • AE Anti-blocking •... -
Page 46: Assigning The Starting Order
ENGLISH 9.4.8 - Assigning the starting order is configured as reserve, it is returned to minimum priority to preserve it Each time the system is switched on a starting order is associated with from wear. each device. Depending on this, the sequential starts of the devices are 9.4.11 - Reserves and number of devices that participate in pumping decided. -
Page 47: Wireless Control
ENGLISH In the DAB catalogue there is a Kit for the integrated creation of a booster 10. MAINTENANCE set of 2 systems. The booster made with the DAB kit appears as in Fig.21 Disconnect the power supply before starting any work on the sys- tem. - Page 48 ENGLISH To use the cross key you must put the unused key “1” away in a safe place so that it does not get lost, or else put it back in its seat inside key “3” at the end of operations. Use of end “C”: this is practically a straight tip screwdriver of the correct size for manoeu- vring the caps of the main connections of the system (1”...
-
Page 49: Emptying The System
ENGLISH water that it contains. Use of end “E”: During handling of the system after emptying it, some small this is practically a straight tip screwdriver amounts of water may probably leak out from the system. of the correct size for manoeuvring the mo- tor shaft access cap and, if the interface for 10.3 - Non-return valve quick connection of the system has been... -
Page 50: Motor Shaft
As already illustrated in the manual par. 9.4.2, to use the e.sybox in a cartridge might be such as to damage the accessory tool. In this pumping set with a wireless connection, the e.sybox firmware versions... -
Page 51: Updating The Firmware
Slave must have a firmware version lower than 4.00. It is necessary Definitions used below: to associate the e.sybox. Master: device from which a firmware is taken to load it in an e.sybox. The function may be fulfilled by an e.sybox, an e.sylink or any other device 11.2.1.1 - Manual updating enabled for downloading firmware to an e.sybox. -
Page 52: Semiautomatic Updating
ENGLISH • The e.sybox used as the Slave must have a firmware version of 4.00 or • It is necessary to have associated the devices with each other. more. In the case of e.sybox 30/50 it is always possible. • If several e.sybox units have to be updated the procedure must be re- •... -
Page 53: Updating The E.sybox By E.sylink
ENGLISH 11.2.2. - Updating the e.sybox by e.sylink 1. Check the system, find and An e.sybox can also be updated by e.sylink. For the procedure, refer to 1. Leak in the eliminate the leak. the e.sylink manual. system. 2. Dismantle the system and... -
Page 54: Disposal
ENGLISH When the utility is The display Air pressure in the ex- TCalibrate the expansion vessel One or more devices Press the + key on the device turned on Red: off shows: Red: off pansion vessel higher pressure or configure the parame- have sensitive param- which we are sure has the most the flow...
Need help?
Do you have a question about the e.sybox and is the answer not in the manual?
Questions and answers
Is there annual maintenance recommened for the DAB E.sybox-mini?