Advertisement
Quick Links
471758 Rev00
Please read these instructions thoroughly before installation.
25kg
55lb
If you have any questions or need
spare parts don't worry, we're happy to help.
Customer Helpline
Online Support
www.avfgroup.com/support
0333 320 0463
Helpine Open Mon to Thurs 9am - 5pm, Fri 9am - 4pm
AVF Group Ltd. Hortonwood 30, Telford, Shropshire, TF1 7YE, England
Advertisement

Subscribe to Our Youtube Channel
Related Manuals for AVF Group 471758


Summary of Contents for AVF Group 471758
- Page 1 If you have any questions or need spare parts don’t worry, we’re happy to help. Customer Helpline Online Support www.avfgroup.com/support 0333 320 0463 Helpine Open Mon to Thurs 9am - 5pm, Fri 9am - 4pm AVF Group Ltd. Hortonwood 30, Telford, Shropshire, TF1 7YE, England...
-
Page 2: Warranty Information
WARRANTY INFORMATION LIFETIME WARRANTY AVF warrants that the product is free from defects in material and workmanship, as long as the product is owned by the original consumer purchaser. If, during the stated warranty of this product, it proves to be defective, AVF will remedy the defect by either repairing or replacing the defective part or, replacing the entire product. -
Page 3: You Will Need
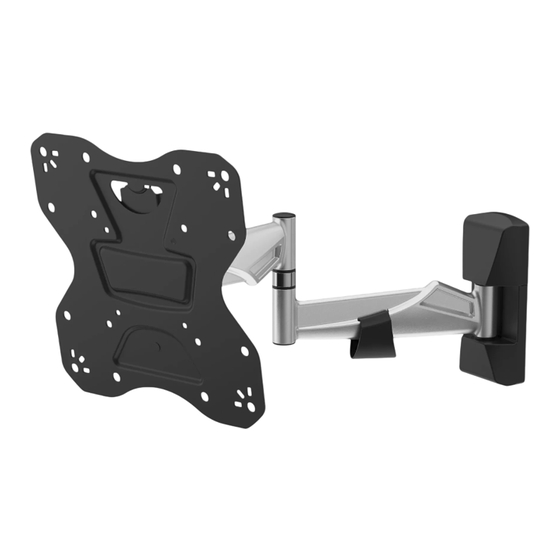
Index Measure the TV fixing holes Width and Height Preparing the TV Mounting Plate Fitting the TV Mounting Plate Marking Wall for Drill Points Fitting the Wall Brackets Fitting the Wall Bracket Covers Hanging the TV Cable Management Retain all packaging in case the product needs to be returned. Contents may vary from photography / illustrations. - Page 4 Boxed Parts...
- Page 5 Measure the TV fixing holes Width and Height 75 - 200mm 75 - 200mm If width is greater than 200mm or height greater than 200mm STOP installation now and contact the customer helpline. Determine which diameter TV Screws fit your TV and put them to one side. M4, M6 or M8 We will select the correct length later.
- Page 6 Preparing the TV Mounting Plate Before you can attach the TV mounting plate to your TV you need to remove the plate from your wall mount. TV Mounting Plate Level Lock Thumb Nut Remove the Level Lock Thumb Nut and safely keep for step Remove the TV Mounting Plate.
- Page 7 Fitting the TV Mounting Plate After completing this step, you will have lots of TV screws left over. Keep them in a safe place in case you require them in future. Select the correct length TV screw. If required You may need to use Spacers L if the screws are too long or the back of your TV is not flat.
- Page 8 Marking Wall for Drill Points For this step you will need your Wall Marking Template WT. To determine the exact position for your drill points use the Height Calculator app. Follow the link to the app shown on your Wall Marking Template. Before marking any drill points you will need to determine the wall type that you have, either Solid Wall or Wood Stud Wall.
- Page 9 Fitting the Wall Bracket Solid Wall If fitting to a Wood Stud Wall follow the installation instructions on the next page. 10mm (25/64") 55mm (2 1/8") MIN Remove Dust from Hole Lubricate screw thread with soap DO NOT overtighten screws. Tighten screws by hand only.
- Page 10 Wood Stud Wall If fitting to a Solid Wall follow the installation instructions on the previous page. 3mm (1/8") 55mm (2 1/8") MIN Ensure you drill in the centre of the wood stud. Lubricate screw thread with soap DO NOT overtighten screws. Tighten screws by hand only.
- Page 11 Fitting the Wall Bracket Covers Align tabs on Wall Bracket Covers with slots on Wall Bracket.
- Page 12 Hanging the TV Reuse the Level Lock Thumb Nut saved in step 2. When the TV is level, ensure the thumb nut is fully tightened. To remove the TV, reverse this procedure.
-
Page 13: Cable Management
Cable Management... - Page 14 Adjust or Lock Tilt (optional) Adjust screws to achieve perfect tilt resistance if required. You must adjust both screws equally. You can also lock the tilt if required.
- Page 15 TV Levelling (optional) Loosen the Level Lock Thumb Nut, adjust your TV until it is level, then re-tighten the thumb nut.
Need help?
Do you have a question about the 471758 and is the answer not in the manual?
Questions and answers