Advertisement
Quick Links
Read through ALL instructions before commencing installation.
If you have any questions about this product or issues with installation contact
STOP
the customer services help line before returning this product to the store.
See www.avfgroup.com/unimax for instruction video.
CUSTOMER SERVICES HELP LINE NUMBER:
+44 (0)1952 670009 (UK)
1-800 667 0808 (USA)
AVF Group Ltd. Hortonwood 30, Telford, Shropshire, TF1 7YE, England
AVF Incorporated 3187, Cornerstone Drive, Eastvale, CA 91752, USA
TVs up to
TVs up to
www.avfgroup.com
465108 rev00
32"
81cm
80"
203cm
##
=
88lbs
40kg
=
121lbs
55kg
Advertisement

Subscribe to Our Youtube Channel
Related Manuals for AVF Group ZML8360


Summary of Contents for AVF Group ZML8360
- Page 1 CUSTOMER SERVICES HELP LINE NUMBER: 81cm 40kg +44 (0)1952 670009 (UK) 1-800 667 0808 (USA) 80" TVs up to 121lbs 203cm 55kg AVF Group Ltd. Hortonwood 30, Telford, Shropshire, TF1 7YE, England AVF Incorporated 3187, Cornerstone Drive, Eastvale, CA 91752, USA www.avfgroup.com...
-
Page 2: Assembly Overview
Assembly Overview Fit Screen Adaptor / Hangers to TV Fitting the Wall Bracket Hanging the TV Retain all packaging in case the bracket needs to be returned. Contents may vary from photography/ Illustrations. You will not need all these parts, so expect there to be some left over depending upon the specification of your TV. - Page 3 Index Measure the TV fixing holes Width and Height Adaptor Required Fit Adaptor to TV Assemble Positioning Template Determine Bracket Hole Centers Marking Wall For Drill Points Fitting the Wall Bracket Fitting the Wall Bracket Covers Hanging the TV No Adaptor Required Fit Screen Hangers to TV Assemble Positioning Template Determine Bracket Hole Centers...
-
Page 4: Tools Recommended
Tools Recommended Ø5.5mm (7/32") Masonry Ø10mm (25/64") Masonry Stud Finder Ø3.5mm (9/64") Metal Ø3mm (1/8") Wood Boxed Parts... - Page 5 TV Screws, Reducers and Spacers You can only use these screws with Adaptor V...
- Page 6 Remove the Wall Bracket Covers and keep for step 7 or 14 Wall bracket covers A1 & B1 are removed in the same way. Take Care...
- Page 7 Measure the TV fixing holes Width and Height Adaptor = 75 or 100mm No Adaptor = 200mm to infinity Required Y Required Y = 75 or 100mm = 200mm to infinity TV Fixing TV Fixing Holes Holes 75 or 200mm 100mm to infinity 75 or 100mm...
- Page 8 With Adaptor Fit Adaptor to TV Once you have established which screw diameter you need for your TV you will need to choose which wall spacing you require. Check the back of your TV and use the OPTION that fits your TV. Please see page opposite for more details.
- Page 9 OPTION 1 20mm Wall Space Top Fixings Bottom Fixings OPTION 2 30mm Wall Space Top Fixings Bottom Fixings OPTION 3 50mm Wall Space Top Fixings Bottom Fixings...
- Page 10 With Adaptor Assemble Positioning Template With Adaptor Determine Bracket Hole Centers Lay the template on the back of the TV and follow the instructions below. Place the top row of holes on template U1 over adaptor V. Top row holes Mark off the 200 centers The center line of the template U2 represents...
- Page 11 With Adaptor Marking Wall For Drill Points Before marking the wall, Represents the determine the wall type that top of your TV. you have (i.e. Solid Wall/ Drywall/Wood Stud/ Metal Stud). Ensure the drilling area is free from mains services (Gas/Electric/Water).
- Page 12 With Adaptor Fitting the Wall Bracket Use the correct fixings for your wall type. Mixing fixing screws may be required for installations that span different wall types. DO NOT OVER TIGHTEN SCREWS. Drywall Solid Wall Min supporting surface specification:- ½” thick drywall, mounted on 1½”...
- Page 13 Metal Stud Wood Stud Min supporting surface specification:- Min supporting surface specification:- ½” thick drywall ½” thick drywall 18mm (3/4") 18mm (3/4") 3.5mm (1/8") Ensure hole is (9/64") in the middle of the wood stud 75mm (3") 0.6mm (0.025") MIN stud thickness Use Drywall Fixing H Use Drywall Fixing H Self...
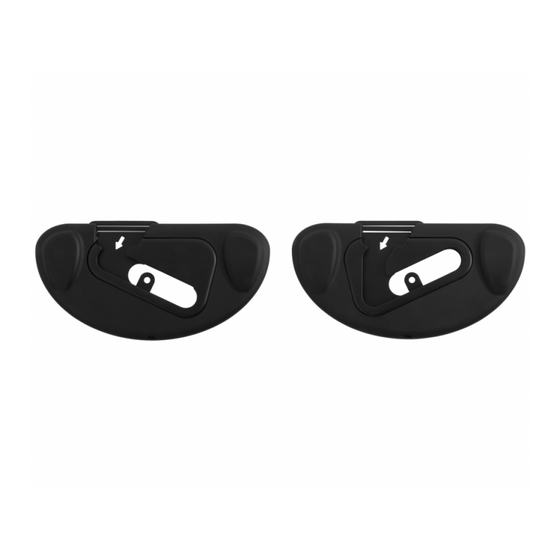
- Page 14 With Adaptor Fitting the Wall Bracket Covers On wall bracket covers A1 & B1 are 3 retaining tabs. These locate onto 3 retaining lips on wall brackets A & B and lock the wall bracket covers in position. Retaining lip Retaining lip Retaining tab Retaining tab...
- Page 15 With Adaptor Hanging the TV Hanging the TV is a two person job. Present adaptor V (on the back of the TV) to the opening on brackets A & B. Slide down and across into place. Ensure adaptor is fully engaged. If cables from the TV prevent the TV resting against the wall then an alternative hanger configuration will be required (see section 2).
- Page 16 Without Adaptor Fit Screen Hangers to TV Once you have established which screw diameter you need for your TV you will need to choose which wall spacing you require. Check the back of your TV and use the OPTION that fits your TV. Please see page opposite for more details.
- Page 17 OPTION 1 12mm Wall Space Top Fixings Bottom Fixings OPTION 2 This OPTION is not suitable for M4 screws G1-3 20mm Wall Space TopFixings Bottom Fixings OPTION 3 This OPTION is not suitable for M4 screws G1-3 40mm Wall Space Top Fixings Bottom Fixings...
- Page 18 Without Adaptor Assemble Positioning Template Without Adaptor Determine Bracket Hole Centers Lay the template on the back of the TV and follow the instructions below. Place the top row of holes on template U1 over hangers C. Mark off the top fixing centers The center line of the template U2 represents Top row holes...
- Page 19 Without Adaptor Marking Wall For Drill Points Before marking the wall, Represents the determine the wall type that top of your TV. you have (i.e. Solid Wall/ Drywall/Wood Stud/ Metal Stud). Ensure the drilling area is free from mains services (Gas/Electric/Water).
- Page 20 Without Adaptor Fitting the Wall Bracket Use the correct fixings for your wall type. Mixing fixing screws may be required for installations that span different wall types. DO NOT OVER TIGHTEN SCREWS. Drywall Solid Wall Min supporting surface specification:- ½” thick drywall, mounted on 1½”...
- Page 21 Metal Stud Wood Stud Min supporting surface specification:- Min supporting surface specification:- ½” thick drywall ½” thick drywall 18mm (3/4") 18mm (3/4") 3.5mm (1/8") Ensure hole is (9/64") in the middle of the wood stud 75mm (3") 0.6mm (0.025") MIN stud thickness Use Drywall Fixing H Use Drywall Fixing H Self...
- Page 22 Without Adaptor Fitting the Wall Bracket Covers On wall bracket covers A1 & B1 are 3 retaining tabs. These locate onto 3 retaining lips on wall brackets A & B and lock the wall bracket covers in position. Retaining lip Retaining lip Retaining tab Retaining tab...
- Page 23 Without Adaptor Hanging the TV Hanging the TV is a two person job. Present hangers (on the back of the TV) to the opening on brackets A & B. Slide down and across into place. Ensure both hangers are fully engaged. If cables from the TV prevent the TV resting against the wall then an alternative hanger configuration will be required (see section 9).
- Page 24 Removing the Wall Bracket Covers Should you want to remove the wall bracket covers please follow the steps below. Take Care Keep screwdriver level as you pull downwards...
Need help?
Do you have a question about the ZML8360 and is the answer not in the manual?
Questions and answers