Advertisement
Quick Links
Advertisement

Subscribe to Our Youtube Channel
Related Manuals for Noraxon PL1


Summary of Contents for Noraxon PL1
- Page 1 Portable Lab Quick Start Guide Portable Lab Quick Start Guide (Rev B)
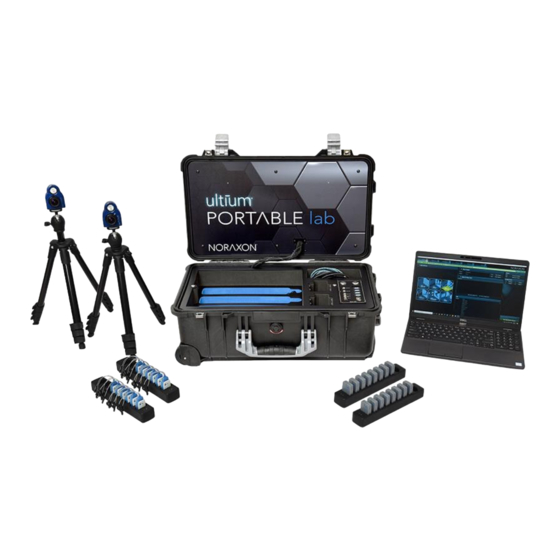
- Page 2 1 System Unboxing Upon arrival, carefully remove all contents and verify the following components are present. Contents will vary depending on the purchased package. 1.1 PL1 System Figure 1 - Portable Lab Figure 2 – PSU9 Figure 3 - USB cables (CBL33)
- Page 3 Portable Lab Quick Start Guide 1.2 PL2 System Figure 1 - Portable Lab Figure 2 – PSU9 Figure 3 - USB cables (Rev B)
- Page 4 Portable Lab Quick Start Guide 1.3 Ultium Portable Lab System Figure 1 - Portable Lab Figure 2 – PSU9 Figure 3 - USB cables (Rev B)
-
Page 5: Hardware Installation
Ninox 125 cameras. Input/Output Panel Note: Connect ONLY Ninox 125 cameras to the input/output panel. The IO panel for the PL1 is not compatible with Ninox 300C cameras. If applicable, please connect Ninox 300C cameras directly to the USB 3 or USB C ports on the PC. - Page 6 Portable Lab Quick Start Guide Connection to Host Computer (Rev B)
- Page 7 Portable Lab Quick Start Guide 2.2 PL2 Hardware Setup Instructions The second-generation Portable Lab System includes Research PRO (or Clinical) IMU and Ultium EMG sensors with optional Ninox 125 and 300C cameras. Ultium Receiver The Ultium receiver is embedded directly into the lid of the PL2 system. The LED indicator for the Ultium system can be viewed as shown on the PL2 lid.
- Page 8 Portable Lab Quick Start Guide Input/Output Panel Note: The Ninox Input can be used with both Ninox 125 and Ninox 300C cameras. (Rev B)
- Page 9 Portable Lab Quick Start Guide Connection to Host Computer Ultium Output Note: It is recommended to connect the Ninox Output cable to the host computer before connecting the Ninox cameras to the Ninox Input on the PL2 IO panel. (Rev B)
- Page 10 Portable Lab Quick Start Guide Ultium Portable Lab Hardware Setup Instructions The third-generation Portable Lab System includes Ultium Motion and EMG sensors with optional Ninox 125 and 300C cameras. Ultium Receiver(s) Two Ultium receivers are embedded directly into the lid of the Ultium Portable Lab system. The LED indicator for each Ultium system can be viewed as shown on the Ultium Portable Lab lid.
- Page 11 Portable Lab Quick Start Guide Input/Output Panel Note: The Ninox Input can be used with both Ninox 125 and Ninox 300C cameras. Reset Ultium Reset Ultium Receiver 1 Receiver 2 (Rev B)
- Page 12 Portable Lab Quick Start Guide Connection to Host Computer Ultium Output Note: It is recommended to connect the Ninox Output cable to the host computer before connecting the Ninox cameras to the Ninox Input on the PL2 IO panel. (Rev B)
- Page 13 Portable Lab Quick Start Guide 3 Adjusting your Computer Settings All changes to the computer settings must be made by a user with Administrator privileges. Note: All computers may not have every Power Option listed below. Adjust only the settings available on your computer.
- Page 14 Portable Lab Quick Start Guide Step 3 Click on Change Plan Settings to make further changes Step 4 Click on Change Advanced Power Settings Step 5 Find the USB Settings -> USB Selective Suspend menu and select Disabled Step 6 Find the Intel (R) Graphics Settings Expand the Intel (R) Graphics Power Plan and change the setting to Maximum Performance...
- Page 15 Portable Lab Quick Start Guide Step 7 Find the Processor Power Management Change both the Minimum and Maximum Processor State to 100% Step 8 Disable fast startup: Open Control Panel\Power Options and click Choose what the power buttons do on the left- hand side.
- Page 16 Portable Lab Quick Start Guide Step 1 Open the Device Manager by right clicking the start menu and select Device Manager Step 2 In the Device Manager expand the tab labeled Display Adapters. Force each display adapter (graphics card) that is listed the driver should be updated to the latest version available.
- Page 17 1. Insert the MR3 USB flash drive into the PC 2. A menu will automatically pop up 3. Click on the Noraxon installation file to begin the installation wizard 4. After installation, an icon will be created on the desktop 4.2 Companion Software Activation...
-
Page 18: Configuring The Hardware
Portable Lab Quick Start Guide 5 Configuring the Hardware Step 1 Open MR3, typically listed under Noraxon -> Click on the Hardware Setup button in the upper right-hand corner. Step 2 Insert Hardware: Select the desired hardware icon to insert, within the ‘New Device’... -
Page 19: Recording A Measurement
Portable Lab Quick Start Guide Step 4 Click on OK (in the bottom of the dialog box) when done. 6 Recording a Measurement Step 1 Within the Home screen, click on the myoMOTION (or myoMuscle/myoVideo) module icon. Create a New Subject Select New Configuration. -
Page 20: Viewing A Record
9 Contact Us Noraxon U.S.A. Inc. 15770 North Greenway-Hayden Loop, Suite 100 Scottsdale, Arizona 85260...
Need help?
Do you have a question about the PL1 and is the answer not in the manual?
Questions and answers