Table of Contents
Advertisement
Quick Links
H-10772, H-10773
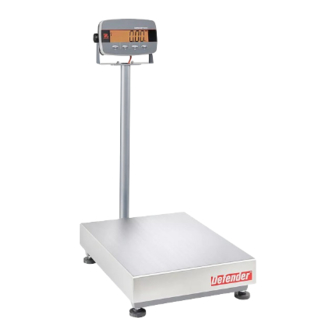
OHAUS DEFENDER™
3000 DIGITAL SCALE
CONTROL PANEL
1
2
3
4
5
6
CONTROL FUNCTIONS
BUTTON
PRIMARY FUNCTION
(Short Press)
SECONDARY FUNCTION
(Long Press)
MENU FUNCTION
(Short Press)
PAGE 1 OF 11
OVERVIEW OF CONTROLS
NET
PT
On/Zero
Print
Function
Off
Units
Mode
Yes
No
Back
On/Zero
Off
Yes
ON/ZERO
If indicator is on, sets
Sends the current value
zero.
to the RS232 port if Print
Setup > Assignment
> Demand Menu is
enabled.
OFF
Turns the indicator on
Changes the weighing
or off.
unit.
YES
Accepts the current
Advances to the next
setting on the display
menu or menu item.
or selects a sub-menu
Rejects the current
or menu item.
setting on the display
and advances to the
next available setting.
1-800-295-5510
uline.com
7
8
%t
9
PCS
kg
lb:oz
10
Tare
11
Menu
Exit
Print
Units
No
PRINT
Initiates an application
mode.
UNITS
Changes the
application mode.
NO
Moves back to previous
menu item.
DISPLAY PANEL INDICATORS
#
DESCRIPTION
1
NET Symbol
2
Center of Zero Symbol
3
Stable Weight Symbol
4
Negative Symbol
5
Preset Tare Symbol
6
Totalization Symbol
7
Battery Symbol
8
Percent/Ton Symbol
9
Pieces Symbol
10
Kilogram, Gram Symbol
11
Pound/Ounce Symbol
Function
Mode
Back
FUNCTION
Performs a tare
operation.
MODE
Enters the user menu.
Shows a tare value in
application modes
BACK
Exits the user menu.
Aborts the calibration
in progress.
Exits when displaying
totalization result or
under/over value in
check mode.
Tare
Menu
Exit
TARE
MENU
EXIT
0723 IH-10772
Advertisement
Table of Contents

Related Manuals for U-Line OHAUS DEFENDER 3000


Summary of Contents for U-Line OHAUS DEFENDER 3000
- Page 1 H-10772, H-10773 1-800-295-5510 uline.com OHAUS DEFENDER™ 3000 DIGITAL SCALE OVERVIEW OF CONTROLS CONTROL PANEL DISPLAY PANEL INDICATORS DESCRIPTION NET Symbol Center of Zero Symbol Stable Weight Symbol Negative Symbol Preset Tare Symbol lb:oz Totalization Symbol On/Zero Print Function Tare Battery Symbol Units Mode Menu...
- Page 2 SETUP RS232 CONNECTION Remove four red shipping spacers located under metal platform. (See Figure 1) Connect optional RS232 cable to connector on rear housing of indicator. (See Figure 3) Figure 1 CONNECTION Figure 3 RS232 Connector CONNECTIONS EASYCONNECT™ INDICATOR Plug the base's connector into external load cell connector at the back.
-
Page 3: Operation
OPERATION TURNING INDICATOR ON/OFF 4. Press the YES button again to accept setting or NO to resume editing. 1. To turn the scale on, short press the ON/ZERO 5. To end current menu selection, press YES to advance OFF button. The indicator performs a display test, to next menu or NO to return to top of current menu. -
Page 4: Calibration Menu
OPERATION CONTINUED CALIBRATION MENU RESET rESEt Set the unit menu to factory INITIAL CALIBRATION default settings: When scale is operated for first time, a zero and span NO = Not Reset calibration are recommended to ensure accurate YES = Reset weighing results. -
Page 5: Span Calibration
OPERATION CONTINUED SPAN CALIBRATION 5. The first calibration point and unit will flash on display based on scale capacity and unit set in menu MENU Long press Menu button until is displayed. 015.000 (e.g. kg). C.A.L 2. Wait for display to show , then press YES button. - Page 6 OPERATION CONTINUED MANUAL TARE RECALL AND USE PREVIOUS APW Press NO button to begin counting. When weighing an item that must be held in a container, taring stores the container weight in CLr.PAN NOTE: If display shows , remove weight memory.
-
Page 7: Zero Check
OPERATION CONTINUED SET CHECK LIMITS 2. Remove a portion of the package or material until display turns green. CHECK Press and hold MODE button until NOTE: To continue weighing multiple portions displayed. CLr .CHK off the scale's pan, tare the scale between each portion. -
Page 8: Legal For Trade
OPERATION CONTINUED LEGAL FOR TRADE ENTER MODE tOtAL Press and hold MODE button intil is displayed. When the indicator is used in trade or a legally controlled application, it must be set up, verified and CLr.ACC 2. Display will show when MODE button is sealed in accordance with local weights and measures released. - Page 9 When indicator is connecterd to an Error 8.9 Ohaus Defender 3000 series base with See Figures 8-9 for connector cover sealing methods. EasyConnect™ function, no sealing is necessary. Once indicator or base is replayed with a new one, error message Error 8.9...
-
Page 10: Maintenance
MAINTENANCE CLEANING CAUTION! Disconnect the unit from the power supply before cleaning. • Housing may be cleaned with a cloth dampened • Do not use solvents, chemicals, alcohol, ammonia with a mild detergent if necessary. or abrasives to clean the housing or control panel. TROUBLESHOOTING OPERATING ISSUE CAUSES... - Page 11 TROUBLESHOOTING CONTINUED OPERATING ISSUE CAUSES RECOMMENDATIONS Error 8.9 Failure to read serial number from Break seal or replace original base/ EasyConnect module. indicator. Service required. Serial number does not match LFT ON status. Err 9.5 Calibration data not present. Calibrate scale. CAL E Calibration error.
Need help?
Do you have a question about the OHAUS DEFENDER 3000 and is the answer not in the manual?
Questions and answers