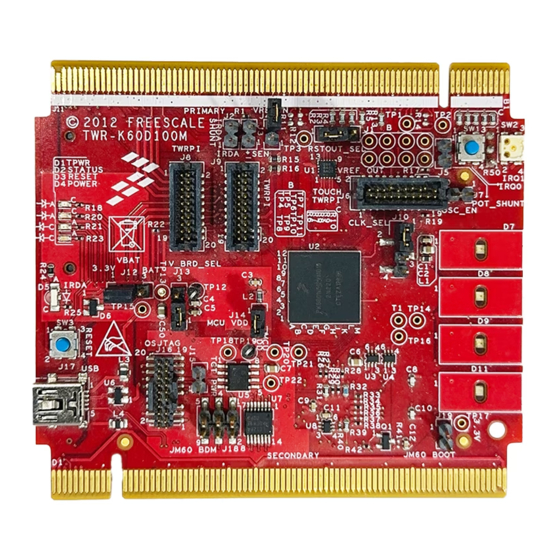
Summary of Contents for Freescale Semiconductor TWR-K60D100M
- Page 1 TWR-K60D100M Quick Start Demo Lab Guide for MQX 4.0 Rev. 1 Freescale Semiconductor Inc. TWRK60D100MQSDLAB...
-
Page 2: Table Of Contents
5.2 IAR Embedded Workbench for ARM 6.50.6 ......................11 6 Task Aware Debugging ........................14 7 Demo Software Overview ........................14 8 Creating a new MQX project ......................15 9 OSJTAG ..............................16 TWR-K60D100M Quick Start Demo Lab Guide Page 2 of 19... -
Page 3: Purpose
5) Connect an Ethernet cable between the TWR-SER board and an Ethernet port on your computer 6) Note that the default jumper settings are in the Quick Start Guide for the TWR-K60D100M and TWR-SER if you want to change back to the default settings after you are done running the demo. - Page 4 JM60 boot loader jumper header. It is J19 and is labelled JM60 Boot on the silk screen. Then re-connect the board to your computer. TWR-K60D100M Quick Start Demo Lab Guide Page 4 of 19...
-
Page 5: Run The Demo
4 Run the Demo 1) Connect a mini-B USB cable to the TWR-K60D100M tower module. 2) Allow the PC to automatically configure the OSJTAG drivers used for debugging and the serial- to-USB feature. If you have trouble connecting to the board or using the Serial Terminal, see... - Page 6 16) However, if you have trouble connecting, you may configure the IP address of the computer manually. Select Start >Settings > Network Connections > Local Area Connection. Note your original TCP/IP settings, and then set your IP address to on your computer 169.254.3.4 and TWR-K60D100M Quick Start Demo Lab Guide Page 6 of 19...
-
Page 7: Development Software And Programming The Board
(This feature is not part of the pre-flashed demo, and is only in web-downloaded version. Also note the errata described in the SD Card demo section above for Rev D TWR-K60D100M boards.) 5 Development Software and Programming the Board The following instructions describe how to build and flash the Kinetis Quick Start Demo using MQX 4.0 with both CodeWarrior MCU 10.4 and IAR 6.50.6... -
Page 8: Codewarrior For Microcontrollers 10.4
4) Install MQX 4.0. You can find this from the MQX website 5) You must then compile the MQX libraries for the TWR-K60D100M board. The workspace at <mqx_dir>\config\twrk60d100m\cw10\twrk60d100m.wsd has all the libraries to build and can be imported going to the File->Import and then Other->Import Working Sets. - Page 9 11) On the next screen, select the “Select root directory:” option, and click on Browse 12) Navigate to the C:\Freescale\Freescale_MQX_4_0\demo\TWR- K60D100M_Quick_Start_Demo directory and hit OK. 13) Make sure TWR-K60D100M_Quick_Start_Demo is checked, and hit Finish. TWR-K60D100M Quick Start Demo Lab Guide Page 9 of 19...
- Page 10 #define ENET_IPADDR IPADDR(169,254,3,3) 17) You could also use DHCP instead of a static IP address by setting DEMOCFG_ENABLE_DHCP to 1 in web.h 18) Save the file after you are done. TWR-K60D100M Quick Start Demo Lab Guide Page 10 of 19...
-
Page 11: Iar Embedded Workbench For Arm 6.50.6
2) Install IAR for ARM v6.60 or higher. The Evaluation edition or Full edition will be required because of code size. 3) Install MQX 4.0. You can find this on the MQX website TWR-K60D100M Quick Start Demo Lab Guide Page 11 of 19... - Page 12 4) You must then compile the MQX libraries for the TWR-K60D100M board. The workspace at <mqx_dir>\config\twrk60d100m\iar\build_libs.eww has all the libraries to build. Use the default “Debug” targets and you can select all the libraries by holding the Ctrl key as you click on each project name, and after they are all highlighted, select “Rebuild All”.
- Page 13 “Download and Debug” button 15) The code will download to Flash, and the debugger screen will come up and pause at the first instruction. Hit the “Go” button to start running. TWR-K60D100M Quick Start Demo Lab Guide Page 13 of 19...
-
Page 14: Task Aware Debugging
Inside the initialization task, global variables are initialized and then the LWGPIO driver is initialized. Next the Accl_Task is started, which polls the MMA7660 sensor on the TWR-K60D100M over I2C. Then the ADC_Task is started, which polls the ADC channel connected to the potentiometer, and the ADC temperature sensor. -
Page 15: Creating A New Mqx Project
<mqx_dir>\demo, modifies them to use the new name, and copies the Hello World example from <mqx_dir>\mqx\examples\hello 5) After the script finishes, hit the Enter key to close the window. TWR-K60D100M Quick Start Demo Lab Guide Page 15 of 19... -
Page 16: Osjtag
When the tower board is plugged in, it should enumerate as a composite device, with one driver for debugging, and the other as a serial port. If you go to the Device Manager you should see the following: TWR-K60D100M Quick Start Demo Lab Guide Page 16 of 19... - Page 17 To fix this, right click on the OSBDM driver and select “Uninstall”. Then unplug and re-plug in the board, and it should enumerate correctly. If there are still problems with enumerating correctly, you can also manually select the drivers. TWR-K60D100M Quick Start Demo Lab Guide Page 17 of 19...
- Page 18 TWR-K60D100M Quick Start Demo Lab Guide Page 18 of 19...
- Page 19 For the Open Source BDM – Debug Port, use the driver at: C:\PEMicro\osbdm_osjtag_virtual_serial_toolkit\Drivers\osbdm\OSJTAG_Debug_Interface_libusb.inf For the PEMicro USB Serial Port (i1), use the driver at: C:\PEMicro\osbdm_osjtag_virtual_serial_toolkit\Drivers\osbdmOSJTAG_Serial_Interface_windriver_ version.inf TWR-K60D100M Quick Start Demo Lab Guide Page 19 of 19...


Need help?
Do you have a question about the TWR-K60D100M and is the answer not in the manual?
Questions and answers