Table of Contents
Advertisement
Quick Links
OPERATION MANUAL
COVERT
FEATURES
• 1/3" 4.0 Megapixel CMOS Image Sensor Providing a High Definition Image in Low Light Situations
• Up to 25fps @ 4MP (2560 × 1440), 3MP (2304 × 1296), 1080P (1920 ×
CIF, 480 × 240
• 3.7mm Fixed Iris Lens
• 36pcs IR with up to 33' (10m) IR Range
• Sleek, Compact Design
• Discreet IR Illumination, Nearly Undetectable in Low Light Environments
• 95° Wide Angle - Suitable for Nearly All Indoor Surveillance Monitoring Environments
• True >100dB Wide Dynamic Range
• True Day / Night • XD-DNR (3D & 2D-DNR) Noise Reduction
• Built-in Mic + 1 Ch. Audio Out
• 16ft. Audio Pick-up Range (5m)
• Motion Detection / Region of Interest (up to 8 Configurable Areas) Each Region to be Configured Separately
• Dual Stream, H.265+ / H.265 / H.264+ / H.264 Compression
• MicroSD Card Slot for Local Recording (Up to 256GB)
• Remote Viewing via VMS (Microsoft Edge, Chrome, Firefox, and Safari, and iOS & Android Apps)
• ONVIF Compliant
• No Plug-in Req'd, Direct Set-up / Live View / Playback / Record from Browser
• Built-in Easy Wall Mount Included
• 12VDC & PoE (Power over Ethernet) Operation
• 3-Year Warranty
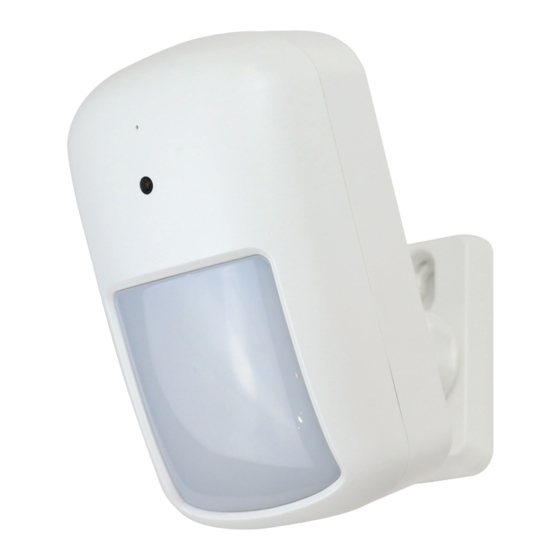
VITEK 4 MegaPixel Passive
Infrared (PIR) H.265+ Network
Camera with Discreet Illumination
1080), 720P (1280 × 720), D1,
Further Information, Guides, Software, Tools, and Updates
are available online. Scan the QR Code or visit:
http://www.vitekcctv.com/Downloads
VTC-PIR4CN-4
Advertisement
Table of Contents

Related Manuals for Vitek VTC-PIR4CN-4


Summary of Contents for Vitek VTC-PIR4CN-4
- Page 1 VTC-PIR4CN-4 VITEK 4 MegaPixel Passive Infrared (PIR) H.265+ Network Camera with Discreet Illumination OPERATION MANUAL COVERT FEATURES • 1/3” 4.0 Megapixel CMOS Image Sensor Providing a High Definition Image in Low Light Situations • Up to 25fps @ 4MP (2560 × 1440), 3MP (2304 × 1296), 1080P (1920 ×...
-
Page 2: Table Of Contents
C C o o n n t t e e n n t t s s Chapter 1 Product Overview ........................2 1.1 Product Introduction .........................2 1.2 Function classification ........................2 1.2.1 Basic functions .........................3 Chapter 2 Setting ............................4 2.1 Connecting device ..........................4 2.2 Searching Device IP Address ......................4 2.3 Exceptional case ..........................5 Chapter 3 Basic functions ...........................6... -
Page 3: Chapter 1 Product Overview
3.4.2.2 LED:Adjusting the lighting mode of the device ......... 16 3.4.2.3 OSD:Set the screen display information............17 3.4.2.4 Privacy Masking ....................... 17 3.4.2.5 ROI: Region of Interest ..................18 3.4.3 Audio Settings ........................19 3.4.4 Network Settings .......................... 20 3.4.5 Storage: Set the parameter settings for device storage recording, scheduled recording, and alarm recording. -
Page 4: Basic Functions
1.2.1 Basic functions Real time monitoring Supports real-time preview of device. Supports Audio in preview screen. Supports real-time snapshot of preview screen. Supports setting encoding parameters and adjusting preview screen. Video recording Supports automatic recording according to the recording plan. Supports video playback from SD card. -
Page 5: Chapter 2 Setting
Chapter 2 Setting 2.1 Connecting device Connect the VTC-PIR4CN-4 and a computer / NVR to the same PoE switch / router, and plug in the power. 2.2 Searching Device IP Address Using the IP55 search tool, click Search to get the IP address assigned to the device on the router, which is used when logging in to the web interface. -
Page 6: Exceptional Case
2. Device Settings Dive Name: input the name you want Click set to save name Click set to change the IP address of the camera, select Static or DCHP and input the IP address, Netmask and Gateway and the click on Set To upgrade the firmware on the camera click Upgrade Firmware and browse to the upgrade file on your computer and then click open To restore factory default to the camera click Restore... -
Page 7: Chapter 3 Basic Functions
changing to static IP, please note that the same IP address cannot exist in the LAN. Chapter 3 Basic functions Introduction to the basic functions of the device, including login, preview, playback, camera attribute settings, network settings, storage management, system settings, etc. 3.1 Device login Log in to the device's web interface through a browser, using Microsoft Edge browser... -
Page 8: Preview Operation
Step 3 Click “Login”. Preview page is displayed. 3.2 Preview operation Introduction to the layout and functional configuration of the preview interface. 3.2.1 Preview interface layout... -
Page 9: Logged-In User Name/Logging Out And Re-Signing In With A New User Name
The preview interface is slightly different for different devices. User name/Exit Displays the logged-in user name for this device. 2. Live video Select the button to view the live screen of the device. 3. Primary/Secondary streams Switches the primary and secondary streams of the live screen. -
Page 10: Setting Real-Time Screen Encoding
3.2.3 Setting real-time screen encoding Main stream: The encoded stream value is relatively large, the image compression ratio is small, but occupies large bandwidth, suitable for storage and preview. Secondary stream: The encoded stream value is relatively small compared to the main stream, the image is smoother and takes up less bandwidth. -
Page 11: Video Playback
3.3 Video playback Playback interface, the functions and operations supported by playback, including playback and download of videos. 1. Function buttons, including play, stop, sound, time bar zoom in, zoom out, and video download. 2. Video date, select the time (month, year, day) of the video you need to watch. 3. -
Page 12: Date Of Video Recording
Mute the audio. Zoom in on the length of each unit of time displayed in the timeline. Narrow the timeline to reduce the length of each unit of time. Download video, download the video being played. 3.3.2 Date of video recording Click on the date bar, select the time and date you need to view, and click OK to display the video of that day on the timeline. -
Page 13: Search Video
The normal video is displayed in green, and the event video is displayed in red. The time units of the timeline can be modified in the function buttons by zooming in and out buttons. 3.3.4 Search video Video types can be searched by all videos, timed videos, and alarm videos. Click on the drop-down menu in the red box, select the needed recording, and click the search button to display the required recording in the timeline. - Page 14 1. Primary/secondary streams, select the type of stream to modify. 2. Video encoding, support H264, H265 mode under the same image quality, occupy less bandwidth than H.264. 3. Resolution of the video picture, the larger the value, the clearer the image, but the more bandwidth it takes up.
-
Page 15: Image Settings
7. Encoding complexity, modify the encoding complexity of the video.. 8. I-frame interval, modifies the I-frame interval of the video, the range of the I- frame interval varies with the frame rate, it is recommended to set the I-frame interval to 2 times the frame rate. 9. -
Page 16: Display
3.4.2.1 Display User can adjust each parameter of the image according to the actual situation. 1. Brightness: The overall brightness of the image, When the value is relatively large, the image tends to be white. 2. Contrast ratio: The ratio of black to white in an image. The larger the value, the more colorful the image will be. -
Page 17: Led:adjusting The Lighting Mode Of The Device
White balance R, G, B values, manually adjust the parameter values of the image to adjust the device to the optimal state. 10. Power frequency:including 50Hz, 60Hz two modes. 50Hz: When the main power is 50 Hz, the exposure is automatically adjusted according to the scene brightness, while ensuring that the image does not show horizontal stripes. -
Page 18: Osd:set The Screen Display Information
1. Day/Night Mode: Set the image to display in black and white, color, or switch between color and black and white depending on the environment. 2. Sensitivity: Set sensitivity for light dark switching. 3. Alarm Time Interval:Set the interval time for triggering an alarm. 3.4.2.3 OSD:Set the screen display information. -
Page 19: Roi: Region Of Interest
Select to enable Privacy Masking, click on the Draw Area to draw the area that needs to be excluded in the image, as shown in the figure, and then click on save to take effect. You can set up to 5 areas. 3.4.2.5 ROI: Region of Interest... -
Page 20: Audio Settings
Select Enable ROI, select the desired encoding quality, click on the drawing area to draw the area that needs to be excluded in the image, as shown in the figure, and then click Save to take effect. Up to 8 areas can be set. 3.4.3 Audio Settings Set the audio input type, volume, etc. -
Page 21: Network Settings
1. Enable Audio: Turns on/off the device's audio option, default to on. 2. Encoding,The set audio encoding mode takes effect simultaneously. 3. Sample Rate:Number of samples per second for audio signals. 4. Bit Width:The Quantization accuracy of each sampling point in digital audio signals. - Page 22 the internet, with two states: successful/failed connection. 2. IP Allocation Mode: Two modes: Static IP and DHCP Dynamic Allocation. Static IP: Manually set the IP address, subnet mask, and route/ Gateway. After clicking "OK", the WEB page will automatically jump to the login interface for the newly set IP address.
- Page 23 Click Scan to search for nearby networks, click on the name of the Wi-Fi you want to connect to, and then enter the password for this Wi-Fi in the WIFI password. Alternatively, you can skip this step and enter the set Wi- Fi account password in the WI-FI name and WI-FI password.
- Page 24 4. Onvif Port:Port for Onvif protocol, default is 9007. 4. FTP: File Transfer Protocol, when an alarm is triggered, real-time images can be sent to a specified network address. 1. Enable FTP: Switch on/off the FTP function. 2. FTP Server: Fill in the network address indicated by the set FTP. 3....
-
Page 25: Storage: Set The Parameter Settings For Device Storage Recording, Scheduled Recording, And Alarm Recording
1. Enable SMTP: Enable Mailbox Pushing. 2. Username: The name of the email to send. 3. Sender: Email address of sender. 4. Password: Email password of sender. 5. SMTP Server: SMTP (Simple Mail Transfer Protocol) Server address. 6. Port: Port of the server. 7.... - Page 26 1.Enable storage: Turn on/off the storage function of device. 2.Allow Overwrite: Turn on/off device loop recording. 3.Max Record Time: The max duration of a single recording saved on a memory card. 2. Schedule Recording: Set the schedule recording parameters of the device. 1.
- Page 27 3. Motion detection: Open the alarm video function of the device. Enable: Turn on/off the alarm recording of the device. Video Stream: Select the stored video as primary/secondary stream. With Audio: Switch for record sound. Pre-record: When an alarm is generated, the video of the previous period will also be entered into the alarm video.
- Page 28 10. Schedule Settings: Click Edit to set the time period of the scheduled route. After setting, click Save to take effect. 4. SD Card: Manage the storage device.
-
Page 29: Time/Date Setting: Displays/Set The Camera Time
1. SD Card: Before removing the SD card, click Unmount SD card to ensure data security. When inserting a new SD card or removing the video stored in the SD card, click Format to clear the information in the SD card. 2. - Page 30 3.4.7 Account Management: Manage system users, add users, delete users, or modify user information. System users include admin and added users. 1. User management operations, including adding users or user groups, deleting users or user groups, and modifying user information, can only be performed when users have user management permissions.
-
Page 31: Routine Maintenance: Check Equipment Software Information, Software Upgrade, Routine Maintenance Equipment, Reset Equipment
3.5 Routine maintenance: check equipment software information, software upgrade, routine maintenance equipment, reset equipment. 1, Firmware upgrade: user can view the software information of the device here, and select the required upgrade file in the upgrade firmware to upgrade the software version of the camera. - Page 32 NOTES...
- Page 33 DETAILED SPECIFICATIONS - VTC-PIR4CN-4 VITEK 4 MegaPixel Passive Infrared (PIR) H.265+ Network Camera with Discreet Illumination Image Sensor 1/3” 4MP Max. Resolution 2560 (H) × 1440 (V) ROM / RAM 16MB / 64MB Electronic Shutter speed Auto / Manual Min Illumination Color: 0.001 Lux @ (F1.2, AGC ON), B/W: 0.0001 Lux @ (F1.2, AGC ON), 0 Lux with IR...
- Page 34 Network Camera User Manual VERSION 1.0 August 2023 APRIL 2020 Vitek IVP, Inc. 28492 Constellation Blvd, Valencia, CA 91355 www.vitekcctv.com...
Need help?
Do you have a question about the VTC-PIR4CN-4 and is the answer not in the manual?
Questions and answers