
Subscribe to Our Youtube Channel
Related Manuals for Nautilus Hyosung MONiMAX5300SE System


Summary of Contents for Nautilus Hyosung MONiMAX5300SE System
- Page 1 Operator Manual MONiMAX5300SE System V01.00.00 (2016. 03. 04) © 2016 Nautilus Hyosung Inc. All Rights Reserved.
- Page 2 Version Date Description of Change Chapter V01.00.00 2016/03/04 New Publication © 2016 Nautilus Hyosung All Rights Reserved. The content of this specification is protected by copyright laws. 2016. 3. 4. 1 Release © 2016 Nautilus Hyosung Inc. All Rights Reserved.
-
Page 3: Table Of Contents
How to Clear Jam ............................4-10 Chapter5. Receipt Printer ..........................5-1 Receipt Paper ............................... 5-1 How to load the receipt paper ........................5-3 How to Clear a Receipt Jam ......................... 5-5 Notes ................................Notes-1 © 2016 Nautilus Hyosung Inc. All Rights Reserved. -
Page 4: Chapter1. Preface
This manual details how the customers replenish the notes and paper and how they remove the jam at the MX5300SE. Audience ► Customers and staffs of Nautilus Hyosung who use and operate the MX5300SE in each branches of bank. Support Information ►... -
Page 5: Terminologies
Europay, Mastercard, Visa Elementary Program Encryption PIN Pad Hardware Interface International Standard Organization Journal Printer Liquid Crystal Display Magnetic Card Unit Operation Panel for Customers to Operate OSD board On Screen Display Board © 2016 Nautilus Hyosung Inc. All Rights Reserved. - Page 6 Power Supply Personal Identification Number Panel Control Board Printer (mainly Receipt Printer) Switch Sensor and Indications Unit Service Provider Slip Printer (Receipt Printer) Text Terminal Unit (OPL or SPL) Vacuum Fluorescent Display © 2016 Nautilus Hyosung Inc. All Rights Reserved.
-
Page 7: Safety Precautions (English)
▪ Do not touch the equipment when it is running. ▪ The equipment can get extremely hot and may cause a burn. ▪ Make sure to close the cover before running the equipment. © 2016 Nautilus Hyosung Inc. All Rights Reserved. - Page 8 TYPE. DISPOSED OF USED BATTERIES ACCORDING TO THE INSTRUCTIONS 3. FOR PLUGGABLE EQUIPMENT, THE SOCKET-OUTLET SHALL BE INSTALLED NEAR THE EQUIPMENT AN SHALL BE EASILY ACCESSIBLE 4. THE EQUIPMENT IS TO BE SECURED TO THE BUILDING STRUCTURE BEFORE OPERATION © 2016 Nautilus Hyosung Inc. All Rights Reserved.
-
Page 9: Précautions Pour La Sécurité (French)
• Ne pas retirer le couvercle. Seul le technicien d'entretien est autorisé à ouvrir le couvercle. • Ne pas toucher. Vous pouvez avoir un choc électrique. • Assurez-vous d'éteindre l'appareil lors de l'entretien de l'équipement. © 2016 Nautilus Hyosung Inc. All Rights Reserved. - Page 10 2. RISQUE D'EXPLOSION SI LA BATTERIE EST REMPLACEE PAR UN TYPE INCORRECT. DISPOSER POUR UTILISATION DES BATTRIES SELON LES INSTRUCTIONS 3. POUR LES APPAREILS RACCORDES, LA PRISE DOIT ETRE INSTALLEE PRES D’EQUIPEMENT POUR ÊTRE FACILEMENT ACCESSIBLE © 2016 Nautilus Hyosung Inc. All Rights Reserved.
-
Page 11: Related Document
4. L’EQUIPEMENT DOIT ETRE SECURISE A LA STRUCTURE DU BATIMENT AVANT D'UTILISER Related Document ▶ The related documents are listed as follows. If needed, please contact staffs of our technical support team and maintenance team. ▪ Installation Manual ▪ Service Manual © 2016 Nautilus Hyosung Inc. All Rights Reserved. -
Page 12: Chapter2. Introduction
Allows tellers to calculate and close amount faster than the existing manual calculation. Allows easy and quick installation and maintenance. © 2016 Nautilus Hyosung Inc. All Rights Reserved. -
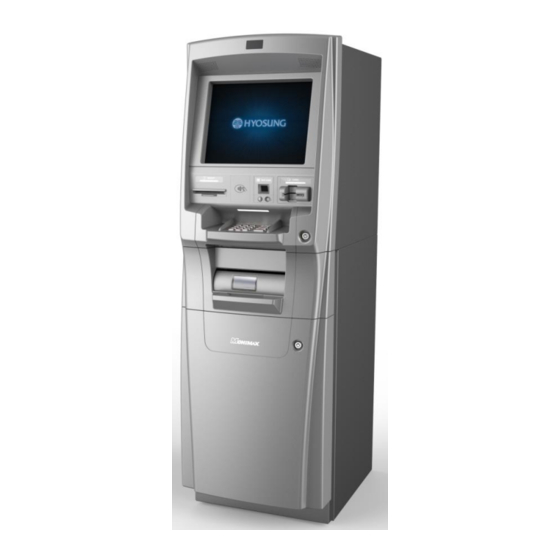
Page 13: The Exterior Overview
The fascia provides the interface between the customer and MX5300SE. The customer selects transactions and requests information at the fascia. Customer Function Keys Display Receipt Printer Slot Card Reader Slot (Dip Type) Encryption Pin Pad Cash Dispenser © 2016 Nautilus Hyosung Inc. All Rights Reserved. -
Page 14: Basic Features
Type EMV DIP Type Magnetic Stripe ISO 1,2,3 Read IC card Support Receipt Printer Printing Type Thermal Line Printing Type Thermal Roll Paper Paper Width Max. 80mm Specification Max. 180Φ Outer Diameter © 2016 Nautilus Hyosung Inc. All Rights Reserved. - Page 15 Humidity <Note!> Your MX5300SE may not contain all the devices described in this section. Some devices are optional and some devices cannot be used in combination with other devices (mutually exclusive combinations). © 2016 Nautilus Hyosung Inc. All Rights Reserved.
-
Page 16: Devices Of Mx5300Se
- Type: 15” wide TFT LCD(1024*768) - Brightness: 250 cd/m² (LED BU) • Guide Light: Flicker LED (SPR/CDU/MCU/EPP) • Function Key: 4 x 2 NDC Basic Specification of Pin-Pad ▪ EPP 8000M (PCI3.0 Compliant) © 2016 Nautilus Hyosung Inc. All Rights Reserved. -
Page 17: Cash Dispenser Unit
▪ Number of cassettes: MAX. 4 Cassette (2/3/4-CST Selectable) ▪ Denomination: USD ▪ Maximum Dispense: 40 Notes/1transaction ▪ Cassette Capacity: 2,000 notes per cassette ▪ Reject Type: Note by Note Reject (200 bills Max) <2-CST> <3-CST> © 2016 Nautilus Hyosung Inc. All Rights Reserved. -
Page 18: Receipt Printer
▪ Printing Type: Thermal Line Printing ▪ Paper Specification: - Type: Thermal Roll Paper - Width: Max. 80mm - Outer Diameter: Max. 180Φ ▪ Black Mark Paper: Support ▪ Paper End Sensor: Support © 2016 Nautilus Hyosung Inc. All Rights Reserved. -
Page 19: Card Reader
The dip card reader cannot retract, capture, or retain cards. Basic Specification of Magnetic Card Reader ▪ Type: EMV DIP Type ▪ Magnetic Stripe: ISO 1,2,3 Read ▪ IC card Support: Support © 2016 Nautilus Hyosung Inc. All Rights Reserved. -
Page 20: Main Control Board
- SDRAM 256MB • Operating System: Win_CE 6.0 • USB Ports: USB2.0 1-Port (Option : Extended 4-Ports) • Serial Ports: 8-Ports • VGA: On-Board (LVDS / TTL I/F) • Communication: Modem & TCP/IP Selectable © 2016 Nautilus Hyosung Inc. All Rights Reserved. -
Page 21: Chapter3. For The Beginning Operator
Operator Manual Chapter3. For the beginning operator Chapter3. For the beginning operator Opening Upper Front Body Hood ▶ 1. Rack out the ATM hood until the monitor/receipt printer assembly is fully extended. © 2016 Nautilus Hyosung Inc. All Rights Reserved. -
Page 22: Opening Security Enclosure
2. Unlock the E-lock referring to “Opening/Closing the Security Enclosure” 3. Turn the security door handle counterclockwise, and then pull the security door to open it. 4. Use the reverse order of above description to close the security cover and door. © 2016 Nautilus Hyosung Inc. All Rights Reserved. -
Page 23: Switching Power On/Off
1. The system turning-on process is as follows 2. Open the upper front body hood 3. Press the power switch (“I”). 4. The system will be turn on automatically © 2016 Nautilus Hyosung Inc. All Rights Reserved. -
Page 24: Switching Power Off
1. Open the upper front body hood 2. Press the power switch (“O”) 3. The system will be shut down automatically 4. The operating system will shut down then power will turn off. © 2016 Nautilus Hyosung Inc. All Rights Reserved. -
Page 25: Opening/Closing The Security Enclosure (Security Door)
2. Uses one (1) 9-Volt alkaline battery only. (Example: Duracell™ or Eveready™ alkaline batteries.) The replacement of batteries at least once annually is recommended. <Note!> If battery is depleted and will not allow lock to open, follow instructions below. © 2016 Nautilus Hyosung Inc. All Rights Reserved. - Page 26 5. Carefully position the keypad over the mounting screws and slide the keypad Housing down. Ensure there are no wires or cables trapped between the input pad and the safe door. Pinched cables can result in a short circuit. © 2016 Nautilus Hyosung Inc. All Rights Reserved.
-
Page 27: Cencon Lock (Option)
CW = Clockwise; CCW = Counter Clockwise 2. Enter the factory combination of 50-25-50 by sequentially pressing those six buttons. The LCD will display the entered number. © 2016 Nautilus Hyosung Inc. All Rights Reserved. - Page 28 At any point while entering the combination during an opening sequence, if you notice that an incorrect number was pressed on the keypad, you may clear the entire operation and start again by pressing the star ( * ) key. This allows you to © 2016 Nautilus Hyosung Inc. All Rights Reserved.
- Page 29 The best thing to do in analyzing the lock level is to write down the entire string and then pick out the portions of it that are significant to you, or if you are experiencing a problem with the lock, report the entire string to the Tech Support group. © 2016 Nautilus Hyosung Inc. All Rights Reserved.
- Page 30 Record the new combination and store it in a secure place. If this combination is lost or forgotten, there is no alternate way to open the lock. 12. POC Remove Change Key EOP Remove the change key. EOP (End Operation) is displayed. 3-10 © 2016 Nautilus Hyosung Inc. All Rights Reserved.
- Page 31 15. OPr Retract Bolt Turn the Dial to the right (CW) to retract the bolt. 16. Close Door 17. Extend Bolt Turn the Dial to the left (CCW) to extend the bolt. © 2016 Nautilus Hyosung Inc. All Rights Reserved. 3-11...
-
Page 32: Chapter4. Cash Dispenser
2. Bill has sufficient life or sizing to be handled easily 3. Bill which can be manually held straightly when one end is held by a hand and the bill is slightly curved vertically © 2016 Nautilus Hyosung Inc. All Rights Reserved. - Page 33 Operator Manual ▶ Unacceptable condition 1. Bill having serious wrinkles, torn or broken section wherein paper fiber is broken and separation begins. Wrinkle Wrinkle Torn Torn Broken section Broken Section © 2016 Nautilus Hyosung Inc. All Rights Reserved.
- Page 34 4. Bill ragged and cannot be held straightly when one end is supported by a hand 20mm [0.79inch] 35mm [1.38inch] When the bill is held by 20mm [0.79inch] and the straightness of the bill is 35mm [1.38inch] or less, it cannot be used © 2016 Nautilus Hyosung Inc. All Rights Reserved.
- Page 35 Chapter4. Cash Dispenser Operator Manual 5. Bill with cellophane tape, scotch tape, etc Tape 6. Bill with folds Fold 7. Gradually curved bill (bills tied by hand seal, etc) Band seal © 2016 Nautilus Hyosung Inc. All Rights Reserved.
- Page 36 1. Fan the notes so that the notes are not sticking together. 2. Remove all notes with holes or notes that are torn. 3. Unfold the folded notes. 4. Place the notes correctly. © 2016 Nautilus Hyosung Inc. All Rights Reserved.
-
Page 37: How To Replenish The Cash Cassette
3. Pull the cash plate back until it is locked against the cash plate latch. [PRECAUTION!] Be careful not to hurt your hands when the black push-plate fails to get locked and suddenly recovers its positions © 2016 Nautilus Hyosung Inc. All Rights Reserved. - Page 38 5. Unlock the cash plate by pulling it again and move it smoothly. 6. Close the cassette cover and turn the cassette key counterclockwise until it is locked. Remove the key when it is locked. © 2016 Nautilus Hyosung Inc. All Rights Reserved.
- Page 39 7. With one hand holding the cassette handle and the other hand supporting the cassette from the bottom, place the cassette carefully on the set guide of the CDU and push it in until it is locked in place. © 2016 Nautilus Hyosung Inc. All Rights Reserved.
-
Page 40: How To Empty The Reject Bin
3. Take bills from the reject box and close the box with key. [PRECAUTION!] Don’t recycle any bill in reject box into cassette. Doing so will cause not only the same reject problem, but other unexpected problems such as note jams on cash dispenser © 2016 Nautilus Hyosung Inc. All Rights Reserved. -
Page 41: How To Clear Jam
1. Turn power off first and pull the rail of CDU outward while pressing the green button on the CDU. 2. Turn the pulley located in left upper in order to move jammed note into a well removed position. 3. Take out the jammed note carefully. 4-10 © 2016 Nautilus Hyosung Inc. All Rights Reserved. - Page 42 If the belt is detached from the Roller, the lifespan of the belt can be dramatically reduced which can result in breakage. Therefore, it is extremely important to check if the belt is positioned correctly after removing the jammed bills. © 2016 Nautilus Hyosung Inc. All Rights Reserved. 4-11...
-
Page 43: Chapter5. Receipt Printer
Type of Paper Setting Semi-Auto loading ▶ Roll appearance (Thermal printing side is OUTSIDE, NOT INSIDE of roll paper) Beginning and ending edge of the paper should be that of the printing specifications. © 2016 Nautilus Hyosung Inc. All Rights Reserved. - Page 44 8. Make sure the paper is rolled evenly. 9. Miscellaneous: If the paper comes in contact with carbon copy paper or if the paper surface is scratched with a metallic object, de-coloring may occur. © 2016 Nautilus Hyosung Inc. All Rights Reserved.
-
Page 45: How To Load The Receipt Paper
2) The leading edge of the roll shall neatly be cut prior to loading the roll. Correct shape of the paper roll 1. Rack out the ATM hood until the monitor/receipt printer assembly is fully extended. 2. Remove the roll guide by carefully pulling it off. Roll Guide © 2016 Nautilus Hyosung Inc. All Rights Reserved. - Page 46 6. If the paper does not feed at all during initializing, make sure that paper has a CLEAN CUT at the end and the Thermal Print Head (TPH) is closed as shown in picture below. 7. Close the upper front body. © 2016 Nautilus Hyosung Inc. All Rights Reserved.
-
Page 47: How To Clear A Receipt Jam
3. After finishing clearing the receipt, load the receipt paper properly. Make sure that the Thermal Print Head (TPH) is closed. When finished loading paper, close the Front Panel and remove the key. © 2016 Nautilus Hyosung Inc. All Rights Reserved. -
Page 48: Notes
Operator Manual Notes Notes © 2016 Nautilus Hyosung Inc. All Rights Reserved. Notes-1...
Need help?
Do you have a question about the MONiMAX5300SE System and is the answer not in the manual?
Questions and answers