
Related Manuals for Technogym D93TNL


Summary of Contents for Technogym D93TNL
- Page 1 TECHNOGYM BIKE LIVE Technical Service Guide Equipment Code: D93TNL Rev: 2.0 Date: 14-03-2022 Document Code: TSG-00187-EN...
- Page 3 The information in this manual is intended for QUALIFIED TECHNICAL PERSONNEL, who have been specifically trained by TECHNOGYM and are qualified to carry out fine tuning and start-up of the equipment, as well as major maintenance work and repairs, requiring in-depth understanding of the equipment, how it works, its safety devices and maintenance procedures.
- Page 4 TECHNOGYM BIKE LIVE Technical Service Guide Rev. 2.0 Blank Page - 4 - TSG-00187-EN - Uncontrolled copy if printed...
-
Page 5: Table Of Contents
DETAIL OF CONNECTORS .................25 3.6.2 CPU BOARD ......................26 3.6.3 WI-FI MODULE ......................26 INFORMATION ABOUT BLUETOOTH CONNECTIONS ........26 CHROMECAST (NOT SUPPLIED WITH TECHNOGYM BIKE EQUIPMENT)..27 LOGIN .........................27 INSTALLATION AND ELECTRICAL CONNECTION ........29 TSG-00187-EN - Uncontrolled copy if printed - 5 -... - Page 6 TECHNOGYM BIKE LIVE Technical Service Guide Rev. 2.0 PRE-INSTALLATION REQUIREMENTS ..............29 SHIPPING THE EQUIPMENT ...................29 INSTALLING THE EQUIPMENT ................29 PLACE OF USAGE ....................29 ELECTRICAL CONNECTION ...................30 TURNING THE PRODUCT ON AND OFF ...............31 MOVING THE EQUIPMENT..................32 STORING THE EQUIPMENT ..................33 UNITY INTERFACE USEFUL INFO - SW&FW UPDATE........35...
- Page 7 TECHNOGYM BIKE LIVE Technical Service Guide Rev. 2.0 EQUIPMENT CONFIGURATION (INSTALLATION WIZARD) ......57 INTRODUCTION ......................57 INSTALLATION WIZARD ..................57 PROCEDURES FOR DISASSEMBLY-REASSEMBLY AND REPLACEMENT OF COMPONENTS ...................63 NECESSARY TOOLS ....................63 EQUIPMENT REFERENCE ..................63 WARNING ........................64 DISASSEMBLING PROCEDURES ................64 DISASSEMBLING THE BRAKE CASINGS AND SIDE CASINGS ......64 DISASSEMBLING THE RPM SENSOR BOARD.............69...
- Page 8 TECHNOGYM BIKE LIVE Technical Service Guide Rev. 2.0 12. LIST OF MODIFICATIONS ................107 12.1 REVISION 1.0 ......................107 12.2 REVISION 1.1 ......................107 12.3 REVISION 2.0 ......................107 - 8 - TSG-00187-EN - Uncontrolled copy if printed...
-
Page 9: General Warnings
Rev. 2.0 GENERAL WARNINGS 1.1 INTRODUCTION This document has been prepared specifically for Technogym After Sales Service, with the aim of providing authorised personnel with the information for carrying out maintenance and repair op- erations in the correct manner. A thorough understanding of the technical data contained herein is absolutely fundamental in order for the operator to achieve the highest level in professional training. -
Page 10: Useful Advice
Rev. 2.0 1.2 USEFUL ADVICE Technogym advises you to plan your technical assistance task in the following way: Carefully assess the impressions reported by the Customer regarding the equipment’s operating faults and ask questions suitable to clarify the signs of the defect. -
Page 11: Technical Specifications
TECHNOGYM BIKE LIVE Technical Service Guide Rev. 2.0 TECHNICAL SPECIFICATIONS 2.1 TECHNICAL DATA Technical Data Power supply 12V 5A input 100÷240 Vac 50/60 Hz 2A Power supply unit output 12V 5A Less than 70 dB Noise level Protection rating IP 20... -
Page 12: Overall Dimensions And Weight Of Equipment
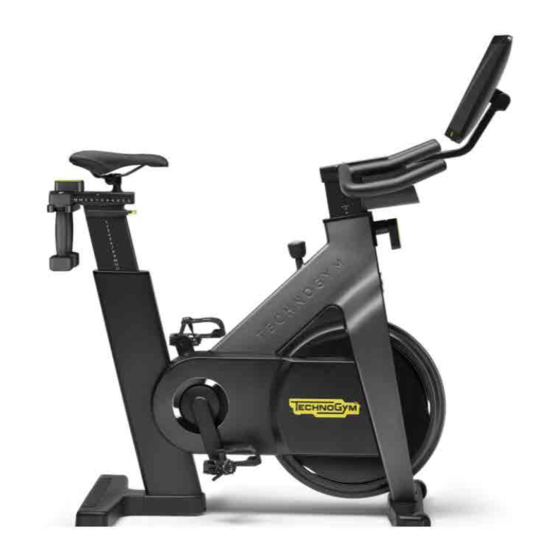
TECHNOGYM BIKE LIVE Technical Service Guide Rev. 2.0 2.2 OVERALL DIMENSIONS AND WEIGHT OF EQUIPMENT 67 Kg (148 lbs) Weight of the product Tab. 2 Fig. 1 2.3 DIMENSIONS AND WEIGHT OF PACKAGING TECHNOGYM BIKE - D93TNLE Packaging_From Technogym Production Line: CARTON_BOX... -
Page 13: Environmental Characteristics
2.5 CONFORMITY WITH STANDARDS AND DIRECTIVES For details about the directives, regulations covered by the equipment and certifications / Declarations of Conformity, contact Technogym Technical Support Service. 2.6 ACCESSORIES For details, refer to Marketing material. TSG-00187-EN - Uncontrolled copy if printed... -
Page 14: Equipment Coding
TECHNOGYM BIKE LIVE Technical Service Guide Rev. 2.0 2.7 EQUIPMENT CODING 2.7.1 TG BIKE WITH NOT PIVOTING DISPLAY (OLD) Characters Description Values and meaning Line Equipment 3 = TECHNOGYM BIKE Model T = Standard Power N = None Display; L = Live... -
Page 15: Serial Number Structure
TECHNOGYM BIKE LIVE Technical Service Guide Rev. 2.0 Characters Description Values and meaning Size S = Standard PIVOT X = XL PIVOT Weights 1 = 1.5 Kg 2 = 2.5 Kg FS = Dark Pearl Grey 9,10 Frame color Saddle... -
Page 16: Position Of Labels
TECHNOGYM BIKE LIVE Technical Service Guide Rev. 2.0 2.9 POSITION OF LABELS 2.9.1 TG BIKE WITH NOT PIVOTING DISPLAY (OLD) Fig. 2 (1): Label with warning label: Fig. 3 - 16 - TSG-00187-EN - Uncontrolled copy if printed... -
Page 17: Tg Bike With Not Pivoting Display (Old)
TECHNOGYM BIKE LIVE Technical Service Guide Rev. 2.0 (2): Label with serial number: Technogym S.p.A. via Calcinaro 2861, Cesena (FC) - Italy Made in Italy TECHNOGYM BIKE Model: D93LNUE0 FCCID: Z64 - WL18DBMOD Max imum User ’s we ight : 160 kg... - Page 18 TECHNOGYM BIKE LIVE Technical Service Guide Rev. 2.0 (1): Label with warning label: Fig. 6 (2): Label with serial number: - 18 - TSG-00187-EN - Uncontrolled copy if printed...
-
Page 19: Wiring Diagram
TECHNOGYM BIKE LIVE Technical Service Guide Rev. 2.0 2.10 WIRING DIAGRAM Fig. 7 TSG-00187-EN - Uncontrolled copy if printed - 19 -... -
Page 20: Cables
Blue NFC_SCL Grey NFC_SDA Green Tab. 9 (*): on the release date of the manual, It is not possible to connect Apple Watch to the Technogym bike 0WCU1365xx: Watt Sensor Board Cable Watt Sensor Board Signal Colour Hall Sensor... - Page 21 TECHNOGYM BIKE LIVE Technical Service Guide Rev. 2.0 0WCU1068xx: RPM / Watt sensor Cable Flying Con- nect. n°7 to Watt sensor sen- Unity spiral board sor board Signal Colour cable 6x1 pin 4x1 pin 3x2 pin Anode (VCC) RX In (From Console)
- Page 22 TECHNOGYM BIKE LIVE Technical Service Guide Rev. 2.0 0WCU1417xx: Display cable Flying Flying Ground Connec- Connec- Display Unit Signal Colour Frame (eye- tion tion 20x2 pin let) 2x2 pin 1x2 pin +12Vdc Tab. 13 0WCU1420xx: Spiral Cable / 0WCU1421xx for XL version...
-
Page 23: Operating Principle And Components
TECHNOGYM BIKE LIVE Technical Service Guide Rev. 2.0 OPERATING PRINCIPLE AND COMPONENTS 3.1 PRINCIPLE OF OPERATION SCHEME Fig. 8 3.2 POWER SUPPLY AC Input: 100-240V ~ 2.0A, 50-60Hz. DC Output: 12Vdc 5A 3.3 HALL SENSOR The Hall Sensor is fixed to the device frame, as detailed in figure below. It acquires the braking position based on the distance between the magnets and the brake and sends this information to the Watt Sensor Board. -
Page 24: Watt Sensor Board
TECHNOGYM BIKE LIVE Technical Service Guide Rev. 2.0 Fig. 9 3.4 WATT SENSOR BOARD The Watt Sensor board receives the information regarding the brake magnetic field (changes based on the position of the brake knob); it also receives the speed signal (rpm) from the RPM sensor. It uses this information as well as an algorithm loaded in its memory to calculate the watts developed by the user and transmits this to the console. -
Page 25: Rpm Sensor Board
TECHNOGYM BIKE LIVE Technical Service Guide Rev. 2.0 3.5 RPM SENSOR BOARD The optical RPM sensor board reads the speed of the flywheel, through the phonic wheel fixed to the flywheel. The RPM board consists of only Hardware (no sw installed). -
Page 26: Cpu Board
It is possible to connect heart rate monitors with Bluetooth connection (for example Polar H7, Polar H9, Polar H10, Polar OH1 ...). It is possible to connect Bluetooth headphones, audio speakers with Bluetooth connection Heart rate monitors with ANT+ connection cannot be paired with Technogym Bike. - 26 - TSG-00187-EN - Uncontrolled copy if printed... -
Page 27: Chromecast (Not Supplied With Technogym Bike Equipment)
HDMI port located on the back of the display. With the connection through Chromecast device, it is possible to view the phone applications that are compatible with the Chromecast connection on the Technogym Bike equipment. 3.9 LOGIN The login can be done in the following ways: ▪... - Page 28 TECHNOGYM BIKE LIVE Technical Service Guide Rev. 2.0 Blank Page - 28 - TSG-00187-EN - Uncontrolled copy if printed...
-
Page 29: Installation And Electrical Connection
Rev. 2.0 INSTALLATION AND ELECTRICAL CONNECTION 4.1 PRE-INSTALLATION REQUIREMENTS For details, see the Pre-installation requirements, available on Technogym Direct. 4.2 SHIPPING THE EQUIPMENT For details, see the Logistics E-Learning courses. 4.3 INSTALLING THE EQUIPMENT For details, see the Assembling instructions shipped with the equipment and the Logistics E-Learn- ing courses. -
Page 30: Electrical Connection
TECHNOGYM BIKE LIVE Technical Service Guide Rev. 2.0 4.5 ELECTRICAL CONNECTION Before connecting the equipment to the mains power supply, ensure that the electrical system specifications comply with current regulations. Check the specifications of the power supply on the product identification label. -
Page 31: Turning The Product On And Off
TECHNOGYM BIKE LIVE Technical Service Guide Rev. 2.0 4.6 TURNING THE PRODUCT ON AND OFF Press the switch underneath the display to turn the equipment on and off. The product must be connected to the mains power supply. Turn the product off, after exercising, only when it is in stand-by When the display is off, the LED (T) lights up. -
Page 32: Moving The Equipment
TECHNOGYM BIKE LIVE Technical Service Guide Rev. 2.0 4.7 MOVING THE EQUIPMENT WARNING: Move the product very carefully; it may become unstable and tip over. Before lifting the product, make sure the saddle is in the lowest position and locked in place. The product has fixed front wheels. -
Page 33: Storing The Equipment
TECHNOGYM BIKE LIVE Technical Service Guide Rev. 2.0 4.8 STORING THE EQUIPMENT Do not store the equipment in a vertical position. It may be unstable and it could fall over. Fig. 18 TSG-00187-EN - Uncontrolled copy if printed - 33 -... - Page 34 TECHNOGYM BIKE LIVE Technical Service Guide Rev. 2.0 Blank Page - 34 - TSG-00187-EN - Uncontrolled copy if printed...
-
Page 35: Unity Interface Useful Info - Sw&Fw Update
TECHNOGYM BIKE LIVE Technical Service Guide Rev. 2.0 UNITY INTERFACE USEFUL INFO - SW&FW UPDATE 5.1 ACCESSING THE MENU The procedure for accessing the menus is as follow: _In the stand-by screen, press and hold the touch screen on the volume icon, as shown in the figure below: Fig. -
Page 36: Update The Sw Of The Display
_Click on VERSIONS --> UPGRADE TECHNOGYM LIVE FROM NET; Wait until the up- grade is successfully done; 3_Upgrade Technogym Live: If it’s necessary to upgrade locally the sw, proceed as follow: _Insert the USB flash drive, just synchronized with PC Synch, in the USB Port of the display;... -
Page 37: Update The Fw Of The Watt Sensor Board
Sensor Board, from the Display or from the Watt Sensor Board). Fig. 22 - Adapter Cable For details about the cables codes, see the Technogym Direct portal - iSP Parts Catalogue section (GROUP CYCLE --> TECHNOGYM BIKE (D93)-->APPENDIX). TSG-00187-EN - Uncontrolled copy if printed... - Page 38 TECHNOGYM BIKE LIVE Technical Service Guide Rev. 2.0 Blank Page - 38 - TSG-00187-EN - Uncontrolled copy if printed...
-
Page 39: Troubleshooting
Each time the Watt Sensor board is replaced, the following is necessary: ▪ Upgrade the Equipment Software Loader db, if necessary; ▪ Write the Technogym Bike SN, through the Equipment Software Loader; ▪ Write the speed sensor setting, through the Equipment Software Loader;... -
Page 40: Replacing A Component That Interacts With Braking System (E.g. Knob, Brake Calliper, Flywheel)
TECHNOGYM BIKE LIVE Technical Service Guide Rev. 2.0 6.1.4 REPLACING A COMPONENT THAT INTERACTS WITH BRAKING SYSTEM (E.G. KNOB, BRAKE CALLIPER, FLYWHEEL) If a component is replaced that interacts with the braking system, the following is necessary: ▪ Calibrate the brake, as detailed in §”6.3 BRAKE CALIBRATION”. -
Page 41: Brake Calibration
TECHNOGYM BIKE LIVE Technical Service Guide Rev. 2.0 6.3 BRAKE CALIBRATION 6.3.1 WHEN MUST THE BRAKE CALIBRATION BE DONE? Brake calibration must be done: • when removing a component that interacts with the braking system (e.g: flywheel, knob, Hall sensor, etc.);... - Page 42 TECHNOGYM BIKE LIVE Technical Service Guide Rev. 2.0 Check that the knob is in a horizontal position (must be the zero position). If the knob is not in a horizontal position, move it so it is in this position. Keep the knob sta- tionary with one hand and adjust the self-locking nut (1).
- Page 43 TECHNOGYM BIKE LIVE Technical Service Guide Rev. 2.0 Check that the brake is in the correct position (there must be no plays when pressing the knob). ATTENTION: DO NOT PRESS TOO HARD ON THE KNOB TO AVOID FLEXING THE COMPONENT [2].
-
Page 44: Soft Calibration Of The Brake
TECHNOGYM BIKE LIVE Technical Service Guide Rev. 2.0 Then, lock the nut [3] with the self-locking nut [4]. Fig. 28 6.3.2.2 SOFT CALIBRATION OF THE BRAKE On display, access the Service Menu (2501). Click on LOWKIT --> START LOWKIT CALIBRATION. - Page 45 TECHNOGYM BIKE LIVE Technical Service Guide Rev. 2.0 Fig. 30 Turn the knob 1/4 of a full rotation to set the gear position 1 and click on CONFIRM LEVEL. Turn the knob 1/4 of a full rotation and click on CONFIRM LEVEL, repeat the operation until the ‘CALIBRATION COMPLETED’...
-
Page 46: Equipment Parameters (Not Applicable)
TECHNOGYM BIKE LIVE Technical Service Guide Rev. 2.0 Click Position of the knob Changed Level Position, shown on the display Tab. 15 6.4 EQUIPMENT PARAMETERS (NOT APPLICABLE) Not Applicable. 6.5 ERROR CODE LIST (NOT APPLICABLE) Not Applicable. - 46 -... -
Page 47: Message On The Display: 'Com Error
TECHNOGYM BIKE LIVE Technical Service Guide Rev. 2.0 6.6 MESSAGE ON THE DISPLAY: ‘COM ERROR’ Fig. 31 The COM error is caused by a communication problem between the Display board and the Watt Sensor board. Press “YES” to retry this message. If the problem persists, follow the below proce- dure. - Page 48 TECHNOGYM BIKE LIVE Technical Service Guide Rev. 2.0 ‘COM ERROR’ message, shown on the display Switch OFF and ON the equipment. Upgrade the SW of the High-Kit and the FW of the Low-kit. Is the problem solved? [**] Ok. Problem solved.
- Page 49 TECHNOGYM BIKE LIVE Technical Service Guide Rev. 2.0 [1]: Watt Sensor Board powered (LED: Green): Fig. 33 [2]: Check the presence of about 5Vdc between PIN 1 Red and PIN 2 Black of the Flying connector 2x2, accessible after removing the display group: Fig.
-
Page 50: Rpm Signal Shown On The Display
TECHNOGYM BIKE LIVE Technical Service Guide Rev. 2.0 Fig. 35 6.7 NO RPM SIGNAL SHOWN ON THE DISPLAY No RPM signal shown on the display Update the sw of the display. OK, problem solved. Is the problem solved? [**] Check the presence of +5Vdc at the input of the RPM sensor. [1]... -
Page 51: Wrong Rpm Signal Shown On The Display
TECHNOGYM BIKE LIVE Technical Service Guide Rev. 2.0 If there’s no RPM signal shown on the display, the troubleshooting doesn’t involve tests about cables continuity (rx-tx), since if there were issue about cables continuity (rx-tx), it would appear the message ‘COM ERROR’ on the screen. -
Page 52: The Display Does Not Turn On
TECHNOGYM BIKE LIVE Technical Service Guide Rev. 2.0 [*]: When replacing components see §”6.1 Procedure to follow when replacing components”. [**]: Make sure the problem is solved. See §”6.2 Equipment testing after the intervention of techni- cal service”. 6.9 THE DISPLAY DOES NOT TURN ON The display does not turn on Check the power supply and resolve any encountered problems. - Page 53 [**]: Make sure the problem is solved. See §”6.2 Equipment testing after the intervention of techni- cal service”. [1]: Make sure that the Power Supply is compatible with the Technogym Bike product. Moreover, check the Power Jack: Make sure that the multimeter measures about +12Vdc, as shown in the following picture.
-
Page 54: Lack Of Precision In The Watt Values Shown On The Display
TECHNOGYM BIKE LIVE Technical Service Guide Rev. 2.0 [3]: Remove the display group. Flying connector 1x2 pin: check the presence of about +12Vdc be- tween Black (Ground) and Red (+12Vdc) wire. Fig. 43 6.10 LACK OF PRECISION IN THE WATT VALUES SHOWN ON THE DISPLAY If the customer complains about ‘Lack of precision in the Watt values shown on the display’... -
Page 55: S Not Possible To Connect The Heart Rate Monitors To Tg Bike Live
Now the AIRPODS should appear in the list of devices identified by the Technogym Bike and should be selected. If they do not appear, repeat the operation by turning off the Bluetooth of the iPhone to exclude a direct connection with the latter. - Page 56 TECHNOGYM BIKE LIVE Technical Service Guide Rev. 2.0 Blank Page - 56 - TSG-00187-EN - Uncontrolled copy if printed...
-
Page 57: Equipment Configuration (Installation Wizard)
The Installation Wizard appears on the screen in the following cases: ▪ At the first switching on of equipment, during the installation phase; For details about the installation requirements, see the document Technogym Bike Live Pre-Installation requirements, available on Technogym Direct. - Page 58 TECHNOGYM BIKE LIVE Technical Service Guide Rev. 2.0 Select the measurement unit. Fig. 45 Select the network. Fig. 46 Configure the scenario: B2C (Home) or B2B (Facility) - 58 - TSG-00187-EN - Uncontrolled copy if printed...
- Page 59 TECHNOGYM BIKE LIVE Technical Service Guide Rev. 2.0 Fig. 47 If you select FACILITY, the field is automatically filled in, enter to proceed. Fig. 48 If you selected HOME, you shall select the time zone. If you selected FACILITY does not appear this screen since the time zone is set automatically.
- Page 60 TECHNOGYM BIKE LIVE Technical Service Guide Rev. 2.0 Set Date and Time. Fig. 50 Configuration Completed. Fig. 51 If necessary, it appears the message that requests to update the SW. 10. At the end of the upgrade, the display reboots.
- Page 61 TECHNOGYM BIKE LIVE Technical Service Guide Rev. 2.0 the TECHNOGYM LOGIN, to login the first time. It’s possible to add another 4 users, clicking on + icon. Fig. 52 Fig. 53 TSG-00187-EN - Uncontrolled copy if printed - 61 -...
- Page 62 TECHNOGYM BIKE LIVE Technical Service Guide Rev. 2.0 Blank Page - 62 - TSG-00187-EN - Uncontrolled copy if printed...
-
Page 63: Procedures For Disassembly-Reassembly And Replacement Of Components
The tools required to carry out all the disassembling, adjustment and maintenance oper- ations on the equipment are given in the TG SERVICE TOOLS BOX LIST, available on Technogym Direct and during the training course on the e-learning platform. 8.2 EQUIPMENT REFERENCE... -
Page 64: Warning
WARNING: Before disassembling, disconnect the power cord from the machine / wall socket. 8.4 DISASSEMBLING PROCEDURES Refer to the Group Cycle (D92*N) Technical Service Guide. Take into account that the Technogym Bike Live is equal to Group Cycle (D92*N), except for the following points: Technogym Bike Live does not have the generator;... - Page 65 TECHNOGYM BIKE LIVE Technical Service Guide Rev. 2.0 Insert the hexagon key wrench in the hole where there was the screw pre- viously removed and lift the left brake casing (B) by pulling outwards with your fingers. ATTENTION: DO NOT USE A...
- Page 66 TECHNOGYM BIKE LIVE Technical Service Guide Rev. 2.0 Lift up the casing on the left and right side, in order to remove it (C) (TOOL: slotted screwdriver) - 66 - TSG-00187-EN - Uncontrolled copy if printed...
- Page 67 TECHNOGYM BIKE LIVE Technical Service Guide Rev. 2.0 Remove the three screws (D), on the left side of equipment. (TOOL: key wrench for Torx T25 head screw) Remove the three screws (E), on the left side of equipment. (TOOL: key wrench for Torx T25 head screw) Insert a cloth to protect the casing.
- Page 68 TECHNOGYM BIKE LIVE Technical Service Guide Rev. 2.0 It’s now possible to remove the left cas- ing (F). There is no priority to be followed in disassembling the right and left cas- ings. CAUTION: For safety reason, when the main guards are re-...
-
Page 69: Disassembling The Rpm Sensor Board
TECHNOGYM BIKE LIVE Technical Service Guide Rev. 2.0 8.6 DISASSEMBLING THE RPM SENSOR BOARD Remove the left side casing (F). Disconnect the cable (G) from the RPM sensor board. TSG-00187-EN - Uncontrolled copy if printed - 69 -... - Page 70 TECHNOGYM BIKE LIVE Technical Service Guide Rev. 2.0 Remove the two screws (H). (TOOL: 2.5mm hexagon key wrench) It’s now possible to remove the RPM sensor board (I). - 70 - TSG-00187-EN - Uncontrolled copy if printed...
- Page 71 TECHNOGYM BIKE LIVE Technical Service Guide Rev. 2.0 You can proceed to remove the plate: Remove the right side casing (L). Loosen the nut. (TOOL: 6mm hexa- gon key wrench and 19mm open end wrench) TSG-00187-EN - Uncontrolled copy if printed...
- Page 72 TECHNOGYM BIKE LIVE Technical Service Guide Rev. 2.0 Open the cable tie (M). Remove the plate (N). - 72 - TSG-00187-EN - Uncontrolled copy if printed...
-
Page 73: Disassembling The Display Group
TECHNOGYM BIKE LIVE Technical Service Guide Rev. 2.0 8.7 DISASSEMBLING THE DISPLAY GROUP Remove the two screws (O). (TOOL: 5mm hexagon key wrench) Remove the component (P). TSG-00187-EN - Uncontrolled copy if printed - 73 -... - Page 74 TECHNOGYM BIKE LIVE Technical Service Guide Rev. 2.0 Remove the one of the two screws (Q). (TOOL: T-handle wrench with hexagon end) ATTENTION: HOLD THE DIS- PLAY WITH A HAND. THE DISPLAY COULD FALL. Remove the second screw (Q). (TOOL:...
- Page 75 TECHNOGYM BIKE LIVE Technical Service Guide Rev. 2.0 Disconnect the two connectors (R). When you reassemble the display group, put inside the cables in the dis- play arm. It’s now possible to remove the display group (S). TSG-00187-EN - Uncontrolled copy if printed...
-
Page 76: Disassembling The Not Pivoting Display (Old)
TECHNOGYM BIKE LIVE Technical Service Guide Rev. 2.0 8.8 DISASSEMBLING THE NOT PIVOTING DISPLAY (OLD) Remove the rear casing (T) and the rear casing (U). (TOOL: slotted screwdriver) Disconnect the ground wire (V). (TOOL: 2.5mm hexagon key wrench) Pay attention to the route of the ground cable. - Page 77 TECHNOGYM BIKE LIVE Technical Service Guide Rev. 2.0 Remove the two screws (W) and the two screws (X). (TOOL: 2.5mm hexagon key wrench) Remove the cap (Y). Disconnect the cable A. (TOOL: slotted screwdriver) TSG-00187-EN - Uncontrolled copy if printed...
- Page 78 TECHNOGYM BIKE LIVE Technical Service Guide Rev. 2.0 Hold the display and remove the last screw (B). (TOOL: 2.5mm hexagon key wrench) It’s now possible to remove the display. - 78 - TSG-00187-EN - Uncontrolled copy if printed...
-
Page 79: Disassembling The Pivoting Display (New)
TECHNOGYM BIKE LIVE Technical Service Guide Rev. 2.0 8.9 DISASSEMBLING THE PIVOTING DISPLAY (NEW) Remove the rear casing (T) and the rear casing (U). (TOOL: slotted screwdriver) Unthread the cylindrical casing. TSG-00187-EN - Uncontrolled copy if printed - 79 -... - Page 80 TECHNOGYM BIKE LIVE Technical Service Guide Rev. 2.0 Remove the two screws to disassem- ble the support casing of display plate, (TOOL: 2,5 mm hexagon key wrench). Remove the four screws to disassem- ble the display plate, (TOOL: 2,5 mm hexagon key wrench).
- Page 81 TECHNOGYM BIKE LIVE Technical Service Guide Rev. 2.0 Disconnect the two connectors. It’s now possible to remove the display. TSG-00187-EN - Uncontrolled copy if printed - 81 -...
- Page 82 TECHNOGYM BIKE LIVE Technical Service Guide Rev. 2.0 Remove the screw to disassemble the first part of the casing, (TOOL: 2,5 mm hexagon key wrench). - 82 - TSG-00187-EN - Uncontrolled copy if printed...
- Page 83 TECHNOGYM BIKE LIVE Technical Service Guide Rev. 2.0 Remove the screw to disassemble the second part of the casing, (TOOL: Me- dium-sized Phillips screwdriver). Remove the two nuts to disassemble the display support, (TOOL: 13 mm open end wrench). ATTENTION: REASSEMBLE WITH A TORQUE OF 16 NM - 12 LBF.-FT, (TOOL: TORQUE...
- Page 84 TECHNOGYM BIKE LIVE Technical Service Guide Rev. 2.0 ATTENTION: NOTE CORRECT POSITION OF THE SPRING WASHERS. Remove the friction rings on the brack- et support for revolving display, (TOOL: slotted screwdriver). During the reassembly procedure, use white lubricating grease for the friction rings.
- Page 85 TECHNOGYM BIKE LIVE Technical Service Guide Rev. 2.0 Remove the central nut to disassem- ble the bracket support for revolving display, (TOOL: 13 mm hexagon key wrench). ATTENTION: REASSEMBLE WITH A TORQUE OF 3,5 NM - 2,6 LBF.-FT, (TOOL: TORQUE WRENCH).
- Page 86 TECHNOGYM BIKE LIVE Technical Service Guide Rev. 2.0 ATTENTION: NOTE THE COR- RECT ORIENTATION OF THE TWO SPRING WASHERS. Before reassembly procedure, clean the frame pin from grease residual. - 86 - TSG-00187-EN - Uncontrolled copy if printed...
-
Page 87: Reassembling The Pedal Crank And Pedal
TECHNOGYM BIKE LIVE Technical Service Guide Rev. 2.0 8.10 REASSEMBLING THE PEDAL CRANK AND PEDAL Remember to put the washer between the pedal crank and the pedal. For details about spare part code, refer to the Spare Parts Catalogue. TSG-00187-EN - Uncontrolled copy if printed... - Page 88 TECHNOGYM BIKE LIVE Technical Service Guide Rev. 2.0 Blank Page - 88 - TSG-00187-EN - Uncontrolled copy if printed...
-
Page 89: Tightening Torques - Greases - Adhesives & Sealants - Belt Tensioning - Adjustments
TECHNOGYM BIKE LIVE Technical Service Guide Rev. 2.0 TIGHTENING TORQUES - GREASES - ADHESIVES & SEALANTS - BELT TENSIONING - ADJUSTMENTS 9.1 ADJUSTMENTS AND REGULATION 9.1.1 LEVELLING THE PRODUCT To level the product, use the two levelling feet shown in figure. -
Page 90: Belt Tension Regulation
TECHNOGYM BIKE LIVE Technical Service Guide Rev. 2.0 9.1.2 BELT TENSION REGULATION Proceed as follows to adjust the belt tension: Remove the main right casing. Loosen the two screws [31] securing the pulley (TOOL: 2x13 mm open end wrench- es). -
Page 91: Play Regulation For Vertical Regulations
TECHNOGYM BIKE LIVE Technical Service Guide Rev. 2.0 Screw the screw [30] to tight- en the belt (TOOL: 8 mm hex- agon key wrench). Unscrew the screw [30] to loosen the belt (TOOL: 8 mm hexagon key wrench). Tighten the nut [29] and the screws [31] The correct belt tension is detailed at §... - Page 92 TECHNOGYM BIKE LIVE Technical Service Guide Rev. 2.0 To adjust the play for the handlebar vertical slider: - unscrew the screw (E) and remove the cover (F); - unscrew the screw (G) and remove the lever (H); - adjust the ring nut (K);...
-
Page 93: Play Regulation For Horizontal Regulations
TECHNOGYM BIKE LIVE Technical Service Guide Rev. 2.0 Fig. 56 9.1.4 PLAY REGULATION FOR HORIZONTAL REGULATIONS To adjust the play for the seat horizontal slider: - unscrew the screw (A); - lift the cover (B); - adjust the nut (C);... -
Page 94: Transmission Belt Tensioning
TECHNOGYM BIKE LIVE Technical Service Guide Rev. 2.0 - tighten the screw (A). If the nut is tightened (to the right), sliding becomes harder. If the nut is loosened (to the left), sliding becomes easier. Turn the nut 1/8 of a turn at a time and check the sliding before proceeding. -
Page 95: Tightening Torques- Greases - Adhesives & Sealants
TECHNOGYM BIKE LIVE Technical Service Guide Rev. 2.0 The belt tension must be measured in the point shown by the arrow in the figure below. Fig. 59 9.3 TIGHTENING TORQUES- GREASES - ADHESIVES & SEALANTS 9.3.1 PIVOTING DISPLAY SUPPORT _Apply a white grease on the friction rings. -
Page 96: Pedal
TECHNOGYM BIKE LIVE Technical Service Guide Rev. 2.0 Fig. 61 9.3.2 PEDAL _Apply a few drops of Loctite 2701 on the pedal thread. Fig. 62 - 96 - TSG-00187-EN - Uncontrolled copy if printed... -
Page 97: Pedal Crank
TECHNOGYM BIKE LIVE Technical Service Guide Rev. 2.0 _Tighten the pedal with a torque wrench set to 40 Nm [29.5 lbf-ft] in correspondence of the point indicated by the arrow. Fig. 63. CAUTION: This procedure allows the thread and the contact surface between the pedal crank and the pedal to settle when the pedal is first tightened, thus ensuring an accurate and secure fit when tightened for the second time. - Page 98 TECHNOGYM BIKE LIVE Technical Service Guide Rev. 2.0 Fig. 64 - 98 - TSG-00187-EN - Uncontrolled copy if printed...
-
Page 99: Handlebar's Vertical Slider
TECHNOGYM BIKE LIVE Technical Service Guide Rev. 2.0 9.3.4 HANDLEBAR’S VERTICAL SLIDER 9.3.4.1 ADJUSTMENT HANDLE Apply medium strength threadlocker ( Loctite 243) on the screw [71] of the adjustment handle. Fig. 65 Apply medium strength threadlocker ( Loctite 243) on the special nut [75]. - Page 100 TECHNOGYM BIKE LIVE Technical Service Guide Rev. 2.0 Apply Molykote Complex 150 on the bearing [78]. Fig. 67 Apply Molykote Complex 150 on the pin [83] in correspondence of the points indicated by the ar- rows. Fig. 68 - 100 -...
-
Page 101: Pipe
TECHNOGYM BIKE LIVE Technical Service Guide Rev. 2.0 9.3.4.2 PIPE Tighten the screw [1] with a torque wrench set to 3 Nm [2.21 lbf-ft]. Fig. 69 9.3.5 FLYWHEEL Apply medium strength threadlocker ( Loctite 243) on the six screws highlighted in red and tighten them with a torque equal to 5 Nm [3.69 lbf-ft]. -
Page 102: Main Shaft
TECHNOGYM BIKE LIVE Technical Service Guide Rev. 2.0 9.3.6 MAIN SHAFT Apply medium strength threadlocker (Loctite 243) and tighten the main shaft with a torque wrench set to 75 Nm. Tighten the ring nut with a torque wrench set to 35 Nm. -
Page 103: Planned Maintenance
ROUTINE maintenance operations must also be carried out by Technogym technicians dur- ing planned maintenance visits. Refer to the User Manual. ROUTINE MAINTENANCE: No technical specialisation required. - Page 104 TECHNOGYM BIKE LIVE Technical Service Guide Rev. 2.0 Blank Page - 104 - TSG-00187-EN - Uncontrolled copy if printed...
-
Page 105: Product Update
11.1 PIVOTING DISPLAY STARTING FROM D93TNL022000783 Starting from serial number D93TNL022000783, the Technogym Bike Live is equipped with the pivoting display, so for the equipment coding refers to § 2.7.2 TG BIKE WITH PIVOTING DIS- PLAY (NEW) and for disassembling procedures/greases and tithtening torques to be applied for the pivoting display, refers to §... - Page 106 TECHNOGYM BIKE LIVE Technical Service Guide Rev. 2.0 Blank Page - 106 - TSG-00187-EN - Uncontrolled copy if printed...
- Page 107 TECHNOGYM BIKE LIVE Technical Service Guide Rev. 2.0 12. LIST OF MODIFICATIONS 12.1 REVISION 1.0 First released version. 12.2 REVISION 1.1 Detailed the tension of the transmission belt - new model S0K001513AA. Revised the tension of the transmission belt - old model S0K000671AB.
- Page 108 TECHNOGYM BIKE LIVE Technical Service Guide Rev. 2.0 Blank Page - 108 - TSG-00187-EN - Uncontrolled copy if printed...
- Page 109 TECHNOGYM S.p.A. Via Calcinaro, 2861 - 47521 Cesena (FC) - Operational Headquarters ITALY International Technical Support: TG Branches: +390547650638 / +390547650667 cloudsupport@technogym.com (Cloud Support) sfdcsrvhqit@technogym.com (Equipment Support) TG Distributors: +390547650638 / +390547650667 cloudsupport4distributors@technogym.com support4distributors@technogym.com...
Need help?
Do you have a question about the D93TNL and is the answer not in the manual?
Questions and answers