Advertisement
Quick Links
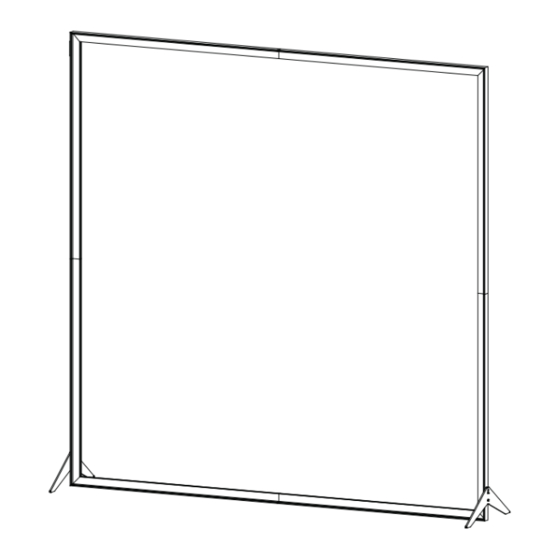
VK-1903/4 - Graphic Frame Assembly
Item
Description
1
45" SEG Extrusion
2
45" SEG Extrusion
3
45" SEG Extrusion
4
45" SEG Extrusion
5
45" SEG Extrusion
6
45" SEG Extrusion
7
45" SEG Extrusion
8
45" SEG Extrusion
A10 Clamp Attachment
Slide connector on back
of A10 clamp into groove
of extrusion.
When desired location
is found, tighten
set screw to secure.
Tighten knob to
secure shelf in place.
w w w . c l a s s i c e x h i b i t s . c o m
7
Corner
2
Tighten knob
to secure
1
5
WHEN DISASSEMBLING ALUMINUM EXTRUSION, TIGHTEN ALL
SETSCREWS AND LOCKS TO PREVENT LOSS DURING SHIPPING
Setups:
1) Assembled SEG extrusions together on floor.
2) Apply SEG graphic to assembled frame.
3) Attach feet to both sides of assembled frame
where indicated.
**** See attached SEG graphic
installation for graphic attachment
8
4
Center
Slide connecting
bar between
verticals/horizontals
and tighten knob
to secure
3
6
Step 1
866.652.2100
Foot Attachment
Hook keyhole cut
out up bolt
Tighten Knob to secure
© 2010
Advertisement

Related Manuals for Classic Exhibits VISIONARY DESIGNS VK-1903/4


Summary of Contents for Classic Exhibits VISIONARY DESIGNS VK-1903/4
- Page 1 Step 1 VK-1903/4 - Graphic Frame Assembly 866.652.2100 Item Description Setups: 45” SEG Extrusion 1) Assembled SEG extrusions together on floor. 45” SEG Extrusion 2) Apply SEG graphic to assembled frame. 45” SEG Extrusion 3) Attach feet to both sides of assembled frame 45”...
- Page 2 Step 2 VK-1903/4 - General Information 866.652.2100 Using Your Setup Instructions The Visionary Designs Setup Instructions are created specifically for your Detail A configuration. They are laid out sequentially, including an exploded view of the entire display, and then a logical series of detailed steps to assemble the main structure and components.
- Page 3 Step 3 VK-1903/4 - SEG Graphic Installation 866.652.2100 SEG Graphic Installation Graphic: To Ensure Proper Fit Graphic Removal Corner A Corner B Corner D Corner C Step 1 Step 2 Step 3 To remove the graphic from It is important to first insert graphic Insert corner A.
Need help?
Do you have a question about the VISIONARY DESIGNS VK-1903/4 and is the answer not in the manual?
Questions and answers