Table of Contents
Advertisement
Quick Links
Advertisement
Table of Contents

Related Manuals for Falcon 900S Induction


Summary of Contents for Falcon 900S Induction
- Page 1 USER GUIDE & INSTALLATION INSTRUCTIONS Falcon 900 S Induction U110267 - 05c...
-
Page 3: Table Of Contents
Contents Before you start... Troubleshooting Personal safety Installation Electrical connection safety Dear installer Peculiar smells Safety requirements and regulations Ventilation Provision of ventilation Maintenance Location of cooker Induction care Positioning the cooker Oven care Moving the cooker Hob care Cooling fan Electrical connection Cooker care Cleaning... -
Page 5: Before You Start
Before you start... Electrical connection safety Your cooker should give you many years of trouble-free cooking if installed and operated correctly. It is important This cooker must be installed in accordance with the relevant that you read this section before you start. instructions in this booklet, with the relevant national and local regulations, and with the local electricity supply Personal safety... -
Page 6: Peculiar Smells
Peculiar smells • NEVER leave the hotplate unattended at high heat settings. Pans boiling over can cause smoking, When you first use your cooker it may give off an odour. This and greasy spills may catch on fire. Use a deep fat should stop after use. -
Page 7: Induction Care
Induction care Fig. 1.1 • IMPORTANT INFORMATION FOR PACEMAKER AND IMPLANTED INSULIN PUMP USERS: The functions of this hob comply with the applicable European standards on electromagnetic interference. If you are fitted with a pacemaker or implanted insulin pump and are concerned please consult your doctor for medical advice. -
Page 8: Oven Care
• Take care NOT TO PLACE HOT LIDS onto the hob surface (Fig. 1.5). Lids that have been used to cover a hot Fig. 1.5 pan can “stick” or create a “vacuum” effect to the Glass Hob. Should this occur, DO NOT attempt to lift the lid ArtNo.312-0001 Not cooking surface off the glass surface, this may damage the glass. -
Page 9: Hob Care
• Make sure the shelves are pushed firmly to the back Cooker care of the oven. DO NOT close the door against the oven As steam can condense to water droplets on the cool outer shelves. trim of the oven, it may be necessary during cooking to wipe •... -
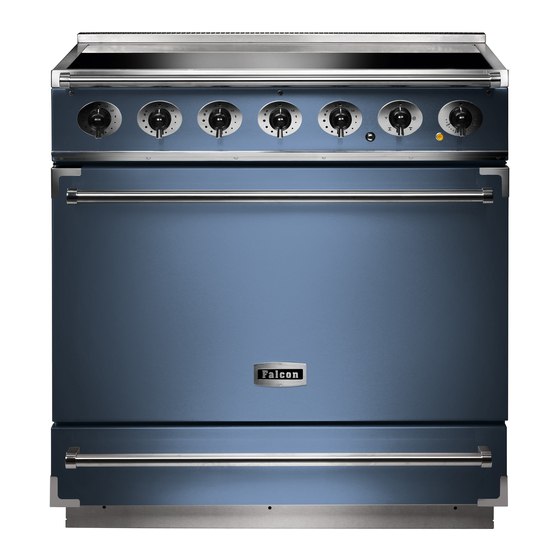
Page 10: Overview
Overview Fig. 2.1 The Falcon induction cooker (Fig. 2.1) has the following Fig. 2.2 features: 5 induction cooking zones A control panel A multifunction oven A storage drawer The hob Use only pans that are suitable for induction hobs. We recommend stainless steel, enamelled steel pans or cast iron pans with enamelled bases. - Page 11 Never use a round-bottomed wok, even with a stand. Fig. 2.3 The very best pans have bases that are very slightly curved up when cold (Fig. 2.3). If you hold a ruler across the bottom you will see a small gap in the middle. When they heat up the metal expands and lies flat on the cooking surface.
- Page 12 Automatic heat-up, A Automatic Heat-up Time at Power Level 100% (min:sec) This function is available on all of the cooking areas. It 0:48 allows rapid heating up of the element to bring the selected cooking zone up to temperature. Once the zone is at the 2:24 required cooking temperature the power level will reduce 3:50...
- Page 13 knob to the required level. The maximum times for all other A & B linked D & E linked Fig. 2.8 power levels are shown in Table 2.3. Power boost setting, P All of the induction cooking zones have Power Boost available, activated by turning the control knob clockwise until [P ] is shown on the hob control display.
- Page 14 The multifunction oven Fan assisted oven This function operates the fan, circulating air heated Multifunction ovens have an oven fan and oven fan element, by the elements at the top and the base of the oven. as well as two extra heating elements. One element is in The combination of fan and conventional cooking the top of the oven and the second is under the oven base.
-
Page 15: Energy Saving Feature
Defrosting in this way speeds up the process and protects the food from flies. Pieces of meat, fish and poultry should WARNING! be placed on a shelf, over a tray to catch any drips. Be sure to Take great care when removing the divider NOT to scratch wash the shelf and tray after defrosting. -
Page 16: Accessories
Refit in the reverse order, making sure to push it fully back. Oven light ArtNo.331-0008 - 90SC ArtNo.326-0014 - Cradle rack (Falcon) grill pan & trivet Press the button to turn on the oven lights (Fig. 2.23). If one of the oven lights fail, turn off the cooker power supply before you change the bulb. -
Page 17: Cooking Tips
Cooking tips Using Your Induction Cooker General oven tips If you have not used an induction cooker before please be The wire shelves should always be pushed firmly to the back aware of the following: of the oven. • Make sure that the pans you have or buy are suitable Baking trays with food cooking on them should be placed for use on the induction hob. -
Page 18: Cooking Table
Cooking table DocNo.031-0004 - Cooking table - electric & fan single cavity The oven control settings and cooking times given in the table below are intended to be used as Top (T) a guide only. Individual tastes may require the temperature to be altered to provide a preferred result. -
Page 19: Cleaning Your Cooker
English 5. Cleaning Your Cooker Isolate the electricity supply before carrying out any major Fig. 5.1 cleaning. Allow the cooker to cool. Never use paint solvents, washing soda, caustic cleaners, biological powders, bleach, chlorine based bleach cleaners, coarse abrasives or salt. Do not mix different cleaning products –... -
Page 20: Control Panel And Oven Doors
English Control Panel and Oven Doors Fig. 5.2 Avoid using any abrasive cleaners including cream cleaners, on brushed stainless steel surfaces. For best results use liquid detergents. The control panel and control knobs should only be cleaned with a soft cloth wrung out in clean hot soapy water – but take care that no surplus water seeps into the appliance. -
Page 21: Cleaning Table
English Cleaning Table Cleaners listed are available from supermarkets or electrical retailers as stated. For enamelled surfaces use a cleaner that is approved for use on vitreous enamel. Regular cleaning is recommended. For easier cleaning, wipe up any spillages immediately. Hotplate Part Finish... -
Page 22: Troubleshooting
6. Troubleshooting Interference with and repairs to the hob MUST NOT The cooling fan be carried out by unqualified persons. Do not try The induction hob incorporates a cooling fan. This cooling fan to repair the hob as this may result in injury and is active when either the grill or ovens are on. - Page 23 The oven is not cooking evenly Fig. 6.1 Do not use a baking tray with dimensions larger than those specified in the section on ‘General Oven Tips’ . If you are cooking a large item, be prepared to turn it round during cooking.
-
Page 24: Installation
INSTALLATION Check the appliance is electrically safe when you have finished. Installation Dear installer Location of cooker Before you start your installation, please complete the details The cooker may be installed in a kitchen/kitchen diner but NOT in a room containing a bath or shower. below, so that, if your customer has a problem relating to your installation, they will be able to contact you easily. -
Page 25: Positioning The Cooker
INSTALLATION Check the appliance is electrically safe when you have finished. Positioning the cooker Fig. 7.1 Fig. 7.1 and Fig. 7.2 show the minimum recommended 75mm 75mm 800mm distance from the cooker to nearby surfaces. The cooker should not be placed on a base. The hotplate surround should be level with, or above, any adjacent work surface. -
Page 26: Moving The Cooker
INSTALLATION Check the appliance is electrically safe when you have finished. Moving the cooker On no account try and move the cooker while it is Fig. 8.1 plugged into the electricity supply. The cooker is very heavy, so take great care. We recommend that two people manoeuvre the cooker. - Page 27 INSTALLATION Check the appliance is electrically safe when you have finished. Repositioning the cooker following Stability bracket Fig. 8.5 connection If you need to move the cooker once it has been connected, make sure it is switched off at the supply switch before Cooker gripping under the fascia panel and lifting the front of the cooker slightly (Fig.
-
Page 28: Electrical Connection
INSTALLATION Check the appliance is electrically safe when you have finished. Electrical connection Current Operated Earth Leakage Breakers The cooker must be installed by a qualified electrician, in accordance with all relevant British Standards/Codes of The combined use of your cooker and other domestic Practice (in particular BS 7671), or with the relevant national appliances may cause nuisance tripping, so we recommend and local regulations. -
Page 29: Final Checks And Fittings
INSTALLATION Check the appliance is electrically safe and gas sound when you have finished. 10. Final checks and fittings Hob check Fig. 10.1 Check each cooking zone in turn. Be sure to use pans of the correct size and material. Oven check ArtNo.062-0001 - 90 Prof+ FX - Removing the door Turn on the oven and check that it starts to heat up. -
Page 30: Fitting The Drawer
INSTALLATION Check the appliance is electrically safe and gas sound when you have finished. Fitting the drawer Removing the drawer... -
Page 31: Circuit Diagrams
11. Circuit diagrams Induction hob Right Rear Right Front Left Front Left Rear Centre Interface board Hob Display Induction unit Code Colour 6 way connector Brown 6 way connector Blue Green... - Page 32 Oven Clear boots r (f) r (f) r (f) r (f) Black boots Code Description Code Description Code Colour Function controller Left-hand top element (outer) Blue Temperature controller Left-hand top element (inner) Brown Right-hand bottom element Left-hand fan element Black Right-hand top element (outer) Left-hand fan Orange...
-
Page 33: Technical Data
COUNTRY OF DESTINATION: GB, IE, FR, NL, DE, SE, BE, AT, CH, LU. Connections Electric 230 / 400 V ~ 50 Hz 3N Dimensions Model Falcon S 900 Induction Overall height minimum 912 mm maximum 937 mm Overall width 900 mm... - Page 34 660 DEPTH INCLUDING HANDLES 600 DEPTH EXCLUDING HANDLES...
- Page 35 Hotplate efficiency data Brand Falcon Model Identification 900s Size 90 Single Cavity Type Induction Type of Hob Induction Number of electric zones Zone 1 - Ø cm 15.5 Heating Technology Energy Consumption (ECElectric cooking) - Wh/kg Zone 2 - Ø cm 18.5...
- Page 36 Oven data Brand Falcon Model identification 900S Type of oven Electric Mass Number of cavities Right-hand Efficiency Fuel type Electric Cavity type Multifunction* *Drop Down Door Power - conventional 2.75 Power - forced air convection Volume Litres Energy consumption (electricity) - conventional kWh / cycle 1.16...
- Page 37 NOTE...
- Page 38 NOTE...
- Page 39 NOTE...
- Page 40 Clarence Street, Royal Leamington Spa, Warwickshire, CV31 2AD, England. www.falconworld.com...
Need help?
Do you have a question about the 900S Induction and is the answer not in the manual?
Questions and answers