
Related Manuals for Graco 17Y907


Summary of Contents for Graco 17Y907
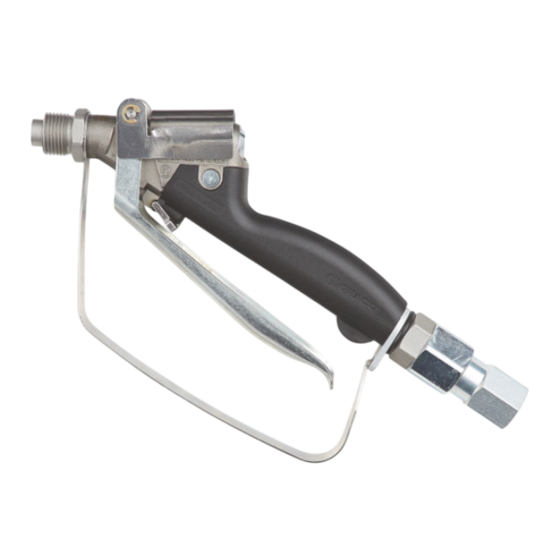
- Page 1 Паспорт МODEL NUMBER ____________________ SERIES ____________________ SERIAL № ____________________ Инструкция по ремонту Текстурный пистолет HD inline Модель: 17Y907...
-
Page 2: Fire And Explosion Hazard
• Check hoses and parts for signs of damage. Replace any damaged hoses or parts. • This system is capable of producing 4000 psi. Use Graco replacement parts or accessories that are rated a minimum of 4000 psi. • Always engage the trigger lock when not spraying. Verify the trigger lock is functioning properly. -
Page 3: Personal Protective Equipment
Do not kink or over-bend the hose. • Do not expose the hose to temperatures or to pressures in excess of those specified by Graco. • Do not use the hose as a strength member to pull or lift the equipment. -
Page 4: Operation
Operation Operation Pressure Relief Procedure Engage the trigger lock. If you suspect the spray tip or hose is Follow the Pressure Relief clogged or that pressure has not been Procedure whenever you see this fully relieved: symbol. VERY SLOWLY loosen the tip guard retaining nut or the hose end coupling to relieve pressure gradually. - Page 5 Refer to your sprayer instruction manual for priming and RUBBER spray instructions. GASKET/METAL SEAL Attach Graco airless hose to sprayer TIP GUARD fluid outlet. Attach other end of hose to gun swivel. RETAINING Use two wrenches (one on the swivel and one on the hose), to tighten all connections securely.
- Page 6 Operation Spray tip must be pushed all the Slowly increase pump pressure until way into the tip guard. Turn spray tip coverage is uniform and even (see to push down. sprayer instruction manual for additional information). Periodically inspect gun handle vent for fluid buildup, this could indicate an internal leak.
- Page 7 Operation Clear Tip Clog NOTE: If spray tip is difficult to rotate when turning to the unclog position perform, Pressure Relief Procedure, page 4, then In the event that particles or debris clog the turn Prime/Spray valve to spray position and spray tip, this sprayer is designed with a repeat step 1.
-
Page 8: Valve Adjustment
Repair Repair trigger lock is damaged. Reassemble gun or take to your nearest Graco distributor. Do not use the gun until problem is corrected. Valve Adjustment Trigger travel and valve opening is factory set Before performing any repairs on the gun, to 1 in. - Page 9 Repair ti13869b NOTES: Ref. Description Torque to 6–10 in-lb (0.68–1.13 N•m Torque to 26–32 ft-lb (35.3–43.4 N•m) Apply lithium base grease to threads Apply lithium base grease When removing fluid hose, use wrench on end of fluid tube assembly (19) hex to avoid loosening fluid tube assembly (19) Torque to 100–125 in-lb (11.3–14.1 N•m) Torque to 200–250 in-lb (22.6–28.2 N•m)
- Page 10 Repair Valve Stem and Seal 16. Lubricate and install spring (4) and spring retainer threads (21) in gun body (17). Replacement 17. Insert a 1/8 inch hex allen wrench If fluid leaks past v-block seal (3), v-block seal through spring retainer (21) and into or valve stem (24) may be worn or damaged.
- Page 11 Repair Lubricate trigger pivot holes (a) bracket handle with screws (9). Torque screws to guide (b), and rod (13). 6–10 in-lb (7.9–9.0 N•m). Install trigger (29) with rod (13) and 11. Install fluid tube assembly (19) through retaining rings (8). gun handle (14) and screw it into gun body (17).
- Page 12 Parts Parts Model 245820 † 14 32 † † † ti29236a Part Description Ref. Qty. Part Description Ref. Qty. 188247 SCREW, spring 100975 NUT, hex, 5-40 adjustment 102233 BALL, stainless steel 236234 STEM, valve 102921 SEAL, v-block 188271 RETAINER, seal 129864 SPRING, compression 188275...
- Page 13 Parts Parts Model 17Y907 Part Description Ref. Qty. Part Description Ref. Qty. 236234 STEM, valve 100975 NUT, hex, 5-40 188271 RETAINER, seal 102233 BALL, stainless steel 188275 Housing, spring 102921 SEAL, v-block 237604 TRIGGER 129864 SPRING, compression 32† 155332 O-ring...
-
Page 14: Technical Specifications
Weight 33.79 oz. 958 g Materials of Construction Wetted materials on all models Stainless Steel, carbide, Fluoroelastomer, PTFE, and Polyurethane 17Y907 Texture Gun Metric Maximum working pressure 1000 psi 6.9 MPa, 69 bar Outlet port size 7/8-14 Inlet port size... -
Page 15: Graco Standard Warranty
Graco’s written recommendations. This warranty does not cover, and Graco shall not be liable for general wear and tear, or any malfunction, damage or wear caused by faulty installation, misapplication, abrasion, corrosion, inadequate or improper maintenance, negligence, accident, tampering, or substitution of non-Graco component parts. - Page 16 Информация о компании Graco Чтобы ознакомиться с последними сведениями о продукции Graco, посетите веб-сайт www.graco.com. Сведения о патентах смотрите на веб-сайте www.graco.com/patents. ЧТОБЫ РАЗМЕСТИТЬ ЗАКАЗ, обратитесь к своему дистрибьютору компании Graco GENERAL ENGINEERING - ОФИЦИАЛЬНЫЙ ДИСТРИБЬЮТОР И СЕРВИСНЫЙ ЦЕНТР КОМПАНИИ «GRACO» В РОССИИ...
Need help?
Do you have a question about the 17Y907 and is the answer not in the manual?
Questions and answers