Table of Contents
Advertisement
Quick Links
Advertisement
Table of Contents

Subscribe to Our Youtube Channel
Related Manuals for Holland Grill Tradition LS-2


Summary of Contents for Holland Grill Tradition LS-2
- Page 1 READ THIS BOOK FIRST Instruction Manual Tradition LS-2 BH421-AG3-A L.P. Tank not included. L.P. NOTICE: This grill shall be connected only to a 20 lb. L.P. cylinder that is equipped with a Sherwood Valve #PV3349 AND an overfill protection device (OPD). The only Grill not to flare up!
-
Page 3: Safety Information
1. SHUT OFF GAS TO THE APPLIANCE. The items in the fuel system are designed for operation with the 2. EXTINGUISH ANY OPEN FLAME. Holland Grill. They must not be replaced with any other brand. 3. OPEN LID. (See parts list for replacement items.) 4. - Page 4 The LP gas cylinder shall be used only outdoors in a well ventilated er to set it up properly. The N.G. Holland Grill is set to operate at space and not in a building, garage, or any other enclosed area. The...
-
Page 5: Install Casters
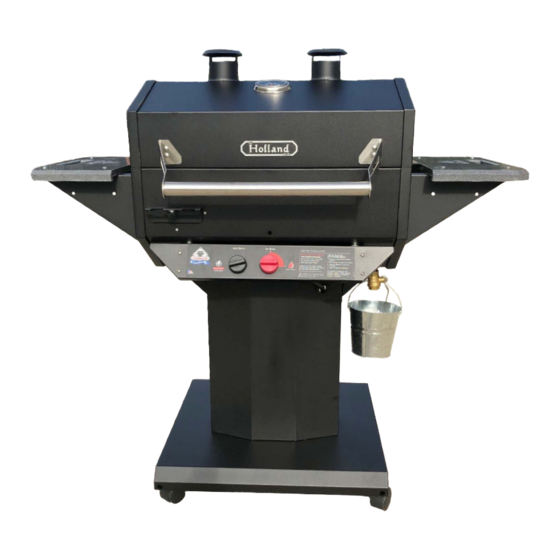
Quick Assembly Instructions Tradition LS-2 By Holland Install Handle Bracket and Handle Attach the brackets to the lid using (4) 10-24 X 1/2 Carriage Bolts "G", (4) #10 lock washers Install Casters "F" and (4) #10-24 hex nuts "E". Do not fully tighten. Insert the casters into the caster socket and push until completely seated. -
Page 6: Tank Installation
Drain Valve & Bucket Tank Retainer QCC-1 regulator Tank Installation ❍ Place your full 20-lb. propane tank into the hole ofthe grill base. Install the Tank Hold -Down Bracket using the wing nut and adjust to secure the tank.Youmay need to rotate the tank to find a suitable areafor the Hold Down Bracket to engage. -
Page 7: Lighting Instructions
There should be no need for re-adjustment for the life of your Holland Grill, but it is wise to check the flame color each time you light your grill. Lock nut should be tight against valve. -
Page 8: Turning Grill Off
Following these instructions will improve the longevity and quality of cooking. To assure safe operation of your Holland Grill, the area for cooking should always be kept free of combustible materials of any type, such as gasoline or other flammable vapors or liquids. - Page 9 • It is important to realize cooking on a Holland Grill uses a different tart pans in the rear corners of process in order for the grill to perform correctly. It is essential that the dry drip pan.
Need help?
Do you have a question about the Tradition LS-2 and is the answer not in the manual?
Questions and answers