Table of Contents
Advertisement
Quick Links
Advertisement
Table of Contents

Related Manuals for Midea MC-HT572B


Summary of Contents for Midea MC-HT572B
- Page 1 Ceramic Hob Instruction Manual / Installation Manual MODEL: MC-HT572B...
-
Page 2: Table Of Contents
Content 1. Foreword ..................4 1.1 Safety Warnings ................. 4 1.2 Installation ................4 1.2.1 Electrical Shock Hazard ..........4 1.2.2 Cut Hazard ..............4 1.2.3 Important safety instructions .......... 4 1.3 Operation and maintenance ............5 1.3.1 Electrical Shock Hazard ..........5 1.3.2 Health Hazard .............. - Page 3 8.4 Connecting the hob to the mains power supply ......21 [键入文字]...
-
Page 4: Foreword
1. Foreword 1.1 Safety Warnings Your safety is important to us. Please read this information before using your cooktop. 1.2 Installation 1.2.1 Electrical Shock Hazard • Disconnect the appliance from the mains electricity supply before carrying out any work or maintenance on it. •... -
Page 5: Operation And Maintenance
• Failure to install the appliance correctly could invalidate any warranty or liability claims. • This appliance can be used by children aged from 8 years and above and persons with reduced physical, sensory or mental capabilities or lack of experience and knowledge if they have been given supervision or instruction concerning use of the appliance in a safe way and understand the hazards involved. -
Page 6: Health Hazard
• Switch the cooktop off at the wall before cleaning or maintenance. • Failure to follow this advice may result in electrical shock or death. 1.3.2 Health Hazard • This appliance complies with electromagnetic safety standards. • However, persons with cardiac pacemakers or other electrical implants (such as insulin pumps) must consult with their doctor or implant manufacturer before using this appliance to make sure that their implants will not be... - Page 7 its electromagnetic field. • Never use your appliance for warming or heating the room. • After use, always turn off the cooking zones and the cooktop as described in this manual (i.e. by using the touch controls). Do not rely on the pan detection feature to turn off the cooking zones when you remove the pans.
-
Page 8: Product Introduction
Congratulations on the purchase of your new Ceramic Hob. We recommend that you spend some time to read this Instruction / Installation Manual in order to fully understand how to install correctly and operate it. For installation, please read the installation section. Read all the safety instructions carefully before use and keep this Instruction / Installation Manual for future reference. -
Page 9: Before Using Your New Ceramic Hob
Read this guide, taking special note of the ‘Safety Warnings’ section. • Remove any protective film that may still be on your ceramic hob. 2.6 Technical Specification Cooking Hob MC-HT572B Cooking Zones 3 Zones Supply Voltage 220-240V~ 50Hz or 60Hz... -
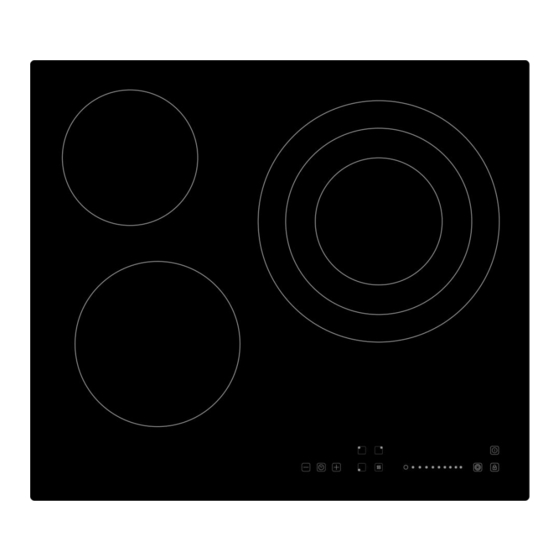
Page 10: How To Use
Make sure that the base of your pan is smooth, sits flat against the glass, and is the same size as the cooking zone. Always centre your pan on the cooking zone. Always lift pans off the ceramic hob – do not slide, or they may scratch the glass. 3.3 How to use 3.3.1 Start cooking After power on, the buzzer beeps once, all the indicators light up for 1 second then go out, indicating that... -
Page 11: Finish Cooking
3.3.2 Finish cooking Touching the heating zone selection control that you wish to switch off. Turn the cooking zone off by touching the slider to ”○”. Make sure the displayshows”0” Turn the whole cooktop off by touching the ON/OFF control. Beware of hot surfaces “H”... -
Page 12: Keeping Warm
Touching the treble zone control once time, section (B) works. The cooking zone indicator show “=” and “6” alternately. Touching the treble zone control second time, the section (C) works. The cooking zone indicator show “ ” and “6” alternately. Deactivate the Treble zone If the 3# cooking zone works in section(B),touching two times, it will return to section (A) and... -
Page 13: Locking The Controls
Touch the slider control to cancel the keep warm function 3.3.5 Locking the Controls • You can lock the controls to prevent unintended use (for example children accidentally turning the cooking zones on). • When the controls are locked, all the controls except the ON/OFF control are disabled. To lock the controls Touch the lock control... - Page 14 When the time is set, it will begin to count down immediately. The display will show the remaining time and the timer indicator will flash for 5 seconds Buzzer will beep for 30 seconds and the timer indicator shows “- -” when the setting time finished. Hint: a) Touch the “-”...
-
Page 15: Over-Temperature Protection
NOTE: The red dot next to power level indicator will flash。 (set to 15 minutes) (set to 5 minutes) b). Once the countdown timer expires, the corresponding zone will switch off. Then it will show the new min. timer and the dot of corresponding zone will flash. c). -
Page 16: Simmering, Cooking Rice
• Minimize the amount of liquid or fat to reduce cooking times. • Start cooking on a high setting and reduce the setting when the food has heated through. 4.1.1 Simmering, cooking rice • Simmering occurs below boiling point, at around 85˚C, when bubbles are just rising occasionally to the surface of the cooking liquid. -
Page 17: Care And Cleaning
• sautéing 7 - 8 • cooking pasta • stir-frying • searing • bringing soup to the boil • boiling water 6. Care and Cleaning What? How? Important! Everyday soiling on 1. Switch the power to the cooktop • When the power to the cooktop is glass (fingerprints, off. -
Page 18: Hints And Tips
7. Hints and Tips Problem Possible causes What to do The cooktop cannot No power. Make sure the ceramic hob is Be turned on. connected to the power supply and that it is switched on. Check whether there is a power outage in your home or area. - Page 19 L(mm) W(mm) H(mm) D(mm) A(mm) B(mm) X(mm) F(mm) 560+4 490+4 50 min. 3 min. Under any circumstances, make sure the ceramic cooker hob is well ventilated and the air inlet and outlet are not blocked. Ensure the ceramic cooker hob is in good work state. As shown below Note: The safety distance between the hotplate and the cupboard above the hotplate should be at least 760mm.
-
Page 20: Before Locating The Fixing Brackets
There are ventilation holes around outside of the hob. YOU MUST ensure these holes are not blocked by the worktop when you put the hob into position. Be aware that the glue that join the plastic or wooden material to the furniture, ⚫... -
Page 21: Cautions
Under any circumstances, the brackets cannot touch with the inner surfaces of the worktop after installation (see picture) 8.3 Cautions 1. The ceramic cooker hob must be installed by qualified personnel or technicians. We have professionals at your service. Please never conduct the operation by yourself. 2. - Page 22 The bottom surface and the power cord of the hob are not accessible after installation. This appliance is labeled in compliance with European directive 2012/19/EU for Waste Electrical and Electronic Equipment (WEEE). By ensuring that this appliance is disposed of correctly, you will help prevent any possible damage to the environment and to human health, which might otherwise be caused if it were disposed of in the wrong way.
Need help?
Do you have a question about the MC-HT572B and is the answer not in the manual?
Questions and answers