Immergas EOLO STAR 24 4E Instructions And Warnings
Hide thumbs
Also See for EOLO STAR 24 4E:
- Installation manual (31 pages) ,
- Instruction and warning booklet (36 pages)

Related Manuals for Immergas EOLO STAR 24 4E


Summary of Contents for Immergas EOLO STAR 24 4E
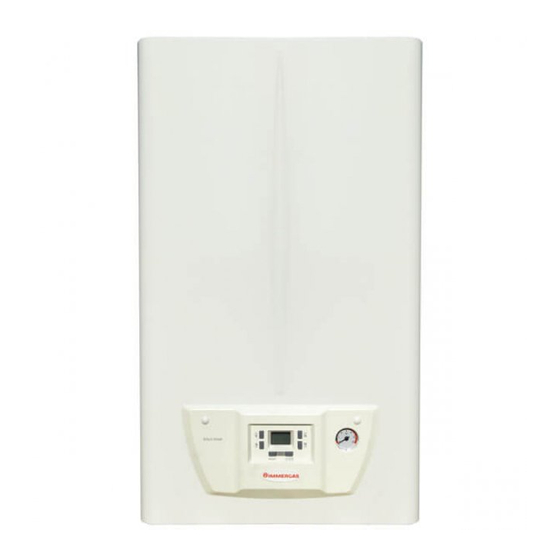
- Page 1 EOLO STAR Instructions and warnings Installer 24 4E User Maintenance technician...
-
Page 3: Table Of Contents
Remote controls and room chrono-thermostats General warnings............... 36 (Optional)................13 Initial check................ 36 Immergas flue systems............14 Yearly appliance check and maintenance....... 37 1.10 Tables of resistance factors and equivalent Boiler Hydraulic diagram..........38 lengths of “blue Range”... -
Page 4: Dear Customer
Dear Customer Congratulations for having chosen a top-quality Immergas product, able to assure well-being and safety for a long period of time. As an Im- mergas customer you can also count on a Qualified Technical Assistance Centre, prepared and updated to guarantee constant efficiency of your appliance. -
Page 5: Safety Symbols Used
SAFETY SYMBOLS USED. GENERIC HAZARD Strictly follow all of the indications next to the pictogram. Failure to follow the indications can generate hazard situa- tions resulting in possible harm to the health of the operator and user in general. ELECTRICAL HAZARD Strictly follow all of the indications next to the pictogram. -
Page 6: Boiler Installation
The place of installation of the appliance and relative Immergas accessories must have suitable features technical data table in this booklet. (technical and structural), such as to allow for (always in safe,... - Page 7 Installation Standards: Before installing the appliance, ensure it has been delivered in perfect condition; if in doubt, contact - this boiler must not be installed outdoors, the supplier immediately. Packing materials (staples, even in a partially protected area. A partially nails, plastic bags, polystyrene foam, etc.) constitute a hazard and must be kept out of the reach of children.
- Page 8 ATTENTION: N.B.: wall mounting of the boiler must guarantee stable and efficient support for the boiler. The - Type B open chamber boilers must plugs (standard supply) are only to be used to fix not be installed in places where com- the boiler to the wall;...
-
Page 9: Main Dimensions
MAIN DIMENSIONS. Key: G - Gas supply AC - Domestic hot water outlet ACV - Solar valve kit DHW inlet (Optional) AF - Domestic cold water inlet R - System return M - System flow V - Electrical connection VS - Safety valve drain PLEASE NOTE: connection group (optional) Height (mm) Width (mm) -
Page 10: Boiler Connection Group (Optional)
BOILER CONNECTION GROUP (OPTIONAL). The connection unit consisting of all the necessary parts to perform the hydraulic and gas system connections of the appli- ance comes as optional kit, perform the connections based on the type of installation to be made and according to the layout shown in Fig 4. -
Page 11: Gas Connection
(i.e. downstream from the pipes connecting the system to the appliance), according to the manufacturer’s instructions. The Immergas connection unit, supplied as an optional kit, also includes the gas cock, whose installation instructions are provided in the kit. -
Page 12: Hydraulic Connection
4. Place the control panel horizontally; the IMMERGAS anti-backflow kit to be used upstream of the cold 5. Insert the control panel feet into the special slots on the frame (c);... -
Page 13: Remote Controls And Room Chrono-Thermostats (Optional)
(Fig. 7 e 8). type A differential safety device. All Immergas chrono-thermostats are connected with 2 wires only. Carefully read the user and assembly instructions contained in the accessory kit. -
Page 14: Immergas Flue Systems
The climate regulator incorporated into the remote panels enables the system flow temperature to be adjusted to the actual needs Immergas supplies various solutions separately from the boilers of the room being heated, in order to obtain the desired room... - Page 15 N.B.: during the installation of the horizontal pipes one must maintain a minimum inclination of the pipes of 3% towards the boiler and a section clamp with gusset must be installed every 3 metres for non-insulated pipes and one every 2 metres for insulated pipes.
- Page 16 • Diaphragm installation (*) Extension in metres vertical Diaphragm For proper boiler operation a diaphragm must be installed on pipe Ø 80 without bends the outlet of the sealed chamber and before the intake and ex- Ø 40 Ø 55 From 0 to 12 haust pipe (Fig.
-
Page 17: Tables Of Resistance Factors And Equivalent Lengths Of "Blue Range" Flue System Components
1.10 TABLES OF RESISTANCE FACTORS AND EQUIVALENT LENGTHS OF “BLUE RANGE” FLUE SYSTEM COMPONENTS Equivalent length Equivalent length Resistance Equivalent length in m of concentric in m of concentric TYPE OF DUCT Factor in m of pipe pipe pipe Ø 80 Ø... -
Page 18: Concentric Horizontal Kit Installation
1.11 CONCENTRIC HORIZONTAL KIT INSTALLATION. • Mounting the horizontal intake-exhaust kit Ø 60/100 (Fig. • Type C configuration, sealed chamber and fan assisted. 11). The position of the terminal (in terms of distances from openings, Install the bend with flange (2) on the central hole of the boiler, overlooking buildings, floor, etc.) must be in compliance with positioning gasket (1) with the circular projections downwards the regulations in force. -
Page 19: Concentric Vertical Kit Installation
• Mounting the horizontal intake-exhaust kit Ø 80/125 (Fig. 1.12 CONCENTRIC VERTICAL KIT INSTALLATION. 13). • Type C configuration, sealed chamber and fan assisted. To install the kit Ø 80/125 one must use the flanged adapter kit Concentric vertical intake and exhaust kit. This vertical terminal in order to install the flue system Ø 80/125. -
Page 20: Separator Kit Installation
• Vertical kit with aluminium tile Ø 80/125. Kit assembly (Fig. • Extensions for vertical kit Ø 80/125 (Fig. 18). 17). The kit with this configuration can be extended up to a max. length of 12.2 m including the terminal. If additional components To install the kit Ø... - Page 21 • Assembly of separator kit Ø 80/80 (Fig. 19). • Extensions for separator kit Ø 80/80. install the flange (4) on the central hole of the boiler inserting The max. vertical straight length (without bends) usable for Ø the gasket (1) and tighten using the hex head and flat tip screws 80 intake and exhaust pipes is 41 metres of which 40 intake and contained in the kit, insert the anti-pulse plate up to the stop (5).
- Page 22 Install the flange (4) on the central hole of the boiler inserting surface of the intake pipes, on request Immergas supplies insu- the gasket (1) and tighten using the hex head and flat tip screws lated intake-exhaust pipes.
- Page 23 12 m, due consideration must be given to the formation of condensate that could take place inside the pipe and Immergas insulated “Blue Series” flue kits must be used. It’s not allowed that condensation flow towards...
-
Page 24: Ducting Of Flues Or Technical Slots
1.14 DUCTING OF FLUES OR TECHNICAL SLOTS. the standard range of daily variation, etc.). Ducting is an operation through which, via the introduction of - Installation and maintenance must be performed according to one or more relevant pipes, one achieves a system for the evacua- the indications supplied by the manufacturer included with the tion of the combustion products of a gas appliance, made up from “blue range”... -
Page 25: Configuration Type B, Open Chamber And Fan Assisted For Indoors
1.16 CONFIGURATION TYPE B, OPEN CHAMBER AND 1.19 SYSTEM FILLING. FAN ASSISTED FOR INDOORS. Once the boiler is connected, proceed with system filling via the The appliance can be installed inside buildings in B mode; in this filling cock (Fig. 34). eventuality, all technical rules and national and local regulations Filling is performed at low speed to ensure release of air bubbles in force, must be complied with. -
Page 26: Circulation Pump
1.22 CIRCULATION PUMP. 1.23 KITS AVAILABLE ON REQUEST. The boilers are supplied with a built-in circulation pump with • Connection unit kit (on request). The kit includes pipes, fittings three-position electric speed control. The boiler does not opera- and cocks (including gas cock), to carry out all connections to te correctly with the circulation pump on first speed. -
Page 27: Boiler Components
1.24 BOILER COMPONENTS. Key: 9 - Positive signal pressure point 18 - Burner 1 - Sample points (air A) - (flue gases F) 10 - Negative signal pressure point 19 - System pressure switch 2 - Sealed chamber 11 - Flue pressure switch 20 - Air vent valve 3 - Fan 12 - Safety thermostat... -
Page 28: Instructions For Use And Maintenance
INSTRUCTIONS FOR USE AND • Do not open or tamper with the ap- MAINTENANCE. pliance. GENERAL WARNINGS. • Do not take apart or tamper with the ATTENTION: intake and exhaust pipes. • Never expose the wall-mounted boiler • Only use the user interface devices listed in to direct vapours from a cooking sur- this section of the booklet. - Page 29 ATTENTION: ATTENTION: if you smell burning or see smoke co- if you smell gas in the building: ming out of the appliance, switch it off, - close the gas meter interception device disconnect power, close the main gas or the main interception device; cock, open the windows and call an authorised - if possible, close the gas interception cock company (e.g.
-
Page 30: Cleaning And Maintenance
CLEANING AND MAINTENANCE. To preserve the boiler's integrity and keep the safety features, performance and reliability, which distin- guish it, unchanged over time, you must execute maintenance operations on a yearly basis in compli- ance with what is stated in the relative point at “annual check and maintenance of the appliance”... -
Page 31: Ignition Of The Boiler
IGNITION OF THE BOILER. Together with a solar valve kit, set the parameter P00 Before ignition make sure the heating system is filled with water in "solar"on mode (correlated). and that the manometer (7) indicates a pressure of 1 ÷ 1.2 bar. - Open the gas cock upstream from the boiler. -
Page 32: Fault And Anomaly Signals
FAULT AND ANOMALY SIGNALS. In case of an anomaly, the letter "E" appears on the display alter- nately with the relevant error code occurred. The error codes are listed in the following table: Error Anomaly signalled Cause Boiler status / Solution Code In the event of request of room central heating or domestic hot water production, the boiler does not... - Page 33 Error Anomaly signalled Cause Boiler status / Solution Code This occurs when the power supply voltage is Low power supply If normal conditions are restored the boiler restarts lower than the allowed limits for the correct boiler voltage without having to be reset (1). operation.
-
Page 34: Information Menu
INFORMATION MENU. Pressing the buttons (3) and (4) simultaneously for 3 seconds, the “Information menu” is activated, which displays some boiler functioning parameters. Press buttons (3) and (4) to scroll through the various parameters. To exit the menu, press buttons (3) and (4) simultaneously again for 3 seconds or wait for 5 minutes. -
Page 35: Boiler Shutdown
BOILER SHUTDOWN. ATTENTION: Press the button (2 Fig. 30) ( ) until the symbol appears on if glycol was input in the system’s circuit, the display ( ). make sure it is discharged into the waste ATTENTION: water system, pursuant to regulation EN 1717 In these conditions the boiler is to be considered still live. -
Page 36: Instructions For Maintenance And Initial Check
With regard to the above, only use Immergas original spare parts when replacing parts. If additional documentation needs to be consulted for extraordinary maintenance, contact the Authorised After-Sales Service. -
Page 37: Yearly Appliance Check And Maintenance
to nominal Q. to minimum Q. YEARLY APPLIANCE CHECK AND MAINTENANCE. G 20 6.90% (± 0,5) 3.20% (± 0,5) The following checks and maintenance should be G 31 7.80% (± 0,5) 3.50% (± 0,5) performed at least once a year to ensure operation, safety and efficiency of the appliance over time. -
Page 38: Boiler Hydraulic Diagram
BOILER HYDRAULIC DIAGRAM. Key: 1 - D.H.W. probe 14 - Safety thermostat 15 - Air vent valve 2 - D.H.W. flow switch 3 - Gas valve 16 - Boiler pump 4 - Flow limiter 17 - System pressure switch 18 - By-pass 5 - System draining valve 6 - Burner 19 - 3 bar safety valve... -
Page 39: Wiring Diagram
WIRING DIAGRAM. Colour code key: Key: S20 - Room thermostat (optional) BK - Black A3 - Integrated P.C.B. S21 - Key to increase DHW BL - Blue B1 - Flow probe temperature BR - Brown B2 - D.H.W. probe S22 - Key to decrease DHW G - Green - Comando Amico Remoto temperature... -
Page 40: Possible Problems And Their Causes
POSSIBLE PROBLEMS AND THEIR CAUSES. Maintenance interventions must be carried out by an authorised company (e.g. Authorised After-Sales Technical Assistance Service). Trouble Possible causes Solutions Caused by leakage from gas circuit pipe- Smell of gas Check sealing efficiency of gas intake circuit. lines Make sure: 1) the intake-exhaust duct is not too long (over allowed length). -
Page 41: Converting The Boiler To Other Types Of Gas
CONVERTING THE BOILER TO OTHER TYPES OF ATTENTION: GAS. The pressure testers used for calibration The gas conversion operation must be carried out by should be perfectly closed and there an authorised company (e.g. Authorised Technical should be no leaks from the gas circuit. Assistance Service). -
Page 42: Gas Valve Calibration
GAS VALVE CALIBRATION. N.B.: to adjust the gas valve, remove the plastic cap (6); after adjusting, refit the cap. The valve calibration must be carried out when the gas valve or • Adjustment of the boiler minimum heat output in heating phase. the P.C.B. -
Page 43: Programming The P.c.b
PROGRAMMING THE P.C.B. - adjust the corresponding value consulting the table using keys The boiler is prepared for possible programming of several ope- (5) and (6): first pressure of buttons displays the current value; ration parameters. By modifying these parameters as described - confirm the value set by pressing the Reset button (1) for about below, the boiler can be adapted according to specific needs. - Page 44 Maximum hea- Defines the maximum flow temperature 35 - 80 °C 80°C ting setting 00 - 15 Temperature Change the insufficient circulation intervention value (E27) (0 = Function gradient deactivated) The pump can function in two ways: oF intermittent: in "winter" mode, the circulator is managed by the room Pump functio- thermostat or by the remote control.
-
Page 45: Solar Panels Coupling Function
3.10 SOLAR PANELS COUPLING FUNCTION. 3.13 PUMP ANTI-BLOCK FUNCTION. The boiler is prepared to receive pre-heated water from a system In the “summer” functioning mode ( ) the boiler has a function of solar panels up to a maximum temperature of 65°C. In any case, that starts the pump at least once every 24 hours for 30 seconds it is always necessary to install a mixing valve on the hydraulic in order to reduce the risk of the pump becoming blocked due to... -
Page 46: Casing Removal
3.18 CASING REMOVAL. To facilitate boiler maintenance the casing can be completely removed as follows (Fig. 38): - Remove the plugs from the cover(1) by pulling them to you as shown by the arrows. - Undo the 2 front screws (2) and the 2 lower screws (3) which fasten the casing (4). -
Page 47: Technical Data
TECHNICAL DATA. VARIABLE HEAT OUTPUT. N.B.: the pressures indicated in the tables represent the difference test. The power data given in the table is obtained with 0.5m long in existing pressures between the gas valve outlet and the com- intake/exhaust pipe. Gas flow rates refer to heating power below a bustion chamber. -
Page 48: Technical Data
TECHNICAL DATA. Domestic hot water nominal heat input 25.5 Central heating nominal heat input 25.5 Minimum DHW heat input Minimum heat input 12.8 Domestic hot water nominal heat output (useful) 23.5 Central heating nominal heat output (useful) 23.5 DHW minimum heat output (useful) Minimum heat output (useful) 11.3 *Efficiency at nominal heat output (80/60°) -
Page 49: Key For Data Nameplate
KEY FOR DATA NAMEPLATE. Cod. Md Sr N° Cod. PIN Type Qnw/Qn min. Qnw/Q max. Pn min. Pn max. Class N.B.: the technical data are provided on the data plate on the boiler Model Cod. Md Model code Sr N° Serial Number Check Cod. - Page 52 Immergas S.p.A. 42041 Brescello (RE) - Italy Tel. 0522.689011 Fax 0522.680617 IMMERGAS SPA - ITALY CERTIFIED COMPANY UNI EN ISO 9001:2015 Design, manufacture and post-sale assistance of gas boilers, gas water heaters and related accessories...
Need help?
Do you have a question about the EOLO STAR 24 4E and is the answer not in the manual?
Questions and answers