Table of Contents
Advertisement
Available languages
Available languages
Quick Links
Advertisement
Chapters
Table of Contents

Related Manuals for JVC TH-W513BK


Summary of Contents for JVC TH-W513BK
- Page 1 Instruction Manual Εγχειρίδιο χρήσης Soundbar Soundbar TH-W513BK...
-
Page 3: Table Of Contents
Contents Safety Warnings ........................4 Unpacking ..........................6 Product Overview ........................7 Main Unit .................................7 Remote Control ............................8 Preparation ...........................8 Remove the Plastic Strip from the Remote Control ................8 Battery Replacement for the Remote Control ..................9 Remote Control Operation Range ...................... 10 Speakers Placement ..........................10 Wall Mounting .............................11 Connections ........................12 Connecting to the TV ..........................12... -
Page 4: Safety Warnings
Safety Warnings • Read all the instructions carefully before Ventilation using the unit and keep them for future • To prevent the risk of electric shock or reference. fire hazard due to overheating, ensure • Retain the manual. If you pass the unit that curtains and other materials do not onto a third party make sure to include this obstruct the ventilation vents. - Page 5 Batteries Service • Batteries used in the remote control for this • To reduce the risk of electric shock, do not unit are easily swallowed by young children remove screws. The unit does not contain and this is dangerous. any user-serviceable parts. Please leave all maintenance work to qualified personnel.
-
Page 6: Unpacking
Thank you for purchasing your new product. We recommend that you spend some time reading this instruction manual in order that you fully understand all the operational features it offers. You will also find some hints and tips to help you resolve any issues. Read all the safety instructions carefully before use and keep this instruction manual for future reference. -
Page 7: Product Overview
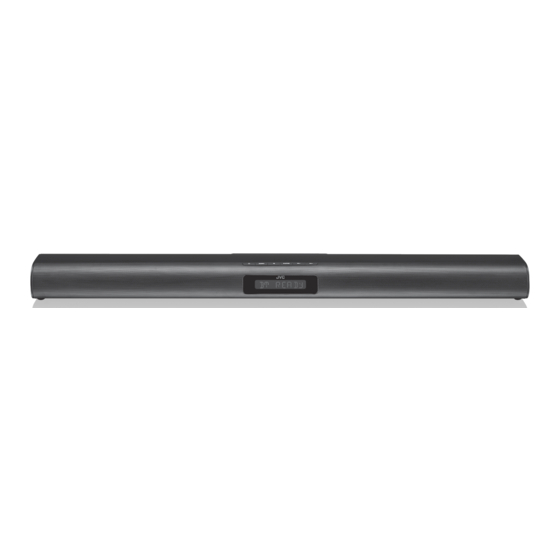
Product Overview Main Unit Front View 1. EQ Button / PAIR Button Select a preset sound effect. • Play / pause / resume playback in Bluetooth® mode. 2. SOURCE Button • Press and hold to activate the pairing Select the Input source. function in Bluetooth®... -
Page 8: Remote Control
Remote Control Button Switch the unit between ON and STANDBY mode. 2. SOURCE Button Select the Input source. 3. VOL + / – Button Adjust the volume. Button Skip backwards to the beginning of the track or to the previous track or skip forwards to the next track in Bluetooth®... -
Page 9: Battery Replacement For The Remote Control
Battery Replacement for the Remote Control The remote control requires a CR2032, 3V Lithium battery. 1. Loosen the screw with a screwdriver (not included) and slide the back cover to open the battery compartment of the remote control. 2. Remove the old battery. 3. -
Page 10: Remote Control Operation Range
Remote Control Operation Range • The remote control sensor on the front unit is sensitive to the remote control’s commands up to a maximum of 6 metres away and within a 30° 30° maximum of a 60° arc. Max. 6 m •... -
Page 11: Wall Mounting
Wall Mounting • Installation must be carried out by qualified personnel only. Incorrect assembly can result in severe personal injury and property damage (if you intend to install this product yourself, you must check for installations such as electrical wiring and plumbing that may be buried inside the wall). It is the installer’s responsibility to verify that the wall will safely support the total load of the Soundbar and wall brackets. -
Page 12: Connections
Connections Ensure the unit is disconnected from the mains socket before connecting it to other devices. Connecting to the TV Method 1: Optical / Coaxial Connection Use an optical cable (not included) / coaxial cable (included) to connect the soundbar’s OPTICAL / COAXIAL socket to the OPTICAL OUT / COAXIAL OUT socket of the external device. -
Page 13: Connecting To An External Audio Device
Method 2: AUX Connection This is a basic connection for connecting your TV to your soundbar. Connect a RCA to 3.5mm stereo audio cable (not included) to AUX / LINE IN socket on your soundbar and the AUDIO OUT L / R (white / red) sockets on your TV. on the unit or remote control and then press SOURCE repeatedly to select AUX / Press LINE IN mode. -
Page 14: Connecting To The Mains Supply
The soundbar is designed to operate with the supplied mains adapter and mains cables. • The mains adapter and mains cable are designed for this JVC soundbar only. DO NOT use the mains adapter and mains cable for other purposes. Connecting the unit to any other power source may damage the unit. -
Page 15: Setting Time In Standby Mode
• If a TV or an external device is connected to AUX / LINE IN socket, the main unit will switch on automatically when the TV or the external device is switched on. BUT in the following case, the unit will not switch on automatically in AUX / LINE IN mode: −... -
Page 16: Aux / Line In / Optical / Coaxial Operation
The system has entered pairing mode. The unit will show PAIR and prompt “Pairing“. 3. Select “TH-W513BK” and enter “0000” for the password if necessary. The unit will voice “Paired” and the screen will show PAIRED. 4. To disconnect the Bluetooth® function, you can: •... -
Page 17: Maintenance
Bluetooth® Problem Solution I cannot find • Ensure the Bluetooth® function is activated on your “TH-W513BK” on my Bluetooth® device. Bluetooth® device. • Ensure you have paired your unit with the Bluetooth® device. -
Page 18: Product Fiche And Specifications
Product Fiche and Specifications Brand Model TH-W513BK Power Adapter (Use only power adapter listed below) Power Adapter Manufacturer Zhong Shan City Richsound Electronic Industrial Ltd. Power Adapter Model RAD2103 Input AC 220 - 240 V~ 50/60 Hz, 1,8A Output DC 21 V... -
Page 19: Others Information And Licences
Others Information and Licences The symbol on the product or its packaging indicates that this product must not be disposed of with your other household waste. Instead, it is your responsibility to dispose of your waste equipment by handing it over to a designated collection point for the recycling of waste electrical and electronic equipment. - Page 20 1 Portal Way, London, W3 6RS, UK For Help and Support Call 210 289 9999 www.kotsovolos.gr The product is distributed and warranted exclusive by DSG Retail Ltd. “JVC” is the trademark of JVC KENWOOD Corporation, used by DSG Retail Ltd. under license.
- Page 21 Περιεχόμενα Προειδοποιήσεις ασφαλείας ................... 22 Αφαίρεση συσκευασίας ....................25 Product Overview ......................26 Βασική μονάδα ............................26 Τηλεχειριστήριο............................27 Προετοιμασία ........................27 Αφαίρεση της πλαστικής ταινίας από το τηλεχειριστήριο ............28 Αντικατάσταση μπαταρίας τηλεχειριστηρίου ................29 Εμβέλεια τηλεχειριστηρίου ........................30 Συνδέσεις ..........................31 Σύνδεση...
-
Page 22: Προειδοποιήσεις Ασφαλείας
Προειδοποιήσεις ασφαλείας • Διαβάστε όλες τις οδηγίες προσεκτικά πριν Υγρασία από τη χρήση της μονάδας και φυλάξτε τις • Προκειμένου να περιοριστεί ο κίνδυνος για σκοπούς μελλοντικής αναφοράς. εκδήλωσης φωτιάς, ηλεκτροπληξίας • Φυλάξτε το εγχειρίδιο. Εάν δώσετε τη ή πρόκλησης ζημιάς στο προϊόν, μην μονάδα... - Page 23 • Εάν το καλώδιο ρεύματος υποστεί φθορά, • Εάν ο χώρος της μπαταρίας δεν κλείνει μπορεί να αντικατασταθεί από τον καλά, μην χρησιμοποιείτε το προϊόν και κατασκευαστή, ένα αντιπρόσωπο σέρβις ή κρατήστε το μακριά από παιδιά. έναν αντίστοιχο εξειδικευμένο τεχνικό για • Εάν...
- Page 24 Συντήρηση • Βεβαιωθείτε ότι αποσυνδέσατε τη μονάδα από την πρίζα πριν από τον καθαρισμό. • Μη χρησιμοποιείτε κανενός είδους τραχύ σπόγγο ή ισχυρά καθαριστικά διαλύματα καθώς ενδέχεται να προκαλέσουν ζημιά στην επιφάνεια της μονάδας. • Μη χρησιμοποιείτε υγρά για να καθαρίσετε τη...
-
Page 25: Αφαίρεση Συσκευασίας
Σας ευχαριστούμε για την αγορά του νέου σας προϊόντος. Η νέα τηλεόρασή σας διαθέτει πολλά χαρακτηριστικά και ενσωματώνει την πιο τελευταία τεχνολογία για βελτιωμένη εμπειρία παρακολούθησης. Συνιστάται να αφιερώσετε λίγο χρόνο στην ανάγνωση αυτού του εγχειριδίου οδηγιών προκειμένου να κατανοήσετε πλήρως όλα τα λειτουργικά... -
Page 26: Product Overview
Επισκόπηση προϊόντος Βασική μονάδα Μπροστινή όψη 1. Κουμπί EQ 4. Κουμπί / PAIR Επιλέξτε ένα προκαθορισμένο ηχητικό • Αναπαραγωγή / παύση / συνέχιση εφέ. αναπαραγωγής σε λειτουργία Bluetooth®. 2. Κουμπί SOURCE • Πιέστε παρατεταμένα για να Επιλέξτε την πηγή εισόδου. ενεργοποιηθεί... -
Page 27: Τηλεχειριστήριο
Τηλεχειριστήριο 1. Κουμπί Θέστε τη μονάδα στις επιλογές λειτουργίας ON και STANDBY. 2. Κουμπί SOURCE Επιλέξτε την πηγή εισόδου. 3. Κουμπί VOL+ / VOL– Προσαρμογή της έντασης. Κουμπί Μεταβείτε προς τα πίσω στην αρχή του κομματιού ή στο προηγούμενο κομμάτι, ή μεταβείτε προς τα εμπρός... -
Page 28: Αφαίρεση Της Πλαστικής Ταινίας Από Το Τηλεχειριστήριο
Αντικατάσταση μπαταρίας τηλεχειριστηρίου Για το τηλεχειριστήριο απαιτείται μπαταρία λιθίου 3V, CR2032. 1. Χαλαρώστε τη βίδα με ένα κατσαβίδι (δεν συμπεριλαμβάνεται) και σύρετε το πίσω κάλυμμα, για να ανοίξει ο χώρος της μπαταρίας του τηλεχειριστηρίου. 2. Αφαιρέστε την παλιά μπαταρία. 3. Αντικαταστήστε την με μια καινούρια μπαταρία. 4. -
Page 29: Εμβέλεια Τηλεχειριστηρίου
Εμβέλεια τηλεχειριστηρίου • Ο αισθητήρας του τηλεχειριστηρίου στο μπροστινό μέρος της μονάδας ανιχνεύει τις εντολές του τηλεχειριστηρίου σε μέγιστη απόσταση 6 μέτρων και 30° 30° σε ακτίνα 60°. Max. 6 m • Έχετε υπόψη ότι η απόσταση λειτουργίας ενδέχεται να ποικίλλει, ανάλογα... - Page 30 Επιτοίχια τοποθέτηση • Η εγκατάσταση πρέπει να πραγματοποιείται μόνο από εξειδικευμένο προσωπικό. Η λανθασμένη συναρμολόγηση μπορεί να προκαλέσει τραυματισμό και καταστροφή αντικειμένων (εάν σχεδιάζετε να τοποθετήσετε το προϊόν μόνοι σας, θα πρέπει να ελέγξετε για εγκαταστάσεις, όπως ηλεκτρικές καλωδιώσεις και υδραυλικά συστήματα, που μπορεί να κρύβονται μέσα στον τοίχο). Το άτομο που τοποθετεί...
-
Page 31: Συνδέσεις
Συνδέσεις Πριν να συνδέσετε τη μονάδα με άλλες συσκευές, βεβαιωθείτε ότι έχει αποσυνδεθεί από το κεντρικό ηλεκτρικό δίκτυο. Σύνδεση με την τηλεόραση Μέθοδος 1: Σύνδεση καλωδίων Optical / Coaxial Χρησιμοποιήστε ένα optical καλώδιο (δεν συμπεριλαμβάνεται) / coaxial καλώδιο (συμπεριλαμβάνεται) για να συνδέσετε την υποδοχή OPTICAL / COAXIAL της soundbar με... -
Page 32: Σύνδεση Εξωτερικής Συσκευής Ήχου
Μέθοδος 2: Σύνδεση AUX Πρόκειται για μια βασική σύνδεση για τη σύνδεση της τηλεόρασης με τη soundbar. Συνδέστε ένα RCA καλωδίου στερεοφωνικού ήχου 3,5 mm (δεν συμπεριλαμβάνεται) στην υποδοχή AUX / LINE IN της soundbar και στις υποδοχές AUDIO OUT L / R (λευκή / κόκκινη) της... -
Page 33: Σύνδεση Με Το Ηλεκτρικό Δίκτυο
• Ο μετασχηματιστής και το καλώδιο ηλεκτρικού δικτύου έχουν σχεδιαστεί μόνο για αυτήν τη soundbar JVC. ΜΗΝ χρησιμοποιείτε το μετασχηματιστή και το καλώδιο ηλεκτρικού δικτύου για άλλους σκοπούς. Εάν συνδέσετε τη μονάδα με οποιαδήποτε άλλη παροχή ισχύος, υπάρχει περίπτωση να καταστραφεί... -
Page 34: Ρύθμιση Ώρας Σε Λειτουργία Αναμονής
• Εάν μια τηλεόραση ή μια εξωτερική συσκευή έχει συνδεθεί σε μια υποδοχή AUX / LINE IN, η βασική μονάδα και το subwoofer θα ενεργοποιούνται αυτόματα, όταν ενεργοποιείται η τηλεόραση ή η εξωτερική συσκευή. ΩΣΤΟΣΟ, στην ακόλουθη περίπτωση, η μονάδα δεν θα ενεργοποιηθεί αυτόματα σε λειτουργία AUX / LINE IN: −... -
Page 35: Λειτουργία Aux / Line In / Optical / Coaxial
• Όταν η μονάδα βρίσκεται σε λειτουργία COAXIAL ή OPITCAL, μεταβαίνει αυτόματα σε εφέ MOVIE EQ. • Όταν η μονάδα βρίσκεται σε λειτουργία BT, AUX ή LINE IN, μεταβαίνει αυτόματα σε εφέ DFLT EQ. Λειτουργία AUX / LINE IN / OPTICAL / COAXIAL Στην... -
Page 36: Λειτουργία Bluetooth
εισέλθει σε λειτουργία σύζευξης. Στη μονάδα θα εμφανιστεί η ένδειξη “PAIR” και το μήνυμα για σύζευξη “Pairing”. 3. Επιλέξτε “TH-W513BK” και εισαγάγετε “0000” για κωδικό πρόσβασης, εάν είναι απαραίτητο. Από τη μονάδα θα ακουστεί η φράση “Paired” και στην οθόνη θα... -
Page 37: Συντήρηση
ενεργοποιήστε την ξανά για επαναφορά της μονάδας. Bluetooth® Πρόβλημα Λύση Δεν μπορώ να βρω • Βεβαιωθείτε ότι η λειτουργία Bluetooth® είναι το “TH-W513BK” στη ενεργοποιημένη στη συσκευή Bluetooth® σας. συσκευή Bluetooth® μου. • Βεβαιωθείτε ότι έχει γίνει σύζευξη της μονάδας με τη συσκευή Bluetooth®. -
Page 38: Δελτίο Προϊόντος Και Προδιαγραφές
Δελτίο προϊόντος και Προδιαγραφές Μάρκα Μοντέλο TH-W513BK Μετασχηματιστής ρεύματος (Χρησιμοποιείτε μόνο το μετασχηματιστή ρεύματος που αναφέρεται παρακάτω) Κατασκευαστής μετασχηματιστή ρεύματος Zhong Shan City Richsound Electronic Industrial Ltd. Μοντέλο μετασχηματιστή ρεύματος RAD2103 Είσοδος AC 220 - 240 V~ 50/60 Hz, 1.8A Εξόδου... -
Page 39: Άλλες Πληροφορίες Και Άδειες
Άλλες πληροφορίες και άδειες Το σύμβολο στο προϊόν ή στη συσκευασία του υποδεικνύει ότι αυτό το προϊόν δεν πρέπει να απορρίπτεται με τα υπόλοιπα οικιακά απορρίμματα. Αντ’ αυτού, είναι δική σας ευθύνη να απορρίψετε τον προς απόρριψη εξοπλισμό σας παραδίδοντάς τον σε ένα καθορισμένο σημείο συλλογής για... - Page 40 βοήθειας και υποστήριξης 210 289 9999 www.kotsovolos.gr Το προϊόν διανέμεται από και φέρει αποκλειστική εγγύηση της DSG Retail Ltd. Το “JVC” αποτελεί εμπορικό σήμα της JVC KENWOOD Corporation, το οποίο χρησιμοποιείται από την DSG Retail Ltd. στο πλαίσιο άδειας. (IB-TH-W513BK-161103V1)
Need help?
Do you have a question about the TH-W513BK and is the answer not in the manual?
Questions and answers