Table of Contents
Advertisement
Quick Links
ELECTRIC BARBECUE
Owner's Guide
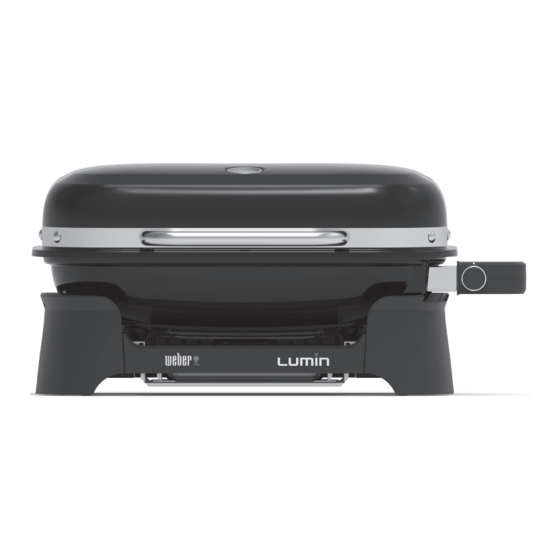
• LUMIN
• LUMIN COMPACT
REGISTER TODAY
78238
We are so glad that you have joined us on the journey to barbecuing greatness.
Register your barbecue and gain access to fun and engaging WEBER information, including
102022
tips, tricks and how to get the most out of your barbecuing experience.
enGB - English
Advertisement
Table of Contents

Related Manuals for Weber LUMIN


Summary of Contents for Weber LUMIN
- Page 1 78238 We are so glad that you have joined us on the journey to barbecuing greatness. Register your barbecue and gain access to fun and engaging WEBER information, including 102022 tips, tricks and how to get the most out of your barbecuing experience.
- Page 2 Important Safety Read all instructions. Should a grease fire occur, close the lid, turn the power button off, unplug the barbecue from the Household use only. Information socket and leave the lid closed until the fire is extinguished. Do not use liquid to extinguish flames. CAUTION: Accessible parts may be very hot.
-
Page 3: Table Of Contents
ASSEMBLY your barbecue. When you sign up for a WEBER account as part of your Parts List registration, we will deliver special barbecue-related content just for you to Operation enjoy. -
Page 4: The Weber Promise
Weber may choose (at its option) to replace the barbecue in question with a new barbecue of equal or greater value. WEBER may ask you to return parts for inspection, shipping charges to be pre-paid. -
Page 5: Assembly
Assembly Parts List These instructions will give you the minimum requirements for assembling your Weber electric barbecue. Improper assembly can be dangerous. WARNING: Do not modify the appliance. Modifications are unsafe and will void your warranty. Remove all packaging materials and protective film before operating your barbecue. -
Page 6: Getting Started
Getting Started Attach Temperature Controller 1) Plug the temperature controller into the barbecue by pushing it straight onto the mounting bracket (A) until the controller clicks into place and sits flat to the mounting bracket. Ensure that the heating element pins are aligned with temperature controller for proper attachment (B). -
Page 7: Meal-To-Meal Upkeep
Replace the brush if any loose bristles are found on the cooking grates or brush. WEBER recommends purchasing a new stainless steel bristle barbecue brush at the beginning of every spring. -
Page 8: High-Heat Searing Setup
5-in-1 Versatility High-Heat Searing Setup Steaming Setup Smoke Infusion Setup Using only the porcelain-enamelled Powerful and ready to steam in With the barbecue OFF and cool, cooking grates, turn the control 10 minutes. remove one cooking grate. Place the knob to the high setting and dry reservoir in the cookbox and fill With the barbecue OFF and cool, preheat the barbecue with the lid... -
Page 9: Food Warming Setup
Food Warming while serving. Temperature Controller Settings: Water Reservoir Capacity: LUMIN 750 ml to shelf line/ 2.8 L maximum LUMIN COMPACT 500 ml to shelf line/ LOW/FOOD 1.9 L maximum WARMING MEDIUM WARNING... -
Page 10: Barbecuing Do's And Don'ts
Barbecuing Do’s and Don’ts Create a little elbow room. Packing too much food onto the cooking grates restricts your flexibility. Leave Preheat barbecue each and every time. at least one-quarter of the cooking grates clear with plenty of space between If the cooking grates are not hot enough, the food will stick and you will each food item in order to get your tongs in there and easily move the food likely never have a chance of searing your food properly or developing those around. -
Page 11: Deep Cleaning And Maintenance
Follow up with a rinse and thorough drying. WEBER recommends the following methods based on Additionally, for stainless steel parts only, you may Do not use any of the following the surface type. -
Page 12: Replacement Parts
SOLUTION Customer Services Department. The temperature controller may not be properly Remove and reinstall temperature controller. Failure to use genuine Weber- inserted into the housing. Always plug the temperature controller into the Stephen parts for any repair or barbecue before plugging power cable into the socket. - Page 13 LUMIN LUMIN - MEDIUM - EMEA 070122...
- Page 14 LUMIN COMPACT LUMIN - COMPACT - EMEA 070122...
- Page 16 +49 (0) 30 219 0710 Weber-Stephen Ibérica SRL service-de@weber.com +34 935 844 055 service-es@weber.com ICELAND weber.com Jarn & Gler Wholesale EHF +354 58 58 900 © 2022 Designed and engineered by Weber-Stephen Products LLC, 1415 S. Roselle Road, Palatine, Illinois 60067 USA.
Need help?
Do you have a question about the LUMIN and is the answer not in the manual?
Questions and answers
Does the grill require a 15 amp circuit and 120 volts?
Yes, the Weber LUMIN grill operates on 13 amps and is recommended to be used with a 15-20 amp circuit breaker. It requires 120 volts (50/60Hz).
This answer is automatically generated