Advertisement
Quick Links
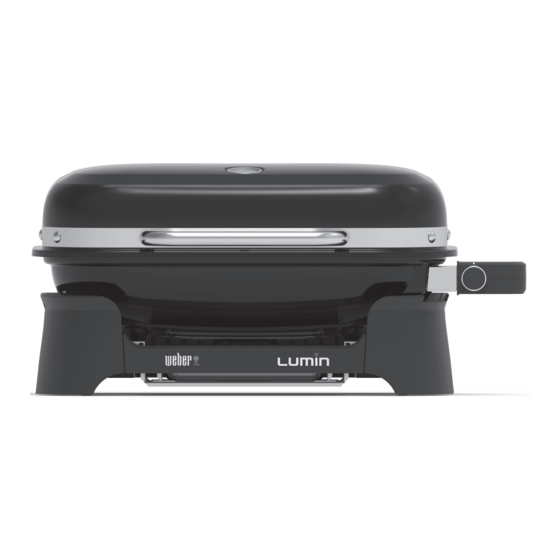
Electric Grill
• LUMIN
• LUMIN COMPACT
REGISTER TODAY.
We are so glad that you have joined us on the journey to grilling greatness. Register
your grill and gain access to fun and engaging WEBER information, including tips, tricks
and how to get the most out of your grilling experience.
Owner's Guide
enUS - English
77445
101022
Advertisement

Related Manuals for Weber LUMIN


Summary of Contents for Weber LUMIN
- Page 1 77445 We are so glad that you have joined us on the journey to grilling greatness. Register your grill and gain access to fun and engaging WEBER information, including tips, tricks 101022 and how to get the most out of your grilling experience.
- Page 2 DANGER The use of accessories not Make sure appliance is OFF and remove recommended by WEBER may cause plug from outlet when not in use, before damage or injuries. putting on or taking off parts, and before cleaning. Allow to cool before handling.
- Page 3 When Meal-to-Meal Upkeep 125 volts at 13 amps. The maximum length for the extension cord is 20 feet (6 meters). Keep the you sign up for a WEBER account High-Heat Searing Setup extension cord as short as possible. Steaming Setup as part of your registration, we will...
- Page 4 The WEBER Promise At WEBER, we pride ourselves on two things: making grills that last and providing a lifetime of excellent customer service. Thank you for purchasing a WEBER product. Weber-Stephen Any parts that are used and/or installed on your WEBER Products LLC, 1415 S.
- Page 5 Assembly Parts List These instructions will give you the minimum requirements for assembling your WEBER electric grill. Improper assembly can be dangerous. WARNING: Do not modify the appliance. Modifications are unsafe and will void your warranty. Remove all packaging materials and protective film before operating your grill.
- Page 6 Getting Started Attach Temperature Controller 1) Plug the temperature controller into the grill by pushing it straight onto the mounting bracket (A) until the controller clicks into place and sits flat to the mounting bracket. Ensure that the heating element pins are aligned with temperature controller for proper attachment (B).
- Page 7 Grill brushes should be checked for loose bristles and excessive wear on a regular basis. Replace brush if any loose bristles are found on cooking grates or brush. WEBER recommends purchasing a new stainless steel bristle grill brush at the beginning of every spring.
- Page 8 5-in-1 Versatility High-Heat Searing Setup Steaming Setup Smoke Infusion Setup Using only the porcelain-enameled Powerful and ready to steam in With the grill OFF and cool, remove cooking grates, turn the control knob 10 minutes. one cooking grate. Place the dry to the high setting and preheat the reservoir in the cookbox and fill with With the grill OFF and cool, remove...
- Page 9 Food Warming while serving. Temperature Controller Settings: Water Reservoir Capacity: LUMIN 3 cups (750 ml) to shelf line / 11 cups (2.8 L) maximum LUMIN COMPACT 2 cups (500 ml) to shelf LOW/ line / 8 cups (1.9 L) FOOD WARMING maximum MEDIUM...
- Page 10 Grilling Do’s and Don’ts Create a little elbow room. Packing too much food onto the cooking grates restricts your flexibility. Leave at Preheat grill each and every time. least one-quarter of the cooking grates clear with plenty of space between each If the cooking grates are not hot enough, the food will stick and you will food item in order to get your tongs in there and easily move the food around.
- Page 11 Do not use any of the following to up with a rinse and thorough drying. Additionally, WEBER recommends the following methods based on for stainless steel parts only, you may want to apply clean your grill: abrasive stainless...
- Page 12 If you are still experiencing any problems, contact the Customer Service Representative in your area using the contact information that can be found on weber.com. REPLACEMENT PARTS To obtain replacement parts, contact the local retailer in your area or log onto weber.com. DON'T FORGET TO REGISTER...
- Page 13 LUMIN LUMIN - MEDIUM - US 070122...
- Page 14 LUMIN COMPACT LUMIN - COMPACT - US 070122...
- Page 15 weber.com...
- Page 16 The serial number appears on the data label that is located on the back of the grill frame. U.S.: Canada: Mexico: 1-800-446-1071 1-800-446-1071 800-009-3237 weber.com © 2022 Designed and engineered by Weber-Stephen Products LLC, 1415 S. Roselle Road, Palatine, Illinois 60067 USA.
Need help?
Do you have a question about the LUMIN and is the answer not in the manual?
Questions and answers