Fora MD Control Operator's Manual
Hide thumbs
Also See for MD Control:
- Operations & procedures manual (28 pages) ,
- Owner's manual (96 pages)
Table of Contents
Advertisement
Quick Links
Advertisement
Table of Contents

Related Manuals for Fora MD Control


Summary of Contents for Fora MD Control
- Page 1 Blood Glucose Monitoring System Owner’s Manual Operator’s Manual...
- Page 3 Dear FORA MD Control System Owner: Thank you for choosing FORA MD Control Blood Glucose Monitoring System. Please use with FORA MD Control Blood Glucose Test Strips only. This easy-to-use monitoring system provides fast and accurate results, including automatic upload of test results to hospital and laboratory information systems enabling powerful data management.
- Page 5 IMPORTANT SAFETY PRECAUTIONS READ BEFORE USE Users need to adhere to Standard Precautions when handling or using this device. All parts of the glucose monitoring system should be considered potentially infectious and are capable of transmitting blood-borne pathogens between patients and healthcare professionals.
- Page 6 4. Keep the equipment and its flexible cord away from hot surfaces. 5. Do not use the device if it is not working properly or damaged. 6. Before using this product to test blood glucose, read all instructions thoroughly and practice the test. Do all quality control checks as directed.
-
Page 7: Table Of Contents
TABLE OF CONTENTS BEFORE YOU BEGIN ................1 Important Information..............1 Intended Use ................1 CONTENTS OF SYSTEM ............... 3 Meter Overview ................4 Test Strip ..................5 Meter Functions ................6 BEFORE USE ..................7 Battery Setup & Recharge ............7 Setup Mode .................. - Page 8 Reviewing Test Results by “Patient Record” ....... 25 Reviewing Test Results by “Operator Record” ......26 Reviewing QC Data ..............27 Reviewing Proficiency Data ............28 TAKING CARE OF THE METER & STRIPS ........29 Disinfecting Procedures .............. 30 Storage ..................32 ERROR MESSAGES ................
-
Page 10: Before You Begin
Before performing patient tests, please read this Operator’s Manual carefully. The FORA MD Control Blood Glucose Monitoring System must be properly set up (configured) before performing patient or quality control tests. Configurations can be set up on the meter or through MD Control Management System according to each facility’s... - Page 11 glucose levels in fresh capillary whole blood from the finger and venous whole blood samples. It is indicated for multiple patients use by health care professionals in health care facilities as an aid in monitoring the effectiveness of a diabetes control program. This system is only used with single-use lancing devices.
-
Page 12: Contents Of System
CONTENTS OF SYSTEM Your FORA MD Control Blood Glucose Monitoring System kit includes: Meter Operator's manual Warranty Card Rechargeable Li-Battery USB Cable Test strip and control solution may be purchased separately. Please make sure you have those items needed for a blood glucose test beforehand. -
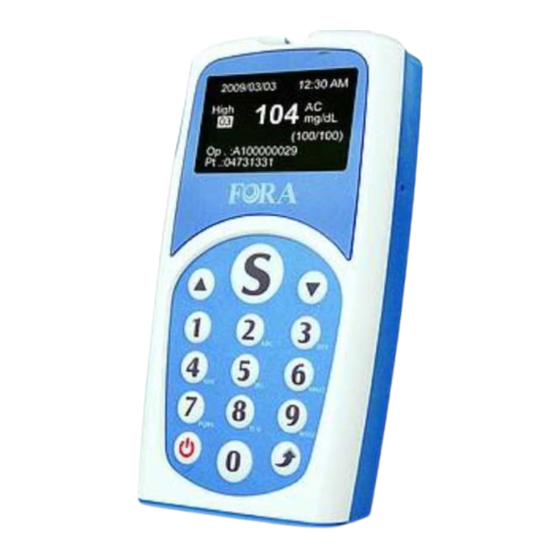
Page 13: Meter Overview
Meter Overview USB port (for mini Strip Ejection Button Recharge Indicator USB cable) LCM Panel Reset Button Battery Compartment Up Button On/Off Button Scan Button Down Button Number Button Return Button Barcode Scanner... -
Page 14: Test Strip
Test results might be wrong if the contact bar is not fully inserted into the test slot. NOTE: The FORA MD Control blood glucose monitoring system should only be used with FORA MD Control blood glucose Test Strips. Using other test strips with this meter may produce inaccurate results. -
Page 15: Meter Functions
Meter Functions When the meter is turned on by pressing On/Off button, five modes are available on the main menu: Measure Mode, QC Mode, Memory Mode, Urgent Mode and Setup Mode. User can select each mode simply by pressing Up or Down button and enter the desired mode by pressing S button. -
Page 16: Before Use
BEFORE USE Battery Setup & Recharge This meter uses one Li-ion rechargeable battery. Please follow the instructions below to setup the meter. 1. Press and push the battery cover on the back of the meter outward and then remove the cover. 2. -
Page 17: Setup Mode
Setup Mode Please follow the step-by-step instructions below to setup your FORA MD Control Blood Glucose Monitoring System. 1. Setting the year, month, and day Press On/Off button to turn on the meter. After pressing Up/Down button to select “Setup Mode”, press S button, and the screen will display “Setting Date”. -
Page 18: Barcode Scanning Procedure
3. Setting the unit of blood glucose The screen returns to “Setup Mode” menu. Press Up/Down button to select “Setting Unit” and then press Up/Down button to select “mmol/L” or “mg/dL”. Press S button to go to the next step. 4. -
Page 19: Training
Each operator has to pass a training test through Training Mode before performing measurements for patients (Measure Mode). This FORA MD Control monitoring system will evaluate the examinee’s training by simple testing and only successful trainees will become proficient operator to access Measure Mode. -
Page 20: Control Test
Please follow the guidelines below to obtain optimal quality control results when using FORA MD Control Blood Glucose Monitoring System. Only use the control solutions for FORA MD Control blood glucose test strips. When using a new bottle of control solution, write the opening date... -
Page 21: Control Test Procedure
Use the control solution by the expiration date printed on the bottle and the box. FORA MD Control Blood Glucose Monitoring System does not accept expired control solutions. Perform quality control testing before using the monitoring system with each new lot and each new vial of strip and once per day. - Page 22 4. Press S button to scan the Test Strip ID barcode or manually enter the Test Strip ID via the keypad. 5. Press S button to scan Level 1 control solution lot number or manually enter the control solution lot number via the keypad.
- Page 23 9. Make sure the test result falls within the acceptable range. NOTE: Control test results can appear as numeric or PASS/FAILdepending how the meter is set. 10. Push up the Strip Ejection button to eject the strip and the meter will shut down automatically.
-
Page 24: Patient Test
Wear protective glasses and/or other protective clothing if necessary. Use control solutions approved for FORA MD Control Blood Glucose test strips use only to ensure the performance of FORA MD Control Blood Glucose test strips and meter. -
Page 25: Collecting Blood Samples
After the blood is applied to the test strip and the count down begins, do not remove the test strip. Use a new test strip for a new test. Read instructions before using test strips. Please refer to the strip manual included in the kit. - Page 26 Avoid squeezing the puncture site excessively. Apply blood to the absorbent hole of the test strip until the confirmation window is fully filled with blood. For venous blood sample, use a syringe and/or a drawing tube to obtain blood sample from a patient’s vein.
-
Page 27: Patient Test Procedure
Patient Test Procedure 1. Press On/Off button to turn on the meter. 2. Press Up/Down button to select Measure Mode. For emergency use, please select Urgent Mode and jump to step 8. 3. Press S button to scan the Operator ID barcode or manually enter the Operator ID via the keypad. - Page 28 5. Press S button to scan the Patient ID barcode or manually enter the Patient ID via the keypad. 6. Press Up/Down button to select Capillary/Venous and then press S button to go to the next step. NOTE: Select VENOUS only for venous samples. Select CAPILLARY for all other ...
- Page 29 10. Wait for the meter to finish analyzing the sample and display the test result. NOTE: The meter will produce a beep sound and then begin to count down. The results will be displayed on the screen and automatically saved in the meter. Push up the Strip Ejection button to eject the strip.
-
Page 30: Results Indicators
Results Indicators Message What it means The result is below measurement limit, 20 mg/dL (1.1 mmol/L). This indicates low blood glucose level. The "low" blood glucose level is between 20 mg/dL and 50 mg/dL (1.1 mmol/L and 2.8 mmol/L). This indicates high blood glucose level. -
Page 31: Memory Mode
MEMORY MODE Reviewing Test Results FORA MD Control stores 1000 sets of test results that can be retrieved by the following categories: All Record: This option displays all data. -
Page 32: Reviewing Test Results By "All Records
1. Press the On/Off button to turn on the meter. 2. Press Up/Down button to select Memory Mode and then press S button. 3. Press Up/Down button to select Test Results. NOTE: If you wish to exit the current mode, press the Return button to return to the previous menu. - Page 33 2. Press Up/Down button to select Test Results and then press S button. 3. Press Up/Down button to select All Record and then press S button. NOTE: The screen displays the most recent test result first. 4. The operator can select one of the following options: ►...
-
Page 34: Reviewing Test Results By "Patient Record
Reviewing Test Results by “Patient Record” 1. Press Up/Down button to select Test Results and then press S button. 2. Press Up/Down button to select Patient Record and then press S button. 3. Scan or manually enter the Patient ID via the keypad and then press Enter. -
Page 35: Reviewing Test Results By "Operator Record
5. When finishing viewing the data, the operator can: ► Press the Return button to return to the menu. ► Press the On/Off button to turn off the meter. Reviewing Test Results by “Operator Record” 1. Press Up/Down button to select Test Results and then press S button. -
Page 36: Reviewing Qc Data
► Press the On/Off button to turn off the meter. Reviewing QC Data FORA MD Control stores 500 sets of QC data (each set includes test results of the three levels of control solution) that can be retrieved by following the operations below: Please refer to “Memory Mode”... -
Page 37: Reviewing Proficiency Data
NOTE: The display also shows: ► 0: Comment Code ► 1/1: the first Record/Total Records ► Op: Operator ID ► Lot: Strip Lot Number 3. When finished viewing the data, the operator can: ► Press the Return button to return to the menu. ►... -
Page 38: Taking Care Of The Meter & Strips
TAKING CARE OF THE METER & STRIPS WARNING: Potential Biohazard! Healthcare professionals using this system on multiple patients should follow the infection control procedure approved by their facility. All products or objects which come in contact with human blood, even after cleaning, should be handled as if capable of transmitting viral diseases. -
Page 39: Disinfecting Procedures
To obtain disinfecting wipes and other information, please contact Medline at 1-800-MEDLINE (1-800-633-5463) or visit www.medline.com. You can also purchase at www.amazon.com. Disinfecting Procedures 1. Put on non-sterile gloves. 2. Take out one disinfecting wipe from the package and squeeze out any excess liquid in order to prevent damage to the meter. - Page 40 This device has been validated to withstand up to 10,000 cleaning and disinfection cycles using the recommended disinfecting wipe/towelette. The tested number of cycles is estimated by 9 cleaning and disinfection cycles per day over 3 years, the expected life of the device. The meter should be replaced after the validated number of cleaning and disinfection cycles or the warranty period, whichever comes first.
-
Page 41: Storage
“FDA Public Health Notification: Use of Fingerstick Devices on More than One Person Poses Risk for Transmitting Bloodborne Pathogens: Initial Communication” (2010) http://www.fda.gov/MedicalDevices/Safety/AlertsandNotices/ucm224 025.htm “CDC Clinical Reminder: Use of Fingerstick Devices on More than One Person Poses Risk for Transmitting Bloodborne Pathogens” (2010) http://www.cdc.gov/injectionsafety/Fingerstick-DevicesBGM.html Storage... - Page 42 another container. Store test strip packages in a cool dry place. Keep away from direct sunlight and heat. After removing a test strip from the vial, immediately close the vial cap tightly. Touch the test strip with clean and dry hands. Use each test strip ...
-
Page 43: Error Messages
ERROR MESSAGES ERROR PROBABLE CAUSE SOLUTION CODE QC overdue Proceed with QC Mode Calibration error Calibrate again Low battery Charge the meter Operator ID error Scan or enter operator ID again Patient ID error Scan or enter patient ID again Test strip ID error Scan strip ID again Used strip... - Page 44 Full memory Upload and remove records Meter error Reboot the meter Used strip Use a new strip to test Low temperature Take the test again High temperature Take the test again Meter Error Take the test again Meter Error Take the test again Meter Error Take the test again Meter Error...
-
Page 45: Detailed Information
DETAILED INFORMATION Reference Values Blood glucose monitoring plays an important role in diabetes control. A long-term study showed that maintaining blood glucose levels close to normal can reduce the risk of diabetes complications by up to 60%* The meter provides you with plasma equivalent results. Normal plasma glucose range for Time of day people without diabetes (mg/dL) - Page 46 working properly. Fast for at least eight hours before doing comparison tests, if possible. Take your meter with you to the lab. While staying at the lab: Make sure that the samples for both tests are taken within 15 minutes of each other.
-
Page 47: Specifications
SPECIFICATIONS Model No.: FORA MD Control Dimension & Weight: 122 (L) x 64 (W) x 24 (H) mm, 130 g Power Source: One 3.7 V rechargeable Li-ion battery Display: LCD Memory: 1000 test results and an additional of 500 sets of control... - Page 48 Distributed by ForaCare, Inc. 893 Patriot Dr., Suite D, Moorpark, CA 93021 USA Products made in Taiwan Toll Free: 1-888-307-8188 (7:00 am - 6:00 pm PST, Mon. - Fri.). For assistance outside of these hours, please visit www.foracare.com for additional information. Read instructions before use.
Need help?
Do you have a question about the MD Control and is the answer not in the manual?
Questions and answers