Table of Contents
Advertisement
Quick Links
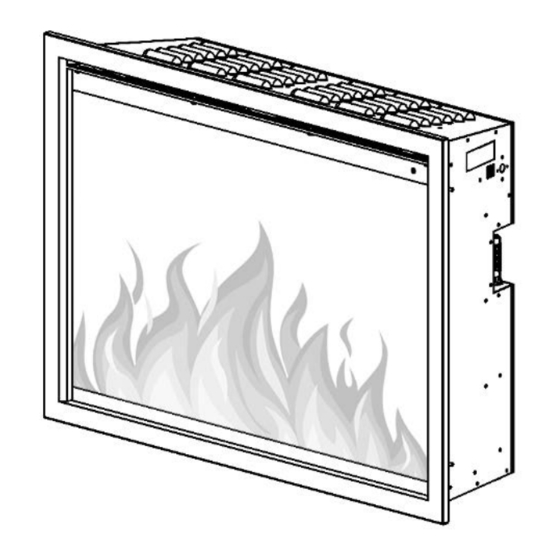
ORION TRADITIONAL BUILT-IN OR INSERT FIREPLACE
Model #: .... OR26-TRAD-INT .... OR30-TRAD-INT ... OR36-TRAD-INT
.... OR42-TRAD-INT .... OR54-TRAD-INT
INSTALLATION MANUAL
AC 220-240V 50Hz 2,000W (6,800BTU's)
Read and understand this entire owner's manual, including all safety information,
before plugging in or using this product. Failure to do so could result in fire,
electric shock, or serious personal injury.
Keep this owner's manual for future reference. If you sell or give this product away,
make sure this manual accompanies this product.
Advertisement
Table of Contents

Related Manuals for Modern Flames OR26-TRAD-INT


Summary of Contents for Modern Flames OR26-TRAD-INT
- Page 1 ORION TRADITIONAL BUILT-IN OR INSERT FIREPLACE Model #: …. OR26-TRAD-INT …. OR30-TRAD-INT … OR36-TRAD-INT …. OR42-TRAD-INT …. OR54-TRAD-INT INSTALLATION MANUAL AC 220-240V 50Hz 2,000W (6,800BTU’s) Read and understand this entire owner's manual, including all safety information, before plugging in or using this product. Failure to do so could result in fire, electric shock, or serious personal injury.
- Page 2 Read all instructions before installing or using this heater. • Use a dedicated 13 Amp (EU) or 10 Amp (AU/NZ) (or higher) circuit breaker. • This heater is hot when in use. To avoid burns, DO NOT let bare skin touch hot surfaces. If •...
- Page 3 ALWAYS disconnect this unit from the power supply before performing any assembly, • cleaning, or before relocating the electric fireplace. NEVER leave this heater unattended. ALWAYS unplug this heater when not in use. • ALWAYS store this heater in a dry location. NEVER use the fireplace if it has become wet. •...
-
Page 4: Table Of Contents
Table of Contents PREPARATION ....................................5 PARTS AND HARDWARE ..................................5 DIMENSIONS AND SPECIFICATIONS ..............................6 INSTALLATION AND ASSEMBLY ................................. 6 GLASS REMOVAL/INSTALLATION ............................... 7 BUILT-IN INSTALLATION FRAMING ..............................8 BUILT-IN INSTALLATION ..................................9 INSERT INSTALLATION ..................................10 HARDWIRING INSTALLATION ................................11 DRIFTWOOD LOGS AND CRUSHED GLASS INSTALLATION ........................ -
Page 5: Preparation
Preparation This product includes a GLASS panel. Always use extreme caution when handling glass. Failure to do so could result in personal injury or property damage. Remove all parts and hardware from the carton and place them on a clean, soft, dry surface. Parts and assembly steps are grouped for wall-hanging or recessing use. -
Page 6: Dimensions And Specifications
Dimensions and Specifications PRODUCT DIMENSIONS Model Number 25" 19-5/8" 9-7/8" 22-3/4" 18-1/2" 9-3/8" 22-7/16" 17-1/16" OR26-TRAD (636mm) (500mm) (250mm) (578mm) (470mm) (238mm) (570mm) (433mm) 30-1/2" 19-5/8" 9-7/8" 28" 18-1/2" 9-3/8" 27-5/8" 17-1/16" OR30-TRAD (776mm) (500mm) (250mm) (711mm) (470mm) (238mm) (702mm) (433mm) 35"... -
Page 7: Glass Removal/Installation
Glass Removal/Installation This product includes a GLASS panel. Always use extreme caution when handling glass. Failure to do so could result in personal injury or property damage. Removing Front Glass With one hand on the front glass to prevent it from falling, remove the screws from the underside of •... -
Page 8: Built-In Installation Framing
Remove the front glass (see “Glass Removal/Installation” section). • Hold the appliance up to ensure it will fit into the framing. ROUGH OPENING FRAMING DIMENSIONS Model Number 23" 18-3/4" 10" min. OR26-TRAD-INT (584mm) (477mm) (254mm min.) 28-1/4" 18-3/4" 10" min. OR30-TRAD-INT... -
Page 9: Built-In Installation
Built-In Installation • Plug the fireplace into the dedicated circuit. If hardwiring the fireplace, see “Hardwiring Installation”. • Install the fireplace in the framed opening (Fig. 2-1). Adjust the adjustable feet as needed to ensure the fireplace is level. Fig. 2-1 •... -
Page 10: Insert Installation
Insert Installation EXISTING FIREPLACE MIN. DIMENSIONS Model Number 23" 18-3/4" 10" min. OR26-TRAD-INT (584mm) (477mm) (254mm min.) 28-1/4" 18-3/4" 10" min. OR30-TRAD-INT (718mm) (477mm) (254mm min.) 32-5/8" 23-7/8" 10" min. OR36-TRAD-INT (829mm) (607mm) (254mm min.) 38-3/4" 26-3/4" 10" min. OR42-TRAD-INT... -
Page 11: Hardwiring Installation
Hardwiring Installation If it is necessary to hardwire this appliance, a qualified electrician must remove the cord connection and wire the appliance directly to the household wiring. NOTE: A dedicated 13 Amp (EU) or 10 Amp (AU/NZ) breaker is required. Note: There are 3 wires from the appliance junction box: white (neutral), black (power L1), and green (ground) that are connected to 220-240V power source (circuit breaker panel). -
Page 12: Driftwood Logs And Crushed Glass Installation
Driftwood Logs and Crushed Glass Installation • Front glass must be removed and the appliance must be mounted in its final location before the driftwood logs and crushed glass is installed. • Install driftwood logs first by plugging the connector into the socket as shown below and placing it in the ember bed. -
Page 13: Operation
Operation Read and understand this entire owner’s manual, including all safety information, before plugging in or using this product. Failure to do so could result in electric shock, fire, serious injury, or death. Power Plug the power cord into a dedicated 240 Volt 13 Amp (EU) or 10 Amp (AU/NZ) grounded outlet (see IMPORTANT SAFETY INFORMATION). - Page 14 Methods of Operation This electric fireplace can be operated by the Touch Control Panel located on the upper right corner of the fireplace, by the battery-powered Remote Control, or by the Modern Flames APP using a smart phone or tablet.
-
Page 15: Operation - Touch Control Panel
Operation – Touch Control Panel Touch Panel Operation Button Function Action ON: Enables control panel functions. Turns 1. Press once: Indicator light turns on. Power turns on flame. on. All functions enabled. OFF: Disables control panel functions. 2. Press again: Flame turns off. Unit goes to standby. Turns off flame. -
Page 16: Operation - Remote Control
Operation – Remote Control Remote Control Operation Button Function Action ON: Enables control panel functions. 1. Press once: Indicator light turns on. Power turns on. All Turns on flame. functions enabled. OFF: Disables control panel functions. 2. Press again: Flame turns off. Unit goes to standby. All Turns off flame. - Page 17 Operation – Remote Control (Continued) Button Function Action MEDIA BED BUTTON: Cycles media bed 1. Press once: Turns on ember bed. colors. 2. Press again until desired color is reached. In total NOTE: Media bed color effect stays on ten colors and one fade. mode.01-02-03-04-05-06-07-08-09-10-11 until power button is turned off.
-
Page 18: Download Smart Phone/Tablet App
Download Smart Phone/Tablet App Smart Phone/Tablet App Connection Note: Download the Modern Flames App from your App store before connecting www.modernflames.com... -
Page 19: Wi-Fi - Initial Log-In
Wi-Fi – Initial Log-in • Search for and install the “Modern Flames” app from the Google Play or Apple App store or scan the QR code on the previous page. • After the App is installed, log in to the Modern Flames App. Must have Wi-Fi and Bluetooth enabled on your smart phone. -
Page 20: Wi-Fi - Pairing
Wi-Fi – Pairing Add Manually • Select the series of fireplace that will be paired with and follow the instructions. • When pairing via Wi-Fi, the 2.4 GHz Wi-Fi signal must be used. Ensure the appropriate login information is entered before continuing to the next step. www.modernflames.com... - Page 21 Wi-Fi – Pairing (Continued) • Hold the “Flame” button on the manual touch controls for 5 seconds. In EZ Mode, the fireplace will display “P0” (Recommended). In AP Mode, the fireplace will display “P2” iii. Holding the flame button for an additional 5 seconds will cycle the fireplace between EZ Mode and AP Mode.
- Page 22 Failure to do so can result in damage to electrical components of the fireplace. Damage as a result of this may not be covered under warranty. Questions or assistance in pairing device, contact Modern Flames: Australia/New Zealand: ▪...
-
Page 23: Auto Scan
Wi-Fi – Pairing (Continued) Auto Scan • Select auto scan from the top of the App. • On the fireplace touch controls, press and hold the “Flame” button for 5 seconds. The fireplace will show either “P0” or “P2”. This will place the fireplace in pairing mode. www.modernflames.com... - Page 24 Wi-Fi – Pairing (Continued) • Auto scan will search for available devices. Upon selecting the available fireplace, select the “Next” button if the app does not proceed automatically. If the scan fails to find a fireplace, press and hold the “Flame” button on the manual touch controls to switch pairing modes. •...
- Page 25 Failure to do so can result in damage to electrical components of the fireplace. Damage as a result of this may not be covered under warranty. Questions or assistance in pairing device, contact Modern Flames: Australia/New Zealand: ▪...
-
Page 26: Operation - Smart Phone/Tablet App
Operation – Smart Phone/Tablet App Home Screen Button Function Action Home Button: Returns the fireplace to the 1. Press once: Flame video changes to flame style 1, default color settings. color yellow. Ember bed and down light changes to orange. Flame speed changes to default and sound level changes to low. -
Page 27: Flame Style Options
Operation – Smart Phone/Tablet App (Continued) Home Screen (Continued) Button Function Action Downlight Button: Opens the downlight 1. Press once: Opens the downlight sub-menu page sub-menu. to select new colors for downlighting. Ember Bed Button: Opens the ember bed 1. Press once: Opens the ember bed sub-menu page sub-menu. -
Page 28: Flame Style One/Two/Three Color Menu
Operation – Smart Phone/Tablet App (Continued) • 3.2 menu depicted. Functions and actions are the same for the 3.3 and 3.4 menu. 3.2.1 3.2.2 3.2.3 3.2.4 3.2.5 3.2.6 3.2.7 Flame Style One/Two/Three Color Menu Note: Flame Style One (3.2), Two (3.3), and Three (3.4) all function the same as below Button Function Action... -
Page 29: Custom Mode Menu
Operation – Smart Phone/Tablet App (Continued) 3.5.1 3.5.2 3.5.3 3.5.4 3.5.5 3.5.6 3.5.7 Custom Mode Menu Button Function Action 3.5.1 Return Button: Returns to the previous page. 1. Press once: Returns to the previous page. Flame Slider: Changes the style of flame. 1. -
Page 30: Downlight Menu
Operation – Smart Phone/Tablet App (Continued) Downlight Menu Button Function Action Return Button: Returns to the previous page. 1. Press once: Returns to the previous page. Color Wheel Button: Changes the color of the 1. Press once: Selecting a color, the downlight will downlight to the selected color. -
Page 31: Ember Bed Menu
Operation – Smart Phone/Tablet App (Continued) Ember Bed Menu Button Function Action Return Button: Returns to the previous page. 1. Press once: Returns to the previous page. Color Wheel Button: Changes the color of the 1. Press once: Selecting a color, the ember bed ember bed to the selected color. -
Page 32: Heater Menu
Operation – Smart Phone/Tablet App (Continued) Heater Menu Button Function Action Return Button: Returns to the previous page. 1. Press once: Returns to the previous page. Ambient Temperature: The fireplace ambient 1. Press once: No action. air temperature reading. Temperature Scale Slider: Changes 1. -
Page 33: Timer Menu
Operation – Smart Phone/Tablet App (Continued) Timer Menu Button Function Action Return Button: Returns to the previous page. 1. Press once: Returns to the previous page. Countdown Timer: Displays remaining time 1. Press once: No action. left on the selected timer. Shows OFF when not in use. -
Page 34: Weekly Program Schedule Menu
Operation – Smart Phone/Tablet App (Continued) 9.4.1 9.4.2 9.4.3 9.4.4 Weekly Program Schedule Menu Button Function Action 9.4.1 Return Button: Returns to the previous page. 1. Press once: Returns to the previous page. Programming Days: Displays if a day has a 1. -
Page 35: Daily Program Schedule Menu
Operation – Smart Phone/Tablet App (Continued) 9.4.2.1 9.4.2.2 9.4.2 9.4.2.3 9.4.2.4 Daily Program Schedule Menu Button Function Action Return Button: Returns to the 1. Press once: Returns to the previous page. 9.4.2.1 previous page. Individual Day 1. Highlight desired time frame: Applies desired function to Programming: Shows the highlighted area. -
Page 36: Operation - Important Warnings
Operation – Important Warnings Note: When the heater is first turned on, a slight odor may be present. This is normal and should not occur again unless the heater is not used for a long period of time. To improve operation, aim the remote control at the front of the fireplace. Quickly pressing buttons on the remote without allowing the fireplace to complete the previous operation may result in operational errors. -
Page 37: Care - Cleaning
Care – Cleaning Always turn heater OFF and unplug power cord from the outlet before cleaning, performing maintenance, or moving this fireplace. Failure to do so could result in electric shock, fire, or personal injury. Never immerse in water or spray with water. Doing so could result in electric shock, fire, or personal injury. -
Page 38: Optional, Extra-Wide Trim
Optional, Extra-Wide Surround Some “insert” installations require “Extra-Wide Surround” to cover existing fireplace edges. For this purpose,extra-wide black surround sets are available and sold separately. Each set comes with an extra bottom piece of surround for low-clearance hearth installations. Extra-Wide Surround Model Surround Overall Size... -
Page 39: Replacement Parts List
Replacement Parts List SPARE PARTS, PART REF. OR26-TRAD-INT OR30-TRAD-INT OR36-TRAD-INT OR42-TRAD-INT OR54-TRAD-INT NUMBERS Front Glass 04-00065 04-00066 04-00067 04-00068 04-00069 Mirror Glass 04-00070 04-00071 04-00072 04-00073 04-00074 Virtual Screen 01-00179 01-00100 01-00173 01-00174 LED Ember Bed Strip 01-00169 01-00170 01-00169... -
Page 40: Troubleshooting / Faq
Inspect circuit boards for loose power button/switch is put into connections or obvious damage. Call the ON position. Modern Flames Customer Service for Main PCB board issue. support (07 5630 6837 (AU/NZ) or +46 762 09 58 09 (EU)) Allow 20-30 seconds for the fireplace to Fireplace has not fully turned on. - Page 41 Inspect the LCD and replace if necessary. Inspect circuit boards for loose connections or obvious damage. Call Dim or no flame. Modern Flames Customer Service for Main PCB board issue. support (07 5630 6837 (AU/NZ) or +46 762 09 58 09 (EU)) Brightness is not selected.
- Page 42 NOTES __________________________________________________________________________________________________ __________________________________________________________________________________________________ __________________________________________________________________________________________________ __________________________________________________________________________________________________ __________________________________________________________________________________________________ __________________________________________________________________________________________________ __________________________________________________________________________________________________ __________________________________________________________________________________________________ __________________________________________________________________________________________________ __________________________________________________________________________________________________ __________________________________________________________________________________________________ __________________________________________________________________________________________________ __________________________________________________________________________________________________ __________________________________________________________________________________________________ __________________________________________________________________________________________________ __________________________________________________________________________________________________ __________________________________________________________________________________________________ __________________________________________________________________________________________________ www.modernflames.com...
- Page 43 NOTES __________________________________________________________________________________________________ __________________________________________________________________________________________________ __________________________________________________________________________________________________ __________________________________________________________________________________________________ __________________________________________________________________________________________________ __________________________________________________________________________________________________ __________________________________________________________________________________________________ __________________________________________________________________________________________________ __________________________________________________________________________________________________ __________________________________________________________________________________________________ __________________________________________________________________________________________________ __________________________________________________________________________________________________ __________________________________________________________________________________________________ __________________________________________________________________________________________________ __________________________________________________________________________________________________ __________________________________________________________________________________________________ __________________________________________________________________________________________________ __________________________________________________________________________________________________...
- Page 44 Copyright © 2023 RPG Brands (Modern Flames). All rights reserved. Products and specifications subject to change without notice. The product images shown are for illustration purposes only and may not be an exact representation of the product. 07-00059 072023...
Need help?
Do you have a question about the OR26-TRAD-INT and is the answer not in the manual?
Questions and answers