
Related Manuals for Modern Flames OR30-SLIM-INT


Summary of Contents for Modern Flames OR30-SLIM-INT
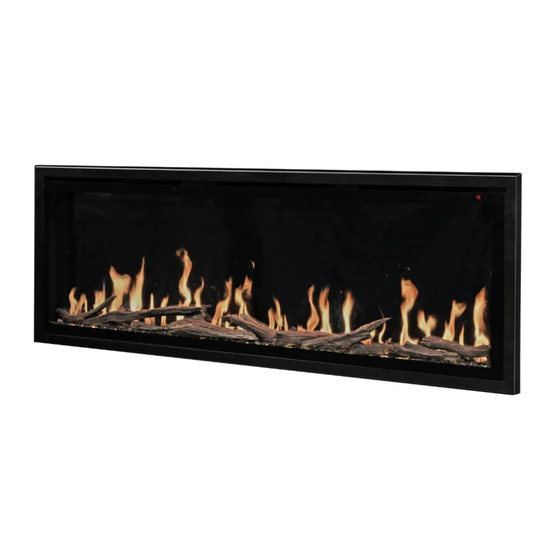
- Page 1 ORION SLIM WALL-MOUNT/RECESSED ELECTRIC FIREPLACE Model #: OR30-SLIM-INT OR52-SLIM-INT OR60-SLIM-INT OR76-SLIM-INT OR100-SLIM-INT OWNER’S MANUAL AC 220-240V, 50Hz 1,500W (OR30-SLIM-INT, AC 220-240V, 50Hz 1,200W)...
- Page 2 Read all instructions before installing or using this heater. Use a dedicated 13 Amp (EU) or a 10 Amp (AU/NZ) breaker. This heater is hot when in use. To avoid burns, DO NOT let bare skin touch hot surfaces. If ...
- Page 3 ALWAYS disconnect this unit from the power supply before performing any assembly, cleaning, or before relocating the electric fireplace. NEVER leave this heater unattended. ALWAYS unplug this heater when not in use. ALWAYS store this heater in a dry location. NEVER use the fireplace if it has become wet. ...
-
Page 4: Table Of Contents
Table of Contents PREPARATION ......................................5 PARTS AND HARDWARE ..................................5 DIMENSIONS AND SPECIFICATIONS ..............................5 PRODUCT DIMENSIONS ..................................6 INSTALLATION AND ASSEMBLY ................................6 FRONT GLASS REMOVAL/INSTALLATION .............................6 WALL RECESSED FRAMING .................................. 7 FINISHED OPENING DIMENSIONS ................................8 WALL RECESSED INSTALLATION ................................8 WALL MOUNTED INSTALLATION ............................... -
Page 5: Preparation
Preparation This product includes a GLASS panel. Always use extreme caution when handling glass. Failure to do so could result in personal injury or property damage. Remove all parts and hardware from the carton and place them on a clean, soft, dry surface. Parts and assembly steps are grouped for wall-hanging or recessing use. -
Page 6: Product Dimensions
PRODUCT DIMENSIONS Model Number 30-13/16" 19-5/8" 6-5/16" 28-3/4" 18-3/4” 5-3/4" 26-3/8" 14-3/8" 5" 1-1/4” 75" OR30-SLIM- (783mm) (499mm) (160mm) (730mm) (476mm) (146mm) (669mm) (364mm) (127mm) (32mm) (1905mm) 52-3/8" 19-5/8" 6-5/16" 50-1/4" 18-3/4” 5-3/4" 47-7/8" 14-3/8" 5" 1-1/4” 75" OR52-SLIM- (1330mm) (499mm) (160mm) (1276mm) -
Page 7: Wall Recessed Framing
With one hand on the front glass to prevent it from falling, remove the two screws (one per side) from the side of the appliance (Fig. 1-1). Set the screws aside. Carefully lift the front glass up and away from the appliance (Fig. 1-2). Place it face down on a soft, non-abrasive surface. -
Page 8: Finished Opening Dimensions
Remove the front glass (see “Front Glass Removal / Installation” section). Hold the appliance up to ensure it will fit into the framing. FINISHED OPENING DIMENSIONS Model Number 29-1/4" 19-1/8" 6" min. OR30-SLIM-INT (743mm) (486mm) (152mm min.) 50-3/4" 19-1/8" 6" min. OR52-SLIM-INT... - Page 9 Insert the appliance into the opening (See “Finished Opening Dimensions”) (Fig.2-2) and then secure it by installing 4 screws (supplied) into the slots on the insides (2 per side) (Fig.2-3). Next reinstall the two interior walls and two screws previously removed. (Fig.2-4). ...
-
Page 10: Wall Mounted Installation
Wall Mounted Installation NOTE: A dedicated 13 Amp (EU) or 10 Amp (AU/NZ) breaker is required. Select a location that is not prone to moisture and is located at least 36" (914mm) away from combustible materials such as curtain drapes, furniture, bedding, paper, etc. Have two people hold the appliance against the wall to determine the final location. -
Page 11: Hardwiring Installation
Hardwiring Installation If it is necessary to hardwire this appliance, a qualified electrician must remove the cord connection and wire the appliance directly to the household wiring. NOTE: A dedicated 13 Amp (EU) or 10 Amp (AU/NZ) breaker is required. Note: There are 3 wires from the appliance junction box: light blue (neutral), brown (power L1), and yellow/green (ground) that are connected to 240V power source (circuit breaker panel). -
Page 12: Driftwood Logs And Crushed Glass Installation
Driftwood Logs and Crushed Glass Installation Front glass must be removed and the appliance must be mounted in its final location before the driftwood logs and crushed glass is installed. Install driftwood logs first, then add the crushed glass around logs. ... -
Page 13: Operation
Operation Read and understand this entire owner’s manual, including all safety information, before plugging in or using this product. Failure to do so could result in electric shock, fire, serious injury, or death. Power Plug the power cord into a dedicated 240 Volt 13 Amp (EU) or 10 Amp (AU/NZ) grounded outlet (see IMPORTANT SAFETY INFORMATION). -
Page 14: Operation (Continued)
Methods of Operation This electric fireplace can be operated by the TOUCH CONTROL PANEL located on the UPPER right corner of the fireplace, by the battery-powered REMOTE CONTROL, or by the MODERN FLAMES APP using a smart phone. Touch Control Panel... -
Page 15: Operation - Touch Control Panel
Operation – Touch Control Panel Touch Panel Operation Button Function Action ON: Enables control panel functions. Turns 1. Press once: Indicator light turns on. Power turns on flame. on. All functions enabled. OFF: Disables control panel functions. 2. Press again: Flame turns off. Unit goes to standby. Turns off flame. -
Page 16: Operation - Remote Control
Operation – Remote Control Remote Control Operation Button Function Action ON: Enables control panel functions. 1. Press once: Indicator light turns on. Power turns on. All Turns on flame. functions enabled. OFF: Disables control panel functions. 2. Press again: Flame turns off. Unit goes to standby. All Turns off flame. - Page 17 Operation – Remote Control (Continued) Button Function Action MEDIA BED BUTTON: Cycles media bed 1. Press once: Turns on ember bed. 2. Press again until desired color is reached. In total colors. NOTE: Media bed color effect stays on ten colors and one fade mode.01-02-03-04-05-06-07- until power button is turned off.
-
Page 18: Download Smart Phone App
Download Smart Phone App Smart Phone App Connection from Note: Download the Modern Flames App your App store before connecting Download Mobile App www.modernflames.com... -
Page 19: Wi-Fi - Initial Log-In
Wi-Fi – Initial Log-in Search for and install the “Modern Flames” app from the Google Play or Apple App store or scan the QR code on the previous page. After the App is installed, log in to the Modern Flames App. Must have Wi-Fi and Bluetooth enabled on your smart phone. -
Page 20: Add Manually
Wi-Fi – Pairing Add Manually Select the series of fireplace that will be paired with and follow the instructions. When pairing via Wi-Fi, the 2.4 GHz Wi-Fi signal must be used. Ensure the appropriate login information is entered before continuing to the next step. www.modernflames.com... - Page 21 Wi-Fi – Pairing (Continued) Ensure the fireplace is ON. Hold the “Flame” button on the manual touch controls for 5 seconds. In EZ Mode, the fireplace will display “P2”. In AP Mode, the fireplace will display “P0” iii. Holding the flame button for an additional 5 seconds will cycle the fireplace between EZ Mode and AP Mode.
- Page 22 Failure to do so can result in damage to electrical components of the fireplace. Damage as a result of this may not be covered under warranty. Questions or assistance in pairing device, contact Modern Flames: Australia/New Zealand: ...
-
Page 23: Auto Scan
Wi-Fi – Pairing (Continued) Auto Scan Select auto scan from the top of the App. On the fireplace touch controls, press and hold the “Flame” button for 5 seconds. The fireplace will show either “P0” or “P2”. This will place the fireplace in pairing mode. www.modernflames.com... - Page 24 Wi-Fi – Pairing (Continued) Auto scan will search for available devices. Upon selecting the available fireplace, select the “Next” button if the app does not proceed automatically. If the scan fails to find a fireplace, press and hold the “Flame” button on the manual touch controls to switch pairing modes. Enter in the Wi-Fi information.
- Page 25 Failure to do so can result in damage to electrical components of the fireplace. Damage as a result of this may not be covered under warranty. Questions or assistance in pairing device, contact Modern Flames: Australia/New Zealand: ...
-
Page 26: Operation - Smart Phone App
Operation – Smart Phone App Home Screen Button Function Action Home Button: Returns the fireplace 1. Press once: Flame video changes to flame style 1, color to the default color settings. yellow. Ember bed and down light changes to orange. Flame speed changes to default and sound level changes to low. -
Page 27: Flame Style Options
Operation – Smart Phone App (Continued) Home Screen (Continued) Button Function Action Downlight Button: Opens the downlight 1. Press once: Opens the downlight sub-menu page sub-menu. to select new colors for downlighting. Ember Bed Button: Opens the ember bed 1. Press once: Opens the ember bed sub-menu page sub-menu. -
Page 28: Flame Style One/Two/Three Color Menu
Operation – Smart Phone App (Continued) 3.2 menu depicted. Functions and actions are the same for the 3.3 and 3.4 menu. 3.2.1 3.2.2 3.2.3 3.2.4 3.2.5 3.2.6 3.2.7 Flame Style One/Two/Three Color Menu Note: Flame Style One (3.2), Two (3.3), and Three (3.4) all function the same as below Button Function Action... -
Page 29: Custom Mode Menu
the designated preset. Operation – Smart Phone App (Continued) 3.5.1 3.5.2 3.5.3 3.5.4 3.5.5 3.5.6 3.5.7 Custom Mode Menu Button Function Action 3.5.1 Return Button: Returns to the previous page. 1. Press once: Returns to the previous page. Flame Slider: Changes the style of flame. 1. -
Page 30: Downlight Menu
Operation – Smart Phone App (Continued) Downlight Menu Button Function Action Return Button: Returns to the previous page. 1. Press once: Returns to the previous page. Color Wheel Button: Changes the color of the 1. Press once: Selecting a color, the downlight will downlight to the selected color. -
Page 31: Ember Bed Menu
Operation – Smart Phone App (Continued) Ember Bed Menu Button Function Action Return Button: Returns to the previous page. 1. Press once: Returns to the previous page. Color Wheel Button: Changes the color of the 1. Press once: Selecting a color, the ember bed ember bed to the selected color. -
Page 32: Heater Menu
accessory is on. Operation – Smart Phone App (Continued) Heater Menu Button Function Action Return Button: Returns to the previous page. 1. Press once: Returns to the previous page. Ambient Temperature: The fireplace ambient 1. Press once: No action. air temperature reading. Temperature Scale Slider: Changes 1. -
Page 33: Timer Menu
blowing to recirculate the air. Heater is off. Operation – Smart Phone App (Continued) Timer Menu Button Function Action Return Button: Returns to the previous page. 1. Press once: Returns to the previous page. Countdown Timer: Displays remaining time 1. Press once: No action. left on the selected time. -
Page 34: Weekly Program Schedule Menu
Operation – Smart Phone App (Continued) 9.4.1 9.4.2 9.4.3 9.4.4 Weekly Program Schedule Menu Button Function Action 9.4.1 Return Button: Returns to the previous page. 1. Press once: Returns to the previous page. Programming Days: Displays if a day has a 1. -
Page 35: Daily Program Schedule Menu
Operation – Smart Phone App (Continued) 9.4.2.1 9.4.2.2 9.4.2 9.4.2.3 9.4.2.4 Daily Program Schedule Menu Button Function Action Return Button: Returns to the 1. Press once: Returns to the previous page. 9.4.2.1 previous page. Individual Day 1. Highlight desired time frame: Applies desired function to Programming: Shows the highlighted area. -
Page 36: Operation - Important Warnings
Operation – Important Warnings Note: When the heater is first turned on, a slight odor may be present. This is normal and should not occur again unless the heater is not used for a long period of time. To improve operation, aim the remote control at the front of the fireplace. Quickly pressing buttons on the remote without allowing the fireplace to complete the previous operation may result in operational errors. -
Page 37: Care - Cleaning
Care – Cleaning Always turn heater OFF and unplug power cord from the outlet before cleaning, performing maintenance, or moving this fireplace. Failure to do so could result in electric shock, fire, or personal injury. Never immerse in water or spray with water. Doing so could result in electric shock, fire, or personal injury. -
Page 38: Replacement Parts List
Replacement Parts List SPARE PARTS, PART REF. OR30-Slim OR52-Slim OR60-Slim OR76-Slim OR100-Slim NUMBERS Virtual Screen 01-00100 Touch-on Control Panel 01-00109 04-00044 04-00038 04-00039 04-00040 04-00041 Mirror Glass, Displays Front Glass 04-00043 04-00034 04-00035 04-00036 04-00037 Top Glass Bracket 02-00540 02-00478 02-00479 02-00480 02-00481... - Page 39 Replacement Parts List (Continued) SPARE PARTS, PART REF. OR30-Slim OR52-Slim OR60-Slim OR76-Slim OR100-Slim NUMBERS Log, Orion, 1 05-00065 Log, Orion, 2 05-00066 Log, Orion, 3 05-00067 Log, Orion, 4 05-00068 Log, Orion, 5 05-00069 Log, Orion, 6 05-00070 05-00071 Log, Orion, 7 Log, Orion, 8 05-00072 Log, Orion, 9...
-
Page 40: Troubleshooting / Faq
Call the ON position. Main PCB board issue. Modern Flames Customer Service for support (07 5630 6837 (AU/NZ) or +46 762 09 58 09 (EU)) Allow 20-30 seconds for the fireplace to Fireplace has not fully turned on. - Page 41 Inspect the LCD and replace if necessary. Inspect circuit boards for loose connections or obvious damage. Call Dim or no flame. Modern Flames Customer Service for Main PCB board issue. support (07 5630 6837 (AU/NZ) or +46 762 09 58 09 (EU)) Brightness is not selected.
- Page 42 DO NOT RETURN TO STORE! CALL US FIRST For immediate help with installation, product information or if your product arrives damaged, please call our toll-free number at: AUSTRALIA/NEW ZEALAND 07 5630 6837 (Monday – Friday, 9:00AM – 4:00PM, AEST) Or email us at: info@modernflames.com EUROPE +46 762 09 58 09...
Need help?
Do you have a question about the OR30-SLIM-INT and is the answer not in the manual?
Questions and answers