
Related Manuals for ZyXEL Communications P2000W


Summary of Contents for ZyXEL Communications P2000W
- Page 1 P-2000W_V2 VoIP Wi-Fi Phone User’s Guide Version WV.00.01 6/2005 VoIPon www.voipon.co.uk sales@voipon.co.uk Tel: +44 (0)1245 808195 Fax: +44 (0)1245 600030...
- Page 2 VoIPon www.voipon.co.uk sales@voipon.co.uk Tel: +44 (0)1245 808195 Fax: +44 (0)1245 600030...
-
Page 3: Copyright
ZyXEL Communications Corporation. Published by ZyXEL Communications Corporation. All rights reserved. -
Page 4: Federal Communications Commission (Fcc) Interference Statement
P-2000W_V2 User’s Guide Federal Communications Commission (FCC) Interference This device complies with Part 15 of FCC rules. Operation is subject to the following two conditions: • This device may not cause harmful interference. • This device must accept any interference received, including interference that may cause undesired operations. - Page 5 P-2000W_V2 User’s Guide Federal Communications Commission (FCC) Interference Statement VoIPon www.voipon.co.uk sales@voipon.co.uk Tel: +44 (0)1245 808195 Fax: +44 (0)1245 600030...
-
Page 6: Safety Warnings
P-2000W_V2 User’s Guide For your safety, be sure to read and follow all warning notices and instructions. • Do NOT open the device or unit. Opening or removing covers can expose you to dangerous high voltage points or other risks. ONLY qualified service personnel can service the device. -
Page 7: Zyxel Limited Warranty
ZyXEL Limited Warranty ZyXEL warrants to the original end user (purchaser) that this product is free from any defects in materials or workmanship for a period of up to two years from the date of purchase. During the warranty period, and upon proof of purchase, should the product have indications of failure due to faulty workmanship and/or materials, ZyXEL will, at its discretion, repair or replace the defective products or components without charge for either parts or labor, and to whatever extent it shall deem necessary to restore the product or components to proper operating... -
Page 8: Customer Support
+34 902 195 420 www.zyxel.es +34 913 005 345 +46 31 744 7700 www.zyxel.se +46 31 744 7701 Tel: +44 (0)1245 808195 REGULAR MAIL ZyXEL Communications Corp. 6 Innovation Road II Science Park Hsinchu 300 Taiwan ZyXEL Communications Czech s.r.o. Modranská 621 143 01 Praha 4 - Modrany Ceská... - Page 9 METHOD SUPPORT E-MAIL SALES E-MAIL LOCATION support@zyxel.co.uk sales@zyxel.co.uk UNITED KINGDOM a. “+” is the (prefix) number you enter to make an international telephone call. Customer Support VoIPon www.voipon.co.uk sales@voipon.co.uk TELEPHONE WEB SITE FTP SITE +44 (0) 8702 909090 www.zyxel.co.uk +44 (0) 1344 303044 ftp.zyxel.co.uk...
- Page 10 P-2000W_V2 User’s Guide Customer Support VoIPon www.voipon.co.uk sales@voipon.co.uk Tel: +44 (0)1245 808195 Fax: +44 (0)1245 600030...
-
Page 11: Table Of Contents
Copyright ... 3 Federal Communications Commission (FCC) Interference Statement ... 4 Safety Warnings ... 6 ZyXEL Limited Warranty... 7 Customer Support... 8 Table of Contents ... 11 List of Figures ... 17 List of Tables ... 19 Preface ... 21 Chapter 1 Getting To Know Your Prestige... - Page 12 P-2000W_V2 User’s Guide 3.7 Authentication Type ...37 3.8 Profiles ...38 Chapter 4 Network Settings... 41 4.1 Fixed IP ...41 4.2 DHCP ...42 4.3 PPPoE ...43 Chapter 5 SIP Settings ... 45 5.1 Registrar Server ...45 5.2 Outbound Proxy Server ...46 5.3 Proxy Server ...47 5.4 User Account ...48 Chapter 6...
- Page 13 Chapter 10 Prestige Usage ... 67 10.1 Dialing a Telephone Number ...67 10.2 Using the Phonebook to Dial a Telephone Number ...67 10.3 Using Speed Dial to Dial a Telephone Number ...67 10.4 Redialing a Telephone Number ...67 10.5 Answering a Call ...68 10.6 Rejecting a Call ...68...
- Page 14 P-2000W_V2 User’s Guide 12.11.2.3 Port Restricted Cone NAT ...87 12.11.2.4 Symmetric NAT ...87 12.12 NAT and SIP ...88 12.12.1 SIP ALG ...88 12.12.2 Fake WAN Address on SIP and RTP ...88 12.12.3 STUN ...89 12.12.4 Outbound Proxy ...89 12.13 NAT Traversal Configuration ...89 12.14 Phonebook ...91 12.14.1 Calling Methods ...91 12.15 Phonebook Configuration ...91...
- Page 15 IP Subnetting ... 111 IP Addressing... 111 IP Classes ... 111 Subnet Masks ... 112 Subnetting ... 112 Example: Two Subnets ... 113 Example: Four Subnets... 115 Example Eight Subnets ... 116 Subnetting With Class A and Class B Networks..117 Appendix C PPPoE ...
- Page 16 P-2000W_V2 User’s Guide Table of Contents VoIPon www.voipon.co.uk sales@voipon.co.uk Tel: +44 (0)1245 808195 Fax: +44 (0)1245 600030...
-
Page 17: List Of Figures
P-2000W_V2 User’s Guide List of Figures Figure 1 SIP Proxy Server Application ... 25 Figure 2 IP to IP Calling ... 25 Figure 3 Ad-Hoc Mode ... 26 Figure 4 Prestige Hardware ... 26 Figure 5 LCD Main Screen ... 29 Figure 6 LCD Screen Menu Navigation ... - Page 18 P-2000W_V2 User’s Guide Figure 39 Prestige as a PPPoE Client ... 120 Figure 40 Peer-to-Peer Communication in an Ad-hoc Network ... 121 Figure 41 Basic Service Set ... 122 Figure 42 Infrastructure WLAN ... 123 Figure 43 Roaming Example ... 124 VoIPon www.voipon.co.uk sales@voipon.co.uk...
-
Page 19: List Of Tables
P-2000W_V2 User’s Guide List of Tables Table 1 Prestige Hardware Descriptions ... 26 Table 2 LCD Main Screen ... 29 Table 3 Web Configurator User Screens Summary ... 71 Table 4 Web Configurator Administrator Screens Summary ... 71 Table 5 Device Information ... 73 Table 6 Private IP Address Ranges ... - Page 20 P-2000W_V2 User’s Guide Table 39 Subnet 3 ... 115 Table 40 Subnet 4 ... 116 Table 41 Eight Subnets ... 116 Table 42 Class C Subnet Planning ... 116 Table 43 Class B Subnet Planning ... 117 VoIPon www.voipon.co.uk sales@voipon.co.uk Tel: +44 (0)1245 808195 Fax: +44 (0)1245 600030 List of Tables...
-
Page 21: About Your Prestige
Help us help you. E-mail all User Guide-related comments, questions or suggestions for improvement to techwriters@zyxel.com.tw or send regular mail to The Technical Writing Team, ZyXEL Communications Corp., 6 Innovation Road II, Science-Based Industrial Park, Hsinchu, 300, Taiwan. Thank you. -
Page 22: Graphics Icons Key
P-2000W_V2 User’s Guide Graphics Icons Key Prestige Server Telephone VoIPon www.voipon.co.uk sales@voipon.co.uk Computer Notebook Computer Switch Router Trunking Gateway Wireless Signal Tel: +44 (0)1245 808195 Fax: +44 (0)1245 600030 Preface... -
Page 23: Getting To Know Your Prestige
Getting To Know Your Prestige This chapter describes the key features and applications of your The Prestige 2000W_V2 is a wireless telephone that operates over the Internet. It gives you the benefits of Internet telephony, for example cheaper calls, without the physical restrictions of a fixed Internet connection (it provides mobility). -
Page 24: Voice Activity Detection/Silence Suppression
1.2.1 Place a Call via “SIP Proxy Server” (SIP Call Server) When you have a (IEEE 802.11b) wireless connection to the Internet, you can use the Prestige to make and receive VoIP telephone calls through an Internet Telephony Service Provider’s (ITSP) call server. -
Page 25: Direct Ip To Ip Calling
Your Prestige can call any landline or mobile telephone that a traditional PSTN telephone can connect to as well the IP telephone network. Calls received from IP telephones works exactly as you would expect from the traditional telephone service. -
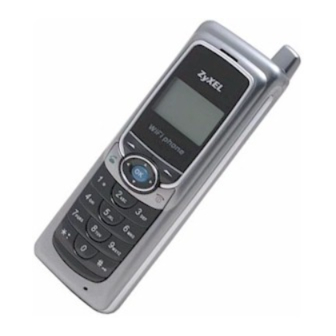
Page 26: Getting To Know The Prestige Hardware
P-2000W_V2 User’s Guide Figure 3 Ad-Hoc Mode 1.3 Getting to Know the Prestige Hardware Figure 4 Prestige Hardware Table 1 Prestige Hardware Descriptions NAME DESCRIPTION 1 LCD Screen Use this screen to display information and navigate the phone’s menus. 2 Left Key Use the Left key to open the on-screen menus and select options. - Page 27 Table 1 Prestige Hardware Descriptions (continued) NAME DESCRIPTION 10 Volume Keys Use these keys to increase or decrease the ear piece volume. 11 Power Jack Connect the phone’s power adapter here to charge the battery. Chapter 1 Getting To Know Your Prestige VoIPon www.voipon.co.uk sales@voipon.co.uk...
- Page 28 P-2000W_V2 User’s Guide Chapter 1 Getting To Know Your Prestige VoIPon www.voipon.co.uk sales@voipon.co.uk Tel: +44 (0)1245 808195 Fax: +44 (0)1245 600030...
-
Page 29: Using The Lcd Screen Menus
Using the LCD Screen Menus This section introduces the Prestige’s LCD screen menu system. Note: See the web configurator section of this guide for background information on the Prestige’s features. 2.1 LCD Main Screen Press the Power/End key for two seconds to turn on the Prestige. The Prestige searches for the available wireless network with the best signal. -
Page 30: Navigating The Lcd Screen Menus
P-2000W_V2 User’s Guide Table 2 LCD Main Screen LABEL DESCRIPTION Menu This is the function of the Left key. Press the Left key from the main screen to open the menus. Names This is the function of the Right key. Press the Right key from the main screen to open the phonebook. - Page 31 • Use the keypad to enter the text. You may need multiple keypad presses to enter letters. For example, to enter a lowercase “b”, press the down arrow key to select lowercase mode (a), then press the “2” key twice. Use the left arrow key to remove typos. •...
- Page 32 P-2000W_V2 User’s Guide Chapter 2 Using the LCD Screen Menus VoIPon www.voipon.co.uk sales@voipon.co.uk Tel: +44 (0)1245 808195 Fax: +44 (0)1245 600030...
-
Page 33: Wireless Lan Setup Menus
Wireless LAN Setup Menus First you need to associate your Prestige with a Wireless LAN Access Point (AP). This provides your Prestige with the basic services for communication. When you turn the Prestige on, it searches for available wireless LAN Access Points (APs). It selects the AP with the best signal and restarts and attempts to connect to it. -
Page 34: Ssid
P-2000W_V2 User’s Guide 3.2 SSID (Service Set ID) The SSID identifies the Service Set with which a wireless station is associated. Wireless stations associating to the access point (AP) must have the same SSID. You can think of the SSID as being similar to a workgroup name in a Microsoft network. Do the following to set the SSID that the Prestige is to use. -
Page 35: Channel
2 Select Network Mode. 3 Select Infra. to access an AP. Select Ad Hoc to form an independent network with another wireless client (like another Prestige for example) without the need of an AP. 3.4 Channel A radio frequency used by a wireless device is called a channel. The Prestige determines which channel to use when you do the site survey and select the AP. -
Page 36: Rate
P-2000W_V2 User’s Guide 3.5 Rate Do the following to set the transfer rate of the Prestige’s wireless connection to the AP. 1 Select Wireless in the first menu screen (use the up or down arrow to highlight it and then press the Left key). 2 Select Rate. -
Page 37: Authentication Type
4 Select a WEP key to configure. 5 Select a keypad mode and use the keypad to enter the WEP key that the AP is using. Use the Power/End key to clear the default text and remove typos. Press the OK key when you are done. 6 You can configure up to four WEP keys (in the same manner as the first) but only one key can be selected (enabled) at any one time. -
Page 38: Profiles
P-2000W_V2 User’s Guide Note: Only set the authentication type to shared key if the wireless clients are required to send the WEP key to the AP for authentication (not just for encryption). Many networks use an open system where you would only use WEP for encryption, not for authentication. - Page 39 3 Select Create to make a new profile. Select Activate to use an existing profile. Select Remove to delete a profile. 4 When creating a profile, select a number for the profile and press the Left key. The profile uses the name of the AP that you are using.
- Page 40 P-2000W_V2 User’s Guide Chapter 3 Wireless LAN Setup Menus VoIPon www.voipon.co.uk sales@voipon.co.uk Tel: +44 (0)1245 808195 Fax: +44 (0)1245 600030...
-
Page 41: Chapter 4 Network Settings
Use this chapter to configure your Prestige to access the Internet. The Prestige restarts when you return to the main screen after changing the network settings. If you were given a user name and password for Internet access, go to If you were given an IP address and subnet mask, go to If you were not given an IP address and subnet mask, go to 4.1 Fixed IP... -
Page 42: Dhcp
P-2000W_V2 User’s Guide 5 Use the left arrow button to clear the IP address. Use the up and down arrows to select the type of characters. Enter your IP address. Use the Left key to select Ok when you are done. 6 Select Subnet Mask. -
Page 43: Pppoe
2 Select Network Mode. 3 Select DHCP. 4.3 PPPoE Point-to-Point Protocol over Ethernet (PPPoE) functions like a dial-up connection. You need a user name (PPPoE name) and password from your ISP. 1 Select Net Settings in the first menu screen (use the up or down arrow to highlight it and then press the Left key). - Page 44 P-2000W_V2 User’s Guide 6 Select PPPoE Pwd. 7 Clear the PPPoE password and enter your’s. VoIPon www.voipon.co.uk sales@voipon.co.uk 3. PPPoE Pwd 1. Network Mode 2. PPPoE Name Select PPPoE Pwd ************************* Chapter 4 Network Settings Tel: +44 (0)1245 808195 Fax: +44 (0)1245 600030 Back Aa1@ Clear...
-
Page 45: Chapter 5 Sip Settings
The Prestige uses Session Initiated Protocol (SIP), an internationally recognized standard for implementing VoIP. You must register your Prestige with your VoIP service provider’s SIP server. Note: You should have a voice account already set up. 5.1 Registrar Server Configure the Registrar settings to have the Prestige register with your provider’s SIP registrar server. -
Page 46: Outbound Proxy Server
P-2000W_V2 User’s Guide 5 Select Port. 6 Clear the port and enter the registrar server’s listening port number. Leave the default port number if you were not given one to use. 7 Select Expiry Time if you were given a specific expiration time period to use. -
Page 47: Proxy Server
4 Use the left arrow button to clear the default text. Use the up and down arrows to select the type of characters. Enter the outbound proxy server’s IP address or domain name. Use the Left key to select Ok when you are done. 5 Select Port. -
Page 48: User Account
Configure the Prestige to use your User Account for registering with the SIP server. When you registered for your voice account, you should have been given a telephone number, user name and password for connecting to the SIP proxy server. Do the following to set up your Prestige to use your telephone number, user name and password when connecting to the SIP server. - Page 49 5 Select Username. 6 Clear the user name and enter yours exactly as it was given to you. 7 Select User Pwd. 8 Clear the password and enter yours exactly as it was given to you. 9 The Prestige restarts when you return to the main screen. Chapter 5 SIP Settings VoIPon www.voipon.co.uk...
- Page 50 P-2000W_V2 User’s Guide VoIPon www.voipon.co.uk sales@voipon.co.uk Chapter 5 SIP Settings Tel: +44 (0)1245 808195 Fax: +44 (0)1245 600030...
-
Page 51: Chapter 6 Phonebook
The following sections describe how to create and erase phonebook entries. 6.1 Calling Methods There are two ways the Prestige can dial a telephone number; either by using the SIP proxy server or an IP address. • Select Proxy to have the SIP server make the connection. -
Page 52: Editing Phonebook Entries
Use the Left key to select Ok when you are done. 4 Enter the telephone number. 5 Enter the SIP server’s or the callee’s IP address or domain name. Leave this blank if you will use the SIP proxy server to call this number. -
Page 53: Erasing Phonebook Entries
3 Select an entry. Note: An empty mailbox icon displays if there are no entries in the phonebook. 4 Select Edit. Then edit the entry in the same manner that you add one (see Section 6.2 on page 6.4 Erasing Phonebook Entries Use the following instructions to remove an existing entry from your phonebook. -
Page 54: Speed Dial Phonebook Entries
P-2000W_V2 User’s Guide 6.5 Speed Dial Phonebook Entries Use the following instructions to make an existing phonebook entry into a speed dial entry. 1 Select Phonebook in the first menu. 2 Select Search. 3 Select an entry. Note: An empty mailbox icon displays if there are no entries in the phonebook. -
Page 55: Chapter 7 Call History
The call history feature is useful for checking missed, received, and dialed calls. 7.1 Missed Calls Follow these directions to use the missed calls list to check for missed calls and then edit and save (or erase) the telephone numbers. 1 Select Call History in the first menu. 2 Select Missed. -
Page 56: Received Calls
P-2000W_V2 User’s Guide 7.2 Received Calls Follow these directions to use the received calls list to check for received calls and then edit or erase the telephone numbers. 1 Select Call History in the first menu. 2 Select Missed. 3 Select an entry. -
Page 57: Dialed Calls
7.3 Dialed Calls Follow these directions to use the list of telephone numbers the Prestige has been used to call to check the list of telephone numbers that have been called and then edit or erase the telephone numbers. 1 Select Call History in the first menu. - Page 58 P-2000W_V2 User’s Guide 1 Select Call History in the first menu. 2 Select Erase Calls. 3 Select Erase All to remove all entries from the call history. Select Missed to remove the missed call entries. Select Received to remove the received call entries. Select Dialed to remove the dialed call entries.
-
Page 59: Chapter 8 Miscellaneous Settings
Miscellaneous Settings These sections detail how to change the Prestige’s other settings. 8.1 Setting the Ring Melody Follow these directions to change the Prestige’s ring melody. 1 Select Settings in the first menu screen. 2 Select Melody. 3 Select a melody. 4 Press the Left key to save your setting. -
Page 60: Setting The Vibration Mode
P-2000W_V2 User’s Guide 8.2 Setting the Vibration Mode You can have the Prestige vibrate to alert you to incoming calls. Follow these directions to turn the Prestige’s vibration mode on or off. 1 Select Settings in the first menu screen. 2 Select Vibrator. -
Page 61: Setting The Time
8.4 Setting the Time Follow these directions to change the Prestige’s time settings. 1 Select Settings in the first menu screen. 2 Select Edit Time. 3 Use the left arrow to move the cursor in front of the number you want to edit and use the keypad to change the number. -
Page 62: Setting The Banner
P-2000W_V2 User’s Guide 8.6 Setting the Banner Follow these directions to change the text that displays in the Prestige’s main screen. 1 Select Settings in the first menu screen. 2 Select Banner. 3 Enter the text that you want to display in the main screen. 4 Press the Left key to save your setting. -
Page 63: Setting The Don't Disturb
8.8 Setting the Don’t Disturb Enable the Prestige’s don’t disturb function, to not receive any incoming calls. Anyone calling the Prestige gets a busy signal when you enable the don’t disturb function. Follow these directions to enable or disable the don’t disturb function. 1 Select Settings in the first menu screen. - Page 64 P-2000W_V2 User’s Guide Chapter 8 Miscellaneous Settings VoIPon www.voipon.co.uk sales@voipon.co.uk Tel: +44 (0)1245 808195 Fax: +44 (0)1245 600030...
-
Page 65: Chapter 9 Information Menus
These sections detail how to use the information menus. 9.1 Displaying Information Follow these directions to display important Prestige information. 1 Select Information in the first menu screen. 2 Select Phone Number. 3 The screen displays the Prestige’s current SIP phone number. 4 Press the Right key to return to the main information menu. - Page 66 P-2000W_V2 User’s Guide 9 The screen displays the Prestige’s MAC address. 10 Press the Right key to return to the main information menu. 11 Select Firmware Ver. 12 The screen displays the Prestige’s current firmware version. VoIPon www.voipon.co.uk sales@voipon.co.uk MAC Address 00a0c5b76249 4.
-
Page 67: Chapter 10 Prestige Usage
Use the following instructions to call a number that is not already in your Prestige’s phonebook. 1 When the Prestige is in standby mode, use the numerical keys to enter the telephone number. 2 If you enter an incorrect number, press the Right key to backspace. -
Page 68: Answering A Call
P-2000W_V2 User’s Guide 10.5 Answering a Call Press the Call key to answer a call. 10.6 Rejecting a Call Press the Off key to reject a call. 10.7 Changing the Volume Press the volume buttons to increase or decrease the volume during a call. Use the web configurator’s administrator account if you want to change the Prestige’s default volume. -
Page 69: Using The Web Configurator Screens
Using the Web Configurator This chapter describes how to use the Prestige’s web configurator to view and configure the Prestige’s settings. 11.1 Introduction to the Web Configurator The embedded web configurator allows you to configure or view the Prestige’s settings through Microsoft Internet Explorer. -
Page 70: Navigating The Prestige Web Configurator
P-2000W_V2 User’s Guide • For user access: Type the default user name: admin and password: 1234 for user-level access, the first time you login. • For administrator access: Type the default user name: zyxeladmin and password: 1234 for administrator access, the first time you login. Figure 9 Login Screen Note: It is strongly advised that you change the passwords for both the user and administrator accounts the first time you login. -
Page 71: Figure 11 Web Configurator First Administrator Screen
Use this screen to configure your Prestige’s Session Initiation Protocol settings. Use this screen to configure your Prestige’s NAT traversal settings. Use this screen to store and later retrieve names and corresponding telephone numbers. Use this screen to configure the wireless LAN settings. - Page 72 P-2000W_V2 User’s Guide Chapter 11 Using the Web Configurator Screens VoIPon www.voipon.co.uk sales@voipon.co.uk Tel: +44 (0)1245 808195 Fax: +44 (0)1245 600030...
-
Page 73: User Web Configurator Screens
User Web Configurator Screens This chapter details the settings that you can configure in the web configurator using the user account. 12.1 Device Information Use this screen to view read-only information about your Prestige. Figure 12 Device Information Table 5 Device Information LABEL DESCRIPTION Software Version... -
Page 74: Ip Address And Subnet Mask
P-2000W_V2 User’s Guide You can obtain your IP address from the IANA, from an ISP or have it assigned by a private network. If you belong to a small organization and your Internet access is through an ISP, the ISP can provide you with the Internet addresses for your local networks. On the other hand, if you are part of a much larger organization, you should consult your network administrator for the appropriate IP addresses. -
Page 75: Dns Server
12.5 DNS Server Use DNS (Domain Name System) to map a domain name to its corresponding IP address and vice versa, for instance, the IP address of www.zyxel.com is 204.217.0.2. The DNS server is extremely important because without it, you must know the IP address of a computer before you can access it. -
Page 76: Network Configuration: Dhcp
P-2000W_V2 User’s Guide Table 7 STATIC LABEL DESCRIPTION Get IP Address Click STATIC to manually enter a fixed IP address. Network Mode Click DHCP to have the Prestige automatically obtain network settings at startup from a Dynamic Host Configuration Protocol server. These settings are not configurable. -
Page 77: Figure 14 Dhcp Network Configuration
Figure 14 DHCP Network Configuration Table 8 DHCP LABEL DESCRIPTION Get IP Address Click STATIC to manually enter a fixed IP address. Network Mode Click DHCP to have the Prestige automatically obtain network settings at startup from a Dynamic Host Configuration Protocol server. These settings are not configurable. -
Page 78: Network Configuration: Pppoe
P-2000W_V2 User’s Guide 12.8 Network Configuration: PPPoE Point-to-Point Protocol over Ethernet (PPPoE) functions as a dial-up connection. PPPoE is an IETF (Internet Engineering Task Force) draft standard specifying how a host personal computer interacts with a broadband modem (for example DSL, cable, wireless, etc.) to achieve access to high-speed data networks. -
Page 79: Voip Introduction
(ITSP) companies provide VoIP service. A company could alternatively set up an IP-PBX and provide it’s own VoIP service. Circuit-switched telephone networks require 64 kilobits per second (kbps) in each direction to handle a telephone call. VoIP can use advanced voice coding techniques with compression to reduce the required bandwidth. 12.9.1 SIP... -
Page 80: Sip Service Domain
SIP server. 12.9.1.3.1 SIP User Agent A SIP user agent can make and receive VoIP telephone calls. This means that SIP can be used for peer-to-peer communications even though it is a client-server protocol. In the following figure, either A or B can act as a SIP user agent client to initiate a call. A and B can also both act as a SIP user agent to receive the call. -
Page 81: Figure 16 Sip User Agent
Figure 16 SIP User Agent 12.9.1.3.2 SIP Proxy Server A SIP proxy server receives requests from clients and forwards them to another server. In the following example, you want to use client device A to call someone who is using client device C. -
Page 82: Figure 18 Sip Redirect Server
P-2000W_V2 User’s Guide Figure 18 SIP Redirect Server 12.9.1.3.4 SIP Register Server A SIP register server maintains a database of SIP identity-to-IP address (or domain name) mapping. The register server checks your user name and password when you register. 12.9.1.4 RTP When you make a VoIP call using SIP, the RTP (Real time Transport Protocol) is used to handle voice data transfer. -
Page 83: Nat
This field displays the name used to interoperate with other SIP devices and identify your Prestige on a network. This field displays your telephone number as your VoIP provider gave you. This field displays either Registered or Not Registered depending on the success of your Prestige’s connection to the SIP-Server. -
Page 84: Nat Example
P-2000W_V2 User’s Guide 12.11.1 NAT Example See the following figure. The Prestige (X) sends packets to the Internet. The Prestige’s IP address is 10.0.0.3 (a private IP address). The NAT router maps the private source IP address to a public source IP address (a.b.c.d). Note: The NAT figures in this chapter use lower-case letters (like a.b.c.d for example) to represent public IP addresses. -
Page 85: Full Cone Nat
The following table summarizes how these NAT types handle outgoing and incoming packets. Read the following sections for more details and examples. Table 12 NAT Types FULL CONE Incoming Any external host Packets can send packets to the mapped external IP address and port. -
Page 86: Restricted Cone Nat
P-2000W_V2 User’s Guide Figure 22 Full Cone NAT Example 12.11.2.2 Restricted Cone NAT As in full cone NAT, a restricted cone NAT router maps all outgoing packets from an internal IP address and port to a single IP address and port on the external network. In the following example, the NAT router maps the source address of all packets sent from internal IP address 1 and port A to IP address 2 and port B on the external network. -
Page 87: Port Restricted Cone Nat
12.11.2.3 Port Restricted Cone NAT As in full cone NAT, a port restricted cone NAT router maps all outgoing packets from an internal IP address and port to a single IP address and port on the external network. In the following example, the NAT router maps the source address of all packets sent from internal IP address 1 and port A to IP address 2 and port B on the external network. -
Page 88: Nat And Sip
P-2000W_V2 User’s Guide Figure 25 Symmetric NAT 12.12 NAT and SIP Some NAT routers are not SIP-friendly and will stop your voice sessions. The Prestige must register its public IP address with a SIP register server. If there is a NAT router between the Prestige and the SIP register server, the Prestige probably has a private IP address. -
Page 89: Stun
12.12.3 STUN STUN (Simple Traversal of User Datagram Protocol (UDP) through Network Address Translators) allows the Prestige to find the presence and types of NAT routers and/or firewalls between it and the public Internet. STUN also allows the Prestige to find the public IP address that NAT assigned, so the Prestige can embed it in the SIP data stream. -
Page 90: Figure 27 Nat Traversal Configuration
P-2000W_V2 User’s Guide Figure 27 NAT Traversal Configuration Table 13 NAT Traversal Configuration LABEL DESCRIPTION Select Type Select None if the Prestige is not behind a NAT router or the NAT router is a SIP ALG. Select By Outbound Proxy if your VoIP service provider has a SIP outbound server to handle voice calls. -
Page 91: Phonebook
12.14.1 Calling Methods The Prestige can dial a telephone number by using the SIP proxy server or an IP address. • Select Proxy to have the SIP server make the connection. • Select P2P to an IP address to place a call without first going through the SIP proxy server. -
Page 92: Figure 28 Phonebook
This field displays the name associated with a telephone number. Phone No. This field displays the telephone number of a contact in your telephone book. Service This displays Proxy for an entry that uses your SIP account. P2P displays for an entry that uses a different SIP server or goes directly to the callee’s VoIP phone... -
Page 93: Wireless Introduction
12.16 Wireless Introduction A wireless LAN can be as simple as two wireless devices communicating in a peer-to-peer network or as complex as a number of wireless devices communicating through access points which bridge network traffic to the wired LAN. Note: See the WLAN appendix for more detailed information on WLANs. -
Page 94: Figure 29 Wireless Setting
P-2000W_V2 User’s Guide Figure 29 Wireless Setting Table 15 Wireless Setting LABEL DESCRIPTION Wireless Mode An 802.11b_AdHoc network is the simplest WLAN configuration, defined as two or more wireless devices within range of each other that form an independent network without the need of an access point (AP). -
Page 95: System
Table 15 Wireless Setting (continued) LABEL DESCRIPTION Default Key Choose from the available WEP keys. Leave Key 1 as the default key unless your network administrator tells you to do otherwise. APPLY Click APPLY to save your changes without restarting the Prestige. Your wireless LAN, Internet and SIP settings changes do not take affect until you use RESTART (in the navigation panel). -
Page 96: Figure 31 S/W Update
P-2000W_V2 User’s Guide Figure 31 S/W Update Table 17 S/W Update LABEL Auto-provisioning by HTTP Update Firmware Update Firmware by Web Browser Update Firmware by Web Server Browse Update VoIPon www.voipon.co.uk sales@voipon.co.uk DESCRIPTION If there is an HTTP server set up to update the Prestige’s configuration through auto-provisioning, type its IP address or domain name in this field. -
Page 97: Administrator Web Configurator Screens
Administrator Web Configurator This chapter details the Prestige’s web configurator settings that can only be configured using the administrator account. Only edit these settings if you understand the technology involved. Note: See Chapter 12 on page 73 through the user account. 13.1 NAT Traversal Configuration Click NAT TRVSL to open the following screen. -
Page 98: Sip Proxy Configuration
P-2000W_V2 User’s Guide Figure 32 NAT Traversal Configuration Table 18 NAT Traversal Configuration LABEL DESCRIPTION Outbound Proxy Outbound Proxy Type in the URL or IP address of your main outbound proxy server. This field is the Server Address destination address where your Prestige’s SIP traffic is sent. Outbound Proxy Type in the port number to access proxy services. -
Page 99: Figure 33 Sip Configuration
LABEL DESCRIPTION SIP Proxy SIP URI Type the SIP telephone number assigned to your Prestige by your VoIP service provider. SIP Server Address Type the IP address or domain name of the SIP server in this field. It doesn’t matter whether the SIP server is a proxy, redirect or register server. You can use up to 95 ASCII characters. -
Page 100: Voice Coding
P-2000W_V2 User’s Guide Table 19 SIP Configuration (continued) LABEL DESCRIPTION Registrar Server Enter the SIP register server’s IP address or domain name in this field. You can Address use up to 95 ASCII characters. Note: If you were not given a register server address, then enter Registrar Server Port Enter the SIP register server’s listening port for SIP in this field. -
Page 101: 101
G.729 provides good sound quality and reduces the required bandwidth to 8kbps. 13.4 PSTN Call Setup Signaling PSTNs (Public Switched Telephone Network)s use DTMF or pulse dialing to set up telephone calls. (Dual-Tone MultiFrequency (DTMF) signaling uses pairs of frequencies (one lower frequency and one higher frequency) to set up calls. -
Page 102: Table 20 Phone
DTMF Relay Dual Tone Multi-Frequency signals are generated when you press a key on the Keypad and communicate information (such as telephone numbers) to the VoIP gateway. Select disable to send the DTMF digits uncompressed from the remaining protocols to use a compression method to match that of your VoIP service provider’s. -
Page 103: System
13.6 System Administrator access allows you to use this screen to set up the Prestige’s administrator user name and password. Figure 35 System Settings Table 21 System LABEL Admin Login username Admin New Password Admin Confirm Password APPLY CANCEL 13.7 Quality of Service Quality of Service refers to both a network's ability to deliver data with minimum delay, and the networking methods used to provide bandwidth for real-time multimedia applications. -
Page 104: Tos
P-2000W_V2 User’s Guide 13.8 ToS The second byte in an IPv4 packet is the Type of Service (ToS) byte. The first three bits (by themselves) of the ToS byte are referred to as the IP Precedence bits and refer to a priority from 0 to 7. -
Page 105: Chapter 14 Troubleshooting
This chapter covers potential problems and the corresponding remedies. 14.1 Problems Starting Up the Prestige Table 23 Troubleshooting the Start-Up of Your Prestige PROBLEM CORRECTIVE ACTION The Prestige Make sure you have the battery installed and charged. does not turn on. Remove the Prestige’s battery and reinstall it. -
Page 106: Problems Accessing The Prestige
P-2000W_V2 User’s Guide 14.3 Problems Accessing the Prestige Table 25 Troubleshooting Accessing the Prestige PROBLEM CORRECTIVE ACTION Cannot access the Make sure that you are connecting to the Prestige’s IP address (you can use web configurator. the Information LCD menu to check the IP address). The username and password fields are case sensitive. -
Page 107: Error Message Troubleshooting
14.5 Error Message Troubleshooting The Prestige displays error messages to let you know that an error has occurred. An error may prevent you from connecting to the network or from using the Prestige. For some of the error messages, you may need to contact the system administrator to resolve the problem. Table 27 Error Message Troubleshooting Error Message CORRECTIVE ACTION... - Page 108 P-2000W_V2 User’s Guide Chapter 14 Troubleshooting VoIPon www.voipon.co.uk sales@voipon.co.uk Tel: +44 (0)1245 808195 Fax: +44 (0)1245 600030...
-
Page 109: Appendix A Product Specifications
See also the Introduction chapter for a general overview of the key features. Specification Tables Table 28 Hardware Specifications Default Network Mode Default User Account User name and Password Default Administrator Account Password Dimensions LCD Module LCD Backlight Keypad Keypad Light Antenna Receiver &... -
Page 110: Table 29 Firmware Features
P-2000W_V2 User’s Guide Table 29 Firmware Features Network Management Wireless Voice Features Other Features VoIPon www.voipon.co.uk sales@voipon.co.uk IP address assignment: Fixed IP, DHCP, PPPoE HTTP, TFTP, TCP, UDP, DNS, ARP, ICMP LCD screen menus Embedded Web Configurator Auto-provisioning: The Prestige acts as a HTTP client to receive configuration file from HTTP server automatically when booting up ESSID Channel ID configurable... -
Page 111: Ip Subnetting
IP Addressing Routers “route” based on the network number. The router that delivers the data packet to the correct destination host uses the host ID. IP Classes An IP address is made up of four octets (eight bits), written in dotted decimal notation, for example, 192.168.1.1. -
Page 112: Subnet Masks
P-2000W_V2 User’s Guide Since the first octet of a class “A” IP address must contain a “0”, the first octet of a class “A” address can have a value of 0 to 127. Similarly the first octet of a class “B” must begin with “10”, therefore the first octet of a class “B”... -
Page 113: Example: Two Subnets
Since the mask is always a continuous number of ones beginning from the left, followed by a continuous number of zeros for the remainder of the 32 bit mask, you can simply specify the number of ones instead of writing the value of each octet. This is usually specified by writing a “/”... -
Page 114: Table 35 Subnet 1
P-2000W_V2 User’s Guide Note: In the following charts, shaded/bolded last octet bit values indicate host ID bits “borrowed” to form network ID bits. The number of “borrowed” host ID bits determines the number of subnets you can have. The remaining number of host ID bits (after “borrowing”) determines the number of hosts you can have on each subnet. -
Page 115: Example: Four Subnets
Example: Four Subnets The above example illustrated using a 25-bit subnet mask to divide a class “C” address space into two subnets. Similarly to divide a class “C” address into four subnets, you need to “borrow” two host ID bits to give four possible combinations of 00, 01, 10 and 11. The subnet mask is 26 bits (11111111.11111111.11111111.11000000) or 255.255.255.192. -
Page 116: Example Eight Subnets
P-2000W_V2 User’s Guide Table 40 Subnet 4 IP Address IP Address (Binary) Subnet Mask (Binary) Subnet Address: 192.168.1.192 Broadcast Address: 192.168.1.255 Example Eight Subnets Similarly use a 27-bit mask to create 8 subnets (001, 010, 011, 100, 101, 110). The following table shows class C IP address last octet values for each subnet. Table 41 Eight Subnets SUBNET SUBNET ADDRESS FIRST ADDRESS... -
Page 117: Subnetting With Class A And Class B Networks
Subnetting With Class A and Class B Networks. For class “A” and class “B” addresses the subnet mask also determines which bits are part of the network number and which are part of the host ID. A class “B” address has two host ID octets available for subnetting and a class “A” address has three host ID octets (see The following table is a summary for class “B”... - Page 118 P-2000W_V2 User’s Guide Appendix B IP Subnetting VoIPon www.voipon.co.uk sales@voipon.co.uk Tel: +44 (0)1245 808195 Fax: +44 (0)1245 600030...
-
Page 119: Appendix Cpppoe
PPPoE in Action An ADSL modem bridges a PPP session over Ethernet (PPP over Ethernet, RFC 2516) from your computer to an ATM PVC (Permanent Virtual Circuit) which connects to a DSL Access Concentrator where the PPP session terminates (see support any number of PPP sessions from your LAN. -
Page 120: How Pppoe Works
P-2000W_V2 User’s Guide Figure 38 Single-Computer per Router Hardware Configuration How PPPoE Works The PPPoE driver makes the Ethernet appear as a serial link to the computer and the computer runs PPP over it, while the modem bridges the Ethernet frames to the Access Concentrator (AC). -
Page 121: Appendix D Wireless Lans
Wireless LAN Topologies This section discusses ad-hoc and infrastructure wireless LAN topologies. Ad-hoc Wireless LAN Configuration The simplest WLAN configuration is an independent (Ad-hoc) WLAN that connects a set of computers with wireless stations (A, B, C). Any time two or more wireless adapters are within range of each other, they can set up an independent network, which is commonly referred to as an Ad-hoc network or Independent Basic Service Set (IBSS). -
Page 122: Ess
P-2000W_V2 User’s Guide Figure 41 Basic Service Set An Extended Service Set (ESS) consists of a series of overlapping BSSs, each containing an access point, with each access point connected together by a wired network. This wired connection between APs is called a Distribution System (DS). This type of wireless LAN topology is called an Infrastructure WLAN. -
Page 123: Channel
Figure 42 Infrastructure WLAN Channel A channel is the radio frequency(ies) used by IEEE 802.11a/b/g wireless devices. Channels available depend on your geographical area. You may have a choice of channels (for your region) so you should use a different channel than an adjacent AP (access point) to reduce interference. -
Page 124: Requirements For Roaming
P-2000W_V2 User’s Guide The roaming feature on the access points allows the access points to relay information about the wireless stations to each other. When a wireless station moves from a coverage area to another, it scans and uses the channel of a new access point, which then informs the access points on the LAN about the change. - Page 125 2 If IEEE 802.1x user authentication is enabled and to be done locally on the access point, the new access point must have the user profile for the wireless station. 3 The adjacent access points should use different radio channels when their coverage areas overlap.
- Page 126 P-2000W_V2 User’s Guide Appendix D Wireless LANs VoIPon www.voipon.co.uk sales@voipon.co.uk Tel: +44 (0)1245 808195 Fax: +44 (0)1245 600030...
-
Page 127: Index
Certifications Changes or Modifications Channel Interference Index VoIPon www.voipon.co.uk sales@voipon.co.uk P-2000W_V2 User’s Guide Index Charge Circuit Circuit-switched Telephone Networks Class B Clicks Client Server, SIP Client-server Protocol Codec 100, 102 Codecs Coder/Decoder 100, 102 Comfort Noise Generation Communications Compliance, FCC... - Page 128 P-2000W_V2 User’s Guide Dual-Tone MultiFrequency Dust Dynamic Jitter Buffer Electric Shock Electrocution Enter See Syntax Conventions Equal Value Ethernet 43, 78 Europe Expiration Duration Exposure Extended Service Set Extended Service Set IDentification 34, 94 External IP Addresses Failure Fake WAN Address on SIP and RTP 88, 91 Compliance Rules, Part 15...
- Page 129 Products Proof of Purchase Proper Operating Condition Proxy 52, 92 Proxy Server, SIP PSTN Public IP Addresses Public Switched Telephone Network Pulse Code Modulation Pulse Dialing Purchase, Proof of Purchaser Qualified Service Personnel Quality of Service Quality of Service (QOS)
- Page 130 23, 88, 89 Subnet Masks Subnetting Supply Voltage Support E-mail Supporting Disk Sweden, Contact Information Swimming Pool Switch Symmetric NAT Symmetric NAT, Outgoing Syntax Conventions Tampering Telephone 8, 22 Telephone Keys Television Interference Tel: +44 (0)1245 808195 Index Fax: +44 (0)1245 600030...
- Page 131 WEP Key Wet Basement Wired Equivalent Privacy See WEP WLAN Interference Workmanship Worldwide Contact Information Written Permission ZyNOS ZyXEL Communications Corporation ZyXEL Home Page ZyXEL Limited Warranty Note ZyXEL Network Operating System Tel: +44 (0)1245 808195 Fax: +44 (0)1245 600030...
Need help?
Do you have a question about the P2000W and is the answer not in the manual?
Questions and answers