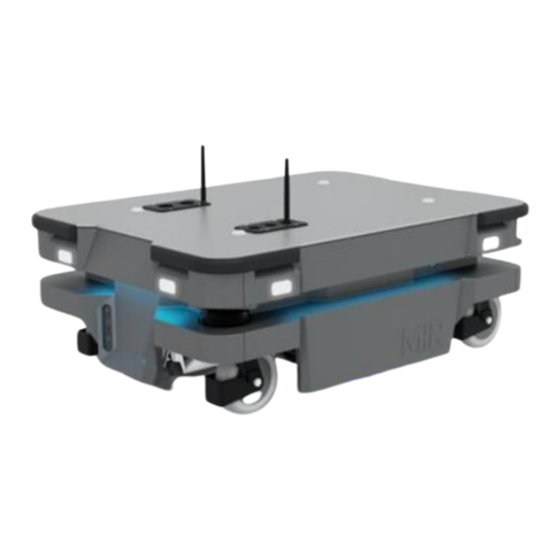
MIR MiR250 Quick Start Manual
Hide thumbs
Also See for MiR250:
- User manual (249 pages) ,
- Manual (195 pages) ,
- Installer/integrator manual (170 pages)
Table of Contents
Advertisement
Quick Links
Advertisement
Table of Contents

Related Manuals for MIR MiR250


Summary of Contents for MIR MiR250
- Page 1 MiR250 Quick Start Date: 09/2023 Version: 2.1 (en) Robot hardware version: 2.0 For the full documentation package and for translated guides for your robot, go to: https://www.mobile-industrial-robots.com/product-documents/mir250-hw-20-sw-2-v1/...
-
Page 2: Copyright And Disclaimer
Copyright and disclaimer Copyright and disclaimer Mobile Industrial Robots A/S (MiR) makes no warranties, expressed or implied, in respect of this document or its contents. In addition, the contents of this document are subject to change without prior notice. Every precaution has been taken in the preparation of this document. -
Page 3: Table Of Contents
6. Accessing the internal parts 6.1 Front compartment 6.2 Rear compartment 6.3 Side compartments 6.4 Top compartments 7. Getting started 7.1 In the box 7.2 Unpacking MiR250 MiR250 Quick Start (en) 09/2023 - v.2.1 ©Copyright 2020–2023: Mobile Industrial Robots A/S. - Page 4 7.7 Connecting the robot to a Wi-Fi network 7.8 Driving the robot in Manual mode 7.9 Moving the robot by hand 7.10 Checking the robot 7.11 Shutting down the robot 7.12 Battery and charging MiR250 Quick Start (en) 09/2023 - v.2.1 ©Copyright 2020–2023: Mobile Industrial Robots A/S.
-
Page 5: Version History
Added warning to ensure all personnel wear safety shoes. Affects section: General safety precautions. Added notice that the robot cannot detect forklift forks and empty pallets reliably. Affects section: General safety precautions. MiR250 Quick Start (en) 09/2023 - v.2.1 ©Copyright 2020–2023: Mobile Industrial Robots A/S. - Page 6 Added more information about storage of robots and batteries. New section: Storage. Added notice that cable chargers only charge the robot's battery to 80–90%. Affects section: Charging the robot. General improvements throughout the manual. MiR250 Quick Start (en) 09/2023 - v.2.1 ©Copyright 2020–2023: Mobile Industrial Robots A/S.
- Page 7 General improvements throughout the manual. Date: 2020-07-08 Robot HW: 1.0 General improvements throughout the manual. Date: 2020-07-01 Robot HW: 1.0 General improvements throughout the manual. Date: 2020-06-26 Robot HW: 1.0 First edition MiR250 Quick Start (en) 09/2023 - v.2.1 ©Copyright 2020–2023: Mobile Industrial Robots A/S.
-
Page 8: Safety
Pay particular attention to the safety instructions and warnings. NOTICE Mobile Industrial Robots disclaims any and all liability if MiR250 or its accessories are damaged, changed, or modified in any way. Mobile Industrial Robots cannot be held responsible for any damages caused to MiR250, accessories, or any other equipment due to programming errors or malfunctioning of MiR250. -
Page 9: General Safety Precautions
The robot may drive over the feet of personnel, causing injury. All personnel must be informed of the side Protective fields of the robot and be instructed to wear safety shoes near an operating robot. MiR250 Quick Start (en) 09/2023 - v.2.1 ©Copyright 2020–2023: Mobile Industrial Robots A/S. - Page 10 This equipment is not intended for use in residential environments and may not provide adequate protection to radio reception in such environments. Do not use the robot in residential environments. MiR250 Quick Start (en) 09/2023 - v.2.1 ©Copyright 2020–2023: Mobile Industrial Robots A/S.
- Page 11 Emergency stop function in emergency situations. Ensure that all personnel are instructed to stay clear of operating hazard zones when the robot is in the zone. MiR250 Quick Start (en) 09/2023 - v.2.1 ©Copyright 2020–2023: Mobile Industrial Robots A/S.
-
Page 12: Intended Use
If used with custom modules, all obligations of a manufacturer apply to the individual who performs the modifications. All modifications must be in accordance with the machinery directive. MiR250 is designed for and all risks are considered when used with one of the following types of top modules: MiR Shelf Carrier 250 to transport MiR supported shelves... -
Page 13: Foreseeable Misuse
2. Safety 2.4 Foreseeable misuse Any use of MiR250 deviating from the intended use is deemed as misuse. This includes, but is not limited to: Using the robot to transport people Using the robot on inclines outside the robot's specifications... -
Page 14: Residual Risks
Identify all hazards specific to your robot installation during commissioning. 2.6 Warning label MiR250 is supplied with a warning label that specifies that it is strictly prohibited to ride on the robot. The label must be placed on the robot or top module so that it is clearly visible. - Page 15 2. Safety Figure 2.1 The warning label must be placed on the robot or top module MiR250 Quick Start (en) 09/2023 - v.2.1 ©Copyright 2020–2023: Mobile Industrial Robots A/S.
-
Page 16: Storage
The storage time of the robot and battery depends on the battery's state of charge, the storage conditions, and the battery version. For more information about storage time, see MiR 48V Battery Technical Guide. You can find this guide on MiR Support Portal. - Page 17 To properly troubleshoot any battery issues and for information about the exact time periods and battery voltages that trigger the transitions between states, see MiR 48V Battery Technical Guide. You can find this guide on MiR Support Portal. MiR250 Quick Start (en) 09/2023 - v.2.1 ©Copyright 2020–2023: Mobile Industrial Robots A/S.
-
Page 18: Light Indicators And Speaker
Protective fields are muted. Figure 4.1 Light indicators on MiR250 Table 4.1 Identification of light indicators in Figure 4.1 Pos. Description Pos. Description Signal lights Status lights MiR250 Quick Start (en) 09/2023 - v.2.1 ©Copyright 2020–2023: Mobile Industrial Robots A/S. -
Page 19: Status Lights
When the robot's battery reaches a critically low level of power (0-1%), the ends of the status lights flash red. 4.2 Signal lights Signal lights are used to indicate the robot’s immediate motion plans by signaling forwards- backwards-braking and left-right turns. MiR250 Quick Start (en) 09/2023 - v.2.1 ©Copyright 2020–2023: Mobile Industrial Robots A/S. -
Page 20: Speaker
In Setup > Sounds, you can upload new sounds to the robot or edit the volume and length of the default sounds. Sounds can be used in missions and zones to alert or to attract people's attention. For more information about how to set up sounds, see MiR Commissioning Guide. You can find this guide on MiR Support Portal. - Page 21 Do not disable the sound in the safety system. This will also cause the robot to not comply with safety standards. MiR250 Quick Start (en) 09/2023 - v.2.1 ©Copyright 2020–2023: Mobile Industrial Robots A/S.
-
Page 22: Control Panel
Pressing this button stops the robot. After pressing this button, you must press the Resume button to let the robot continue operating. Color indication: Red: It is possible to engage the Manual stop. MiR250 Quick Start (en) 09/2023 - v.2.1 ©Copyright 2020–2023: Mobile Industrial Robots A/S. - Page 23 Middle position: Locked mode. Locks the robot. The robot blocks the wheels; you cannot start a mission or drive the robot manually. Right position: Manual mode. Puts the robot in Manual mode. MiR250 Quick Start (en) 09/2023 - v.2.1 ©Copyright 2020–2023: Mobile Industrial Robots A/S.
-
Page 24: Accessing The Internal Parts
6. Accessing the internal parts 6. Accessing the internal parts Most internal parts of MiR250 are accessed through covers that open to different compartments. See a video of the process on the MiR TechComm videos channel on vimeo.com. CAUTION Removing covers from the robot exposes parts connected to the power supply, which can result in a short circuit that will damage the robot and could injure personnel. - Page 25 Loosen the bottom corners one at the time by pulling out each corner. Loosen the top corners one at the time by pulling each corner down, and then out. MiR250 Quick Start (en) 09/2023 - v.2.1 ©Copyright 2020–2023: Mobile Industrial Robots A/S.
-
Page 26: Rear Compartment
Pull off the cover. 6.2 Rear compartment To open the rear compartment, follow these steps: Push the two white buttons on the rear cover at the same time. MiR250 Quick Start (en) 09/2023 - v.2.1 ©Copyright 2020–2023: Mobile Industrial Robots A/S. - Page 27 Loosen the bottom corners one at the time by pulling out each corner. Loosen the top corners one at the time by pulling each corner down, and then out. MiR250 Quick Start (en) 09/2023 - v.2.1 ©Copyright 2020–2023: Mobile Industrial Robots A/S.
-
Page 28: Side Compartments
To open a side compartment, follow these steps: Remove the front cover and rear cover—see "Front compartment" on page 24 "Rear compartment" on page 26. Turn the two screws counterclockwise. Use a T30 bit. MiR250 Quick Start (en) 09/2023 - v.2.1 ©Copyright 2020–2023: Mobile Industrial Robots A/S. - Page 29 6. Accessing the internal parts Loosen the bottom corners one at the time by pulling out each corner. Pull off the cover. MiR250 Quick Start (en) 09/2023 - v.2.1 ©Copyright 2020–2023: Mobile Industrial Robots A/S.
-
Page 30: Top Compartments
Unscrew and remove the antenna from the top cover. Unscrew the nut from the antenna connector, and push the antenna cable free of the cover. Use a 10 mm wrench. MiR250 Quick Start (en) 09/2023 - v.2.1 ©Copyright 2020–2023: Mobile Industrial Robots A/S. - Page 31 6. Accessing the internal parts Unscrew the four screws. Use a T8 bit. Pull off the cover. MiR250 Quick Start (en) 09/2023 - v.2.1 ©Copyright 2020–2023: Mobile Industrial Robots A/S.
-
Page 32: Getting Started
7. Getting started 7. Getting started This section describes how to get started with MiR250. To be able to use MiR250 hardware version 2.0, the robot must be running software version 2.14.2 or higher. Read "Safety" on page 8 before powering up MiR250. - Page 33 7. Getting started Cut the protective straps surrounding the box. Remove the lid from the box. MiR250 Quick Start (en) 09/2023 - v.2.1 ©Copyright 2020–2023: Mobile Industrial Robots A/S.
- Page 34 7. Getting started Take the box with the Emergency stop box, antennas, and printed documents out of the box. Remove the pallet collars and the protective foam blocks. MiR250 Quick Start (en) 09/2023 - v.2.1 ©Copyright 2020–2023: Mobile Industrial Robots A/S.
- Page 35 Use a T45 screwdriver to unscrew the mounting screw, and tighten it to 15 Nm when remounting it with the Emergency stop box. MiR250 Quick Start (en) 09/2023 - v.2.1 ©Copyright 2020–2023: Mobile Industrial Robots A/S.
-
Page 36: Connecting The Battery
Screw on the two antennas, one on each top compartment. 7.3 Connecting the battery To connect the battery to the robot, you need to open the rear compartment—see "Accessing the internal parts" on page 24. MiR250 Quick Start (en) 09/2023 - v.2.1 ©Copyright 2020–2023: Mobile Industrial Robots A/S. - Page 37 Pull the battery lock pin out while pushing the battery lever up. The battery lock pin will click into place and lock the battery connector once the battery lever has been pushed all the way up. MiR250 Quick Start (en) 09/2023 - v.2.1 ©Copyright 2020–2023: Mobile Industrial Robots A/S.
- Page 38 Reattach the rear cover by tilting it slightly so that the bottom points forward while inserting it into the two attachment sockets. Press the two white buttons while attaching the cover to the robot. MiR250 Quick Start (en) 09/2023 - v.2.1 ©Copyright 2020–2023: Mobile Industrial Robots A/S.
-
Page 39: Enabling Fast Swap
Battery lever—this is known as enabling the fast swap-option. You only need to do this once, and it is only relevant if you need to remove the battery regularly. MiR250 Quick Start (en) 09/2023 - v.2.1 ©Copyright 2020–2023: Mobile Industrial Robots A/S. - Page 40 Unscrew the two bolts and washers keeping the fast-swap levers raised. Use a 10 mm hex bit for the bolts and a 10 mm hex wrench to keep the nuts in place. MiR250 Quick Start (en) 09/2023 - v.2.1 ©Copyright 2020–2023: Mobile Industrial Robots A/S.
- Page 41 7. Getting started Pull the status light bracket down and fasten the two levers to the battery lever using the same two bolts, washers, and nuts. MiR250 Quick Start (en) 09/2023 - v.2.1 ©Copyright 2020–2023: Mobile Industrial Robots A/S.
-
Page 42: Powering Up The Robot
When the initialization process ends, the robot goes into Protective stop. Press the Resume button to clear the Protective stop. The robot is now ready for operation. MiR250 Quick Start (en) 09/2023 - v.2.1 ©Copyright 2020–2023: Mobile Industrial Robots A/S. -
Page 43: Connecting To The Robot Interface
You can connect to the robot using an Ethernet cable or an access point. If you are located in North America, EU, or a part of EAC, you can purchase a MiR Access Point from MiR. Outside these areas, you need to use your own access point that is approved for use in your region. If you choose to use an access point, you must ensure that the robot is disconnected from the wireless network before attaching the access point to remain compliant—see... - Page 44 If you are using an access point, connect your device to the access point. The MiR Access Point Wi-Fi has the following format: MiR_3042XXXXX. Use the password shipped with the access point to connect. MiR250 Quick Start (en) 09/2023 - v.2.1 ©Copyright 2020–2023: Mobile Industrial Robots A/S.
-
Page 45: Connecting The Robot To A Wi-Fi Network
To comply with the robot's certification, you must use an Ethernet cable to avoid simultaneously active radio transmitters while setting up the connection to the local Wi-Fi network. MiR250 Quick Start (en) 09/2023 - v.2.1 ©Copyright 2020–2023: Mobile Industrial Robots A/S. - Page 46 Select the network you want the robot to be connected to, and fill out the displayed fields—see the guide How to connect a MiR robot to a Wi-Fi network for more information about the Wi-Fi settings. You can find this guide on MiR Support Portal.
- Page 47 When you are connected to the same network, you can access the robot's interface by entering the IP address displayed under the connection description into your internet browser. To disconnect the robot from a Wi-Fi network, select Disconnect. MiR250 Quick Start (en) 09/2023 - v.2.1 ©Copyright 2020–2023: Mobile Industrial Robots A/S.
-
Page 48: Driving The Robot In Manual Mode
Be aware that you can make the robot collide with obstacles even if you do not mute the Protective fields. If you mute the Protective fields the robot will not stop at all for detected obstacles. MiR250 Quick Start (en) 09/2023 - v.2.1 ©Copyright 2020–2023: Mobile Industrial Robots A/S. - Page 49 In the robot interface, select Manual control under the joystick tab. The Resume button on the robot starts blinking. On the robot, press the Resume button. The status lights turn blue, indicating that the robot is in Manual mode. MiR250 Quick Start (en) 09/2023 - v.2.1 ©Copyright 2020–2023: Mobile Industrial Robots A/S.
-
Page 50: Moving The Robot By Hand
If the robot is stuck, push or pull gently on the top bumpers or the pull handles to move the robot. Do not push or pull the robot sideways. MiR250 Quick Start (en) 09/2023 - v.2.1 ©Copyright 2020–2023: Mobile Industrial Robots A/S. - Page 51 Figure 7.1 When pushing the robot, only push on the corner bumpers or top cover Figure 7.2 When pulling the robot, use either the front pull handle or the rear pull handle MiR250 Quick Start (en) 09/2023 - v.2.1 ©Copyright 2020–2023: Mobile Industrial Robots A/S.
-
Page 52: Checking The Robot
MiR250 Quick Start (en) 09/2023 - v.2.1 ©Copyright 2020–2023: Mobile Industrial Robots A/S. - Page 53 You can see the software version your robot is running in the bottom left corner of the robot interface. MiR250 Quick Start (en) 09/2023 - v.2.1 ©Copyright 2020–2023: Mobile Industrial Robots A/S.
-
Page 54: Shutting Down The Robot
7.11 Shutting down the robot To shut down MiR250, follow these steps: Ensure that the robot is not moving or executing an action. Press the Power button for three seconds. MiR250 Quick Start (en) 09/2023 - v.2.1 ©Copyright 2020–2023: Mobile Industrial Robots A/S. -
Page 55: Battery And Charging
The robot is powered by a fast swap lithium-ion battery that can be charged inside the robot with a MiR cable charger or a MiR Charge 48V charging station. Instructions for charging depend on the charger type and are described in the guides included with each charger. - Page 56 Using a charging device different from the one supplied by the manufacturer can cause a fire and thereby burn injuries to nearby personnel and damage to the robot and equipment. Only use an original MiR charger. MiR250 Quick Start (en) 09/2023 - v.2.1 ©Copyright 2020–2023: Mobile Industrial Robots A/S.
- Page 57 Never smoke or allow an open spark or flame in the vicinity of the robot's battery. Do not use the battery for anything other than MiR250. MiR250 Quick Start (en) 09/2023 - v.2.1 ©Copyright 2020–2023: Mobile Industrial Robots A/S.
- Page 58 7. Getting started Doc. no.: 301002 MiR250 Quick Start (en) 09/2023 - v.2.1 ©Copyright 2020–2023: Mobile Industrial Robots A/S.
Need help?
Do you have a question about the MiR250 and is the answer not in the manual?
Questions and answers