MIR MiR200 Quick Start Manual
Hide thumbs
Also See for MiR200:
- User manual (46 pages) ,
- Quick start manual (40 pages) ,
- Operating manual (47 pages)
Table of Contents
Advertisement
Quick Links
Advertisement
Table of Contents

Related Manuals for MIR MiR200


Summary of Contents for MIR MiR200
- Page 1 Quick start MiR200 Revision: Date: 2019/05...
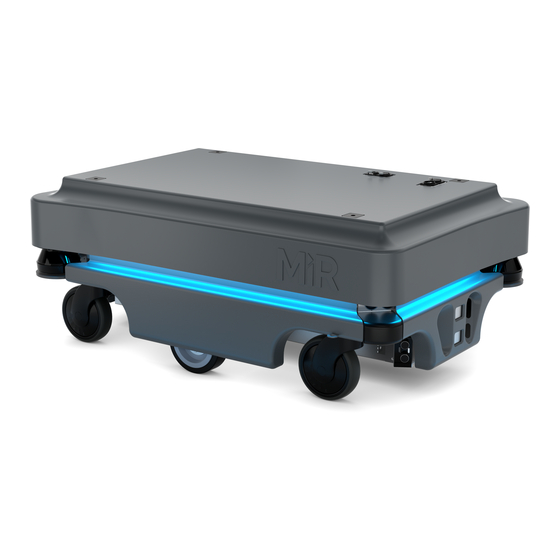
- Page 2 Getting started 1. Getting started This section describes how to get started with MiR200. The section contains the following topics: 1.1. In the box 1.2. Unpacking MiR200 MiR200 quick start, 2019/05, rev.1.7...
- Page 3 • Emergency stop box, external antenna and 4 pcs. M10x40 bolts • One charging cable • One external charger, 24VDC, 10A 3. MiR200 document folder containing the printed documents and the USB flash drive. 4. Printed documents: • MiR200 Quick Start •...
- Page 4 Note Keep the original packaging for the future transportation of the robot. 1. Remove pallet lid and take out the box with the MiR200 kit. Keep the original packaging for future transportation of the robot. 2. Remove the top foam, foam blocks on the sides and the pallet frames.
- Page 5 Commissioning 2. Commissioning This section describes how to get started with MiR200. NOTICE Read the Safety chapter before powering up the robot. The section contains the following topics: 2.1. Powering up 2.2. Connecting to the robot interface 2.3. Charging the robot 2.4.
- Page 6 Commissioning 2.1. Powering up Follow these steps to power up MiR200. 1. Grab the two rounded corners and carefully lift off the cover. 2. Connect one of the two battery cables to the plug on top of the battery box. The second cable is for an extra battery.
- Page 7 4. Ensure that the battery disconnect switch is on (the two yellow indicators pointing to On). 5. Connect the two ESD cables attached to the robot frame, next to the loudspeaker, and inside the cover. MiR200 quick start, 2019/05, rev.1.7...
- Page 8 If a top module is going to be mounted on top of the robot, the emergency stop must be placed in a position where it is easy to reach. See Mounting a top module on page 1. MiR200 quick start, 2019/05, rev.1.7...
- Page 9 10. Press the reset button on the emergency stop when it has lit up. The robot light now switches to yellow constant light, indicating that the robot is paused and ready to operate. MiR200 quick start, 2019/05, rev.1.7...
- Page 10 NOTICE The username and password for the robot’s WiFi access point and for accessing the web interface are in the MiR username and passwords document. The document is in the box with the robot. Follow these steps to connect to the robot interface: 1.
- Page 11 Commissioning 2. In a browser, go to the address mir.com and sign in. The robot is now ready to move down the ramp. To do this switch to manual mode and use the electronic joystick in the robot interface. See next section Driving the robot in manual mode on page 1.
- Page 12 If charging two robots right after each other with a cable, wait approximately one minute between unplugging the first robot and plugging in the second. This will ensure that the charger registers that a new robot is being charged. MiR200 quick start, 2019/05, rev.1.7...
- Page 13 4. Turn off the rocker switch and disconnect the charging cable from the robot. Slide the corner cover back Note The robot detects both cable and activated charging-button and will go into emergency stop in both cases. For information about the charging time, see the robot specifications at www.mir-robots.com. MiR200 quick start, 2019/05, rev.1.7...
- Page 14 Go to Monitoring > Hardware health. Check that all elements on the page have the OK status and that they have green dots on the left. For more information, see Hardware health in MiR Robot Interface 2.0 Reference Guide. MiR200 quick start, 2019/05, rev.1.7...
-
Page 15: Table Of Contents
Pay particular attention to the safety instructions and warnings. NOTICE Mobile Industrial Robots disclaims any and all liability if MiR200 or its accessories are damaged, changed or modified in any way. Mobile Industrial Robots can not be held responsible for any damages caused to MiR200, accessories or any other equipment due to programming errors or malfunctioning of MiR200. -
Page 16: Safety Message Types
• Ensure that the load is positioned according to the specifications and fastened correctly.See Payload specifications on page. WARNING Using a charger different from the one supplied by the manufacturer can cause a fire. • Use only the original charger. MiR200 quick start, 2019/05, rev.1.7... -
Page 17: Intended Use
3.3. Intended use MiR200 is intended to be commissioned and used in indoor industrial environments where access for the public is restricted. For details about the environmental conditions in which the robot should operate, see Technical specifications on our website. -
Page 18: Foreseeable Misuse
Those who design, manufacture or commission a system that does not meet the limitations of use of MiR200, carry the obligations of a manufacturer and shall ensure a safe design according to EN ISO 12100. Guidelines outlined in this manual are not sufficient. Examples of top- applications, which are not intended use of MiR200, but not limited to, are: •... -
Page 19: Risk Assessment
Mobile Industrial Robots has identified the potential significant hazards listed below as hazards that must be considered by the integrator. • Being run over, drawing-in, trapping or impact if a person steps into the route or walks towards MiR200 while in motion. -
Page 20: Limiting Safety-Related Functions
Safety 3.8. Limiting safety-related functions MiR200 has several built-in safety-related functions that are used to ensure safe operation in the environment it is designed to be used in. Advanced control software ensures that locomotion and the drive pattern are within safety related limits and thereby avoid triggering a safety function. -
Page 21: Lithium Battery
Safety 3.9. Lithium battery This section contains safety precautions related to lithium batteries in MiR robots. WARNING Lithium battery packs may get hot, explode or ignite and cause serious injury if they are abused electrically or mechanically. Observe the following precautions when handling and using lithium batteries: •... - Page 22 Safety MiR200 quick start, 2019/05, rev.1.7...
- Page 23 Safety MiR200 quick start, 2019/05, rev.1.7...
- Page 24 All rights reserved. No parts of this manual may be reproduced in any form without the express written permission of Mobile Industrial Robots A/S (MiR). MiR makes no warranties, express or implied, in respect of this document or its contents. In addition, the contents of the document is subject to change without prior notice.
Need help?
Do you have a question about the MiR200 and is the answer not in the manual?
Questions and answers