
Related Manuals for promotal Elite 12524-01


Summary of Contents for promotal Elite 12524-01
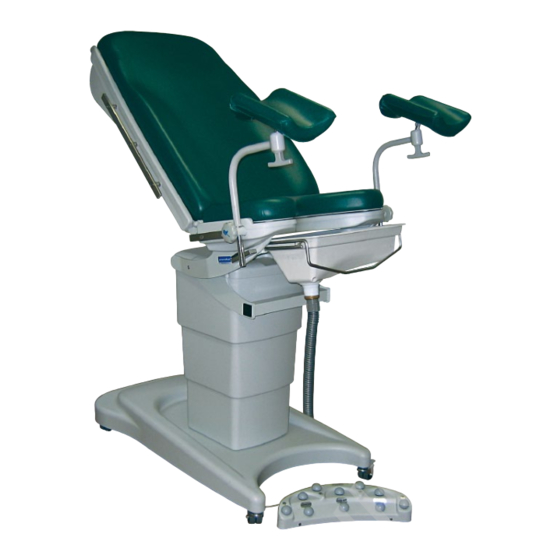
- Page 1 All manuals and user guides at all-guides.com User’s Guide Elite Model Shown : 12534-01 Electric Urological Table 12524-01 / 12534-01...
- Page 2 Tél. : +33 (0)2 43 05 12 70 without notice. Fax : +33 (0)2 43 05 68 99 Before any order, we recommend that our customers internet : www.promotal.com consult a local sales manager. www.midmark.com Type plate...
-
Page 3: Table Of Contents
All manuals and user guides at all-guides.com Summary Important Information Safety symbols Power supply Electromagnetic interfere Precautions when unpacking Material delivered in cardboard packaging Products delivered on wooden palettes Storage condition Unpacking / Installation Verification Cleaning protocol Warning General maintenance Disinfection Maintenance Instructions Painted surfaces (epoxy polyester fi nish) - Page 4 All manuals and user guides at all-guides.com Summary Safety Connecting the pedal control Using the pedal control Using the Table Adjusting the height Trendelenburg position Postioning the incline of the backrest (for 12534-01 models) Postioning the incline of the backrest (for 12524-01 models) Paper roll Installation of the paper roll Pair of stirrups or pair of Goeppels Installing the Goeppels...
- Page 5 All manuals and user guides at all-guides.com Summary Olympus Colposcope holder Installing the colposcope holder Head cushion Installing Options The programmable pedal control Using the 3 pre-programmed positions Selection the 3 pre-programmed positions Restarting the table S/S rails 25 x 10 Electrical receptacles Using the electrical receptacles Lifespan of the Medical Device Fuse replacement Obligatory/specific maintenance End of the device’s useful life Maintenance notebook Note...
-
Page 6: Important Information
All manuals and user guides at all-guides.com Important Information Safety symbols Warning sign The information marked with this symbol must be read and strictly followed ! Note Procedure, practice, or condition. Proper shipping Keep dry Fragile orientation Maximum stacking height (palletted units) Fuse rating specifi Protective earth Type B, Applied Part... -
Page 7: Power Supply
All manuals and user guides at all-guides.com Power supply The equipotential bonding terminal must never be used as a protective earth connection. For class 1 products, to avoid all risks of electrocution, this device must be connected only to a power system with protective earth. Electromagnetic interfere This Midmark Europe examination equipment was designed and built in order to minimize electromagnetic interferences with other devices. -
Page 8: Precautions When Unpacking
All manuals and user guides at all-guides.com Precautions when unpacking Material delivered in cardboard packaging ○ Small, lightweight, easy ○ Heavy or cumbersome material requiring the use to handle materiel of lifting gear In this case, the products can be easily handled In this case, it is possible to use a fork lift truck, without any lifting gear, taking care to position the provided it is used correctly. - Page 9 All manuals and user guides at all-guides.com Note : Authorized CE representative Countries in the EEC should direct all questions, incidents, and complaints to Midmark Europe’s Authorized CE representative listed below : Midmark Europe 22, rue de Saint-Denis de Gastines 53500 Ernée, FRANCE Téléphone : + 33 (0)2 430 517 76...
-
Page 10: Cleaning Protocol
All manuals and user guides at all-guides.com Cleaning protocol Warning You must read the installation instructions, technical Under no circumstances must electrical parts instructions, and instructions for use before (motor, unit housing the electrical control systems, handling this equipment. The instrument must be control unit, adaptor etc.) be opened. -
Page 11: Imitation Leather Coverings
All manuals and user guides at all-guides.com Imitation leather coverings Use a damp cloth and soapy water (eg. household Flame retardort classifi cation : All our coverings soap). For stubborn stains, dab, but do not rub, class are M2 or M1. We can provide you with a using a cloth soaked in white spirits or in a solution manufacturers certifi cate on request. -
Page 12: User's Guide - Urological Table
All manuals and user guides at all-guides.com User’s Guide – Urological Table Intended use This appliance is designed for use in professional premises only : ● Medical practices ● Care establishments This appliance must not be installed in domestic premises. This table is designed to be used only by healthcare staff. -
Page 13: Electrical Connections
All manuals and user guides at all-guides.com Electrical connections This table must be connected to the main electricity supply. ● Connection to the supply : 120 V or 230 V (depending on country) ● Frequency : 50/60 Hz ● Protection Classification / Degree of electric shock protection : Class 1 / B ●... -
Page 14: Safety
All manuals and user guides at all-guides.com Safety The switch situated at the base of the table allows the table to be switched on or off. If the table is not to be used for a prolonged period of time, it should be switched off. -
Page 15: Using The Pedal Control
All manuals and user guides at all-guides.com Using the pedal control To achieve the desired position, simply apply and maintain pressure on the pedal. As soon as this pressure is released, the movement will stop. The table is fitted with an internal device to limit the high and low positions. -
Page 16: Using The Table
All manuals and user guides at all-guides.com Using the Table Adjusting the height Press on the pedal control for the desired position. Down Caution Make sure that there is no object present under the device before lowering it. Trendelenburg position Press on the pedal control for the desired position. -
Page 17: Postioning The Incline Of The Backrest (For 12534-01 Models)
All manuals and user guides at all-guides.com Postioning the incline of the backrest (for 12534-01 models) Press on the pedal control for the desired position. Down Postioning the incline of the backrest (for 12524-01 models) Use one hand to guide up or down the backrest (to the desired position) and the other to activate the gas-spring assisted backrest (L). -
Page 18: Paper Roll
All manuals and user guides at all-guides.com Using the Table Paper roll (maxi length 500 mm - maxi Ø 125 mm) Installation of the paper roll 1. Lift the backrest. 2. Place the paper roll in the housing. Paper can be positioned in two ways: Draw on the paper roll and pass it underneath the backrest to place the paper on the base only (photo 1). -
Page 19: Plastic Pan
All manuals and user guides at all-guides.com Plastic pan Installation of the plastic pan Sliding plastic removable bowl (6 liters) with The plastic pan is removable to ensure easy cleaning, drainage tube (150 cm) and splash guard cover. it can be moved towards the front and also be placed under the seat. -
Page 20: The Upholstery
All manuals and user guides at all-guides.com Using the Table The upholstery Removing the upholstery base backrest Raise the base by uncoupling the 4 studs. 1 : Then move the whole of the backrest forwards. 2 : Side the backrest upwards. User’s Guide... -
Page 21: Accessories
All manuals and user guides at all-guides.com Accessories Sliding clamp for 25 x 10 rail (reference 878-12) Installing the clamp 878-12 Caution Only to be used with these options. (ref. : 12878 and 12879-01). Using the clamp Check that the parts are secure before use. -
Page 22: Rotating Clamp For 25 X 10 Rail
All manuals and user guides at all-guides.com Accessories Rotating clamp for 25 x 10 rail (reference 879-10) Caution Only to be used with these options. (ref. : 12878 and 12879-01). Installing the clamps Insert the clamp on the rail. (The clamps accept accessories with Ø 16 and Ø 18.). Tighten the screws before use. User’s Guide... -
Page 23: Leisegang Colposcope Holder
All manuals and user guides at all-guides.com Leisegang Colposcope holder (reference 11810-01) Installing the colposcope holder (Insert right or left) - Remove the tip (E) 40x40 on the tube (tc), and - Insert the colp support in the tube (TC) and unscrew the screw (VA). tighten the screw (VA). -
Page 24: Support Colposcope Zeiss / Colposcope Kaps
All manuals and user guides at all-guides.com Accessories Support Colposcope Zeiss / Colposcope KAPS (reference 11840-01) Installing the colposcope holder (Insert right or left) - Remove the tip (E) 40x40 on the tube (tc), and - Insert the colp support in the tube (TC) and unscrew the screw (VA). -
Page 25: Lamp Holder
All manuals and user guides at all-guides.com Lamp holder (reference 11910-01) Installing the lamp holder (Insert right or left) - Remove the tip (E) 40x40 on the tube (tc), and - Insert the lamp support in the tube (TC) and unscrew the screw (VA). tighten the screw (VA). -
Page 26: Auto-Blocking I.v. Pole
All manuals and user guides at all-guides.com Accessories Auto-blocking I.V. pole N°4 Allen key (reference 2985-01) Installing the IV pole Caution Clamps are necessary to install these accessorie. (réf. : 11910-01). Tighten screws before use. Adjusting the height of the IV pole The IV pole has 1 sliding stem. Use the screw to adjust the height of the lower stem and the bolt to adjust the upper stem. -
Page 27: Leg Cushion
All manuals and user guides at all-guides.com Leg cushion (reference 12672) Installing the anchor points Installing the leg cushion - Slide the cushion on the rails placed under the base. Caution Make sure that the cushion of feet is well to insert. This is designed for a charge of 25 kg maxi. -
Page 28: Installing The Wall-Mounted Support For The Foot Cushion
All manuals and user guides at all-guides.com Accessories Installing the wall-mounted support for the foot cushion - The support is fixed to the wall by 3 holes Ø 6 (indicated by the arrows) Caution Ensure correct fixation to the wall. (adapted screws + rawlplugs). Proctology cushion (reference 12681) Installing the anchor points... -
Page 29: Olympus Colposcope Holder
All manuals and user guides at all-guides.com Olympus Colposcope holder (reference 8850-01 and 8851-01) Installing the colposcope holder 8850-01 right 8851-01 left - Remove the tip (E) 40x40 on the tube (tc), and - Insert the colp support in the tube (TC) and unscrew the screw (VA). -
Page 30: Options
All manuals and user guides at all-guides.com Options The programmable pedal control (reference 12700 and 12701) To achieve the desired position, simply apply and table is fitted with an internal device to limit the high maintain pressure on the pedal. As soon as this and low positions. -
Page 31: Selection The 3 Pre-Programmed Positions
All manuals and user guides at all-guides.com Selection the 3 pre-programmed positions Use the pedal control (PC). Press the buttons with the arrows (To adjust the Keeping your foot on the button (Marker P), at the height, backrest position, and seat) to place the table same time press the selection button (Marker 0). in the position you want to program. -
Page 32: S/S Rails 25 X 10
All manuals and user guides at all-guides.com Options S/S rails 25 x 10 (reference 12878 and 12879-01) Seat : reference 12878 Backrest : reference 12879-01 Electrical receptacles (reference 12691-01) Using the electrical receptacles User’s Guide... -
Page 33: Lifespan Of The Medical Device
Insert fuse drawer (1) into fuse housing (2) until fuse drawer snaps into place (both side of use drawer are locked into fuse housing). Plug in power cord to equipment. If fuse blows again, call your Promotal distributor. User’s Guide... -
Page 34: Obligatory/Specific Maintenance
All manuals and user guides at all-guides.com Lifespan of the Medical Device Obligatory/specific maintenance Once per year : • Check the good tightening of the screws and the rods. • Check the state of fixings of the articulated parts. • Check the which structure did not undergo any deformation. •... -
Page 35: Maintenance Notebook
All manuals and user guides at all-guides.com Maintenance notebook User’s Guide... -
Page 36: Note
All manuals and user guides at all-guides.com Note User’s Guide... - Page 37 All manuals and user guides at all-guides.com User’s Guide...
-
Page 38: Warranty Information
All manuals and user guides at all-guides.com Warranty Information Warranty Midmark Europe warrants, to the original purchaser, products manufactured by Midmark Europe and components to be free from defects in materials and workmanship for a period of two (2) years from the date of purchase. -
Page 39: Declaration Of Conformity
22, rue de Saint-Denis de Gastines, 53500 Ernée - FRANCE Tél. : +33 (0)2 43 05 17 76, Fax : + 33 (0)2 43 05 72 00, www.promotal.com S.A.S. au capital de 4 290 660 € - R.C.S. LAVAL Siret 421 156 720 00011 - TVA FR 67 421 156 720 - APE 3250A... - Page 40 All manuals and user guides at all-guides.com MIDMARK EUROPE - FRANCE www.promotal.com DIC12524-01_2314EN...
Need help?
Do you have a question about the Elite 12524-01 and is the answer not in the manual?
Questions and answers