Waldorf RNL8200G Installation And Operation Manual
Hide thumbs
Also See for RNL8200G:
- Installation and operation manual (35 pages) ,
- Installation and operation manual (32 pages) ,
- Installation and operation manual (31 pages)
Advertisement
Quick Links
I n s t a l l a t i o n a n d O p e r a t i o n M a n u a l
Gas Cooktops
RN 8 2 00 G
RN L 8 20 0 G
RN 8 4 00 G
RN L 8 40 0 G
RN 8 6 00 G
RN L 8 60 0 G
RN 8 8 00 G
RN L 8 80 0 G
S e ri e s
RN B8 2 00 G
RN B8 4 00 G
RN B8 6 00 G
RN B8 8 00 G
RN L B8 20 0 G
RN L B8 40 0 G
RN L B8 60 0 G
RN L B8 80 0 G
For use in GB, IE & DK
228605-29
Advertisement

Subscribe to Our Youtube Channel
Related Manuals for Waldorf RNL8200G


Summary of Contents for Waldorf RNL8200G
- Page 1 I n s t a l l a t i o n a n d O p e r a t i o n M a n u a l Gas Cooktops S e ri e s RN 8 2 00 G RN L 8 20 0 G RN B8 2 00 G RN L B8 20 0 G...
- Page 2 Moffat Limited Rolleston 7675 New Zealand AUSTRALIA Moffat Pty Limited Web: www.moffat.com.au E.Mail: vsales@moffat.com.au Main Office: (tel) +61 (03) 9518 3888 (fax) +61 (03) 9518 3838 Service: (tel): 1800 622 216 Spares: (tel): 1800 337 963 Customer Service: (tel): 1800 335 315 (fax): 1800 350 281 CANADA Serve Canada...
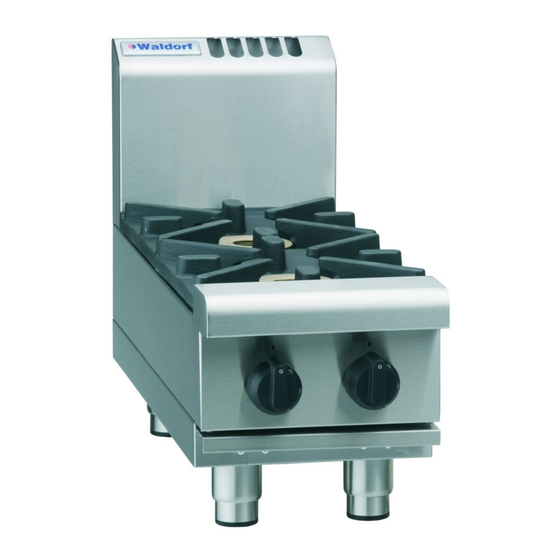
- Page 3 Waldorf Gas Cooktops RN(L)(B)8200G Gas Cooktop 300mm wide. RN(L)(B)8400G Gas Cooktop 600mm wide. RN(L)(B)8600G Gas Cooktop 900mm wide. RN(L)(B)8800G Gas Cooktop 1200mm wide. Model Numbers Covered in this Specification General Gas Supply Requirements Gas Connection Installation Requirements Unpacking Location Clearances...
- Page 4 We are confident that you will be delighted with your WALDORF GAS COOKTOP, and it will become a most valued appliance in your commercial kitchen. To ensure you receive the utmost benefit from your new Waldorf Gas Cooktops, there are two important things you can do.
- Page 5 RN[1]8200G-[2]-[3] 2 Open Burners. RN[1]8203G -[3] 300mm Griddle. RN[1]8400G-[2]-[3] 4 Open Burners. RN[1]8403G-[2]-[3] 2 Open Burners + 300mm Griddle. RN[1]8406G -[3] 600mm Griddle. RN[1]8600G-[2]-[3] 6 Open Burners. RN[1]8603G-[2]-[3] 4 Open Burners + 300mm Griddle. RN[1]8606G-[2]-[3] 2 Open Burners + 600mm Griddle. RN[1]8609G -[3] 900mm Griddle.
- Page 6 - Australia Input Rate (N.H.G.C.) 28 MJ/hr 28 MJ/hr - each Open Burner - each 300mm Griddle Section 21 MJ/hr 21 MJ/hr Supply Pressure 1.13 - 3.40 kPa 2.75 - 4.50 kPa 0.95 kPa 2.6 kPa Burner Operating Pressure (*) See ‘Gas Connection’...
- Page 7 - All Other Markets Input Rate (N.H.G.C.) 28 MJ/hr 28 MJ/hr - each Open Burner - each 300mm Griddle Section 21 MJ/hr 21 MJ/hr 1.13 - 3.40 kPa 0.75 - 1.50 kPa Supply Pressure 0.95 kPa 0.63 kPa Burner Operating Pressure (*) Gas Connection See ‘Gas Connection’...
- Page 8 = Rating Plate Location for this option. Refer to Page 9 for Cooktop options...
- Page 9 RN8200G Models - not available in Cabinet Base option. = Rating Plate Location for this option. Refer to Page 9 for Cooktop options...
- Page 10 RN8200G Models - not available in Leg Stand Base option. = Rating Plate Location for this option. Refer to Page 9 for Cooktop options...
- Page 11 RN8200G and RN8400G Models - not available in Refrigerated Base option. = Rating Plate Location for this option. Refer to Page 9 for Cooktop options...
- Page 12 NOTE: RN8200G models are only available in Bench Model (-B) option. RN8400G models are available in Bench Model (-B), Cabinet Base (-CB), or Leg Stand (-LS) model options. RN8600G and RN8800G are available in Bench Model (-B), Cabinet Base (-CB), Leg Stand (-LS), or Refrigeration Base (-RB) model options.
-
Page 13: Combustion Air Requirements
Waldorf Cooktops are designed to provide years of satisfactory service, and correct installation is essential to achieve the best performance, efficiency and trouble-free operation. This appliance must be installed in accordance with National installation codes and in addition, in accordance with relevant National / Local codes covering gas and fire safety. - Page 14 NOTE: Only non-combustible materials can be used in close proximity to this appliance. Left / Right Hand Side 250mm (*) Rear; - 50mm Standard Models 100mm Low Back Models Side clearances can be 50mm when adjacent surface is at least 100mm below cooking surface. NOTE: ...
- Page 15 Rear Adjustable Feet, fitting:- Secure rear of base tray to rear cooktop legs by screwing the two adjustable feet supplied, into base of rear cooktop legs. Secure each adjustable foot, hand tight. Cooktop Rear Rollers, fitting:- Fit rear leg securing bolts up through centre of rear leg housings to secure rear of base tray to rear cooktop legs Leg Mount...
- Page 16 Rear Adjustable Feet, fitting:- Raise appliance from floor by approximately 75mm using suitable lifting equipment (i.e. Cabinet / Palletiser / Forklift) to allow rear rollers to be Refrigeration removed. Base Unscrew and remove securing bolt that secures rear roller to rear leg housing. Rear roller will drop freely from rear leg housing.
- Page 17 NOTE: ALL GAS FITTING MUST ONLY BE CARRIED OUT BY A QUALIFIED PERSON. Waldorf Cooktops do not require electrical connection, as they function totally on the gas supply. It is essential that gas supply is correct for Cooktop being installed and that adequate supply pressure and volume are available.
-
Page 18: Installation
Before leaving the new installation; a. Check the following functions in accordance with operating instructions specified in ‘Operation’ section of this manual. Lighting the Griddle. Light the Open Burners. (F - Flame Failure Option). Light the Open Burners. (PF - Pilot and Flame Failure Option). ... - Page 19 Waldorf appliances have been designed to provide simplicity of operation and 100% safety protection. Improper operation is almost impossible, however bad operation practices can reduce the life of the appliance and produce a poor quality product. To use this appliance correctly please read the following sections carefully:- ...
- Page 20 Lighting the Open Burners Flame Failure Protection is incorporated for each burner by way of a thermo-electric system which will shut off gas supply to that burner in the event that burner goes out, so that un-burnt gas is not expelled.
-
Page 21: Lighting The Griddle
Lighting the Griddle a. Depress gas control knob and rotate anti-clockwise to ‘PILOT’ position. b. Hold gas control knob depressed, press piezo ignition button to ignite pilot burner. Repeat Items 1 to 2 until pilot is lit. c. Release gas control knob approximately 10-20 seconds after lighting pilot. d. - Page 22 NOTE: Allow appliance to cool before commencing cleaning. DO NOT use abrasive or strong caustic detergents as they could corrode or damage the Cooktop. Ensure that any detergent or cleaning material has been completely removed after each cleaning.
- Page 23 1. Remove pot stands, burner caps, burner bowls and pot stand supports from top of cooktop. Wash with hot soapy water, using a soft HE BLADES FITTED TO THE SCRAPER TOOL ARE EXTREMELY bristled brush. Dry thoroughly with a dry cloth. SHARP AND ARE TO BE USED WITH CARE Any baked-on deposits can be scraped off using a scraper tool.
- Page 24 This section provides an easy reference guide to the more common problems that may occur during operation of your equipment. The fault finding guide in this section is intended to help you correct, or at least accurately diagnose problems with your equipment. Although this section covers the most common problems reported, you may encounter a problem not covered in this section.
- Page 25 NOTE: These conversions should only be carried out by qualified persons. All connections must be checked for leaks before re-commissioning the appliance. Adjustment of components that have adjustments / settings sealed (e.g. paint sealed) can only be adjusted in accordance with the following instructions and shall be re-sealed before re-commissioning this appliance.
- Page 26 Piezo Igniter Pilot Supply Tube Carry out the following:- Remove griddle plate section and heat shield. Remove main burner. Disconnect piezo igniter from mounting bracket. (For access purposes). Pilot Burner Disconnect pilot supply tube from pilot burner to access pilot injector.
- Page 27 NOTE, Pin rotated - NAT Gas / LPG / Butane Only. for Natural Gas NOTE: The gas regulator supplied is convertible between Natural Gas and LP Gas, but it’s outlet NOTE, Pin rotated pressure is fixed ex-factory and for LPG is NOT to be adjusted.
- Page 28 - Australia Main Burner Ø 2.45mm Ø 1.50mm Open Burner Pilot Burner ('PF' Models Only) 0.30 0.20 Main Burner Ø 2.10mm Ø 1.30mm Pilot Burner 0.35 0.23 Griddle Burner Aeration Setting Fully open Fully open Supply Pressure 1.13 - 3-40 kPa 2.75 - 3-40 kPa Burner Operating Pressure (*) 0.95 kPa...
- Page 29 - All Other Markets Main Burner Ø 2.45mm Ø 4.50mm Open Burner Pilot Burner ('PF' Models only) 0.30 0.60 Main Burner Ø 2.10mm Ø 3.40mm Griddle Pilot Burner 0.35 0.60 Burner Aeration Setting Fully open Fully open Supply Pressure 1.13 - 3-4 kPa 0.75 - 1.5 kPa Burner Operating Pressure (*) 0.95 kPa...
-
Page 30: Replacement Parts List
Replacement Parts List IMPORTANT: When ordering replacement parts, please quote part number and description as listed below. If part required is not listed below, request part by description and quote model number and serial number of equipment which is shown on rating plate. Cooktops Open Burners 235678... - Page 31 General 227015 Pot Stand. 228881 Spill Tray 300mm. 228882 Spill Tray 600mm. 233502 Spill Tray LH, RN8800G Series. 233503 Spill Tray RH, RN8800G Series. 230247 Spill Tray 900mm. 227855 Adjustable Leg (84mm - Bench Models). 227850 Adjustable Leg (Flush Stud) (150mm - CB / RB Models).
Need help?
Do you have a question about the RNL8200G and is the answer not in the manual?
Questions and answers